Shapes in Photoshop
Step 1
- Pick your FAVORITE photograph you have taken this year.
- Turn it BLACK and WHITE first!!!!!!!
Step 2:
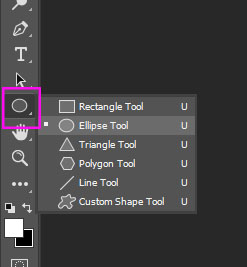
- Right Click on the Shape Box
Step 3:
- Pick Geometric shape. It doesn’t matter which one you pick

Step 4:
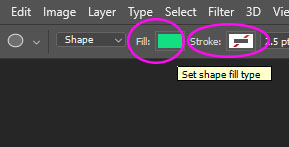
- Click on the color Fill box
- Pick any color you would like (NOTE: this assignment works with lighter colors best)
- Stroke must be white with red line through it
Step 5:
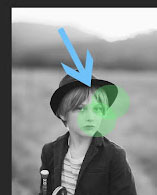
- Draw the shape near the middle of the photo.
- Don’t make your shape to big or small (see example below)

Step 6:
- Click on the Shape Layer (Above Background Layer
- Change Opacity to 30-40% (Adjust as needed)
- You need to be able to see through the image but still see the shape/color.

Step 7:
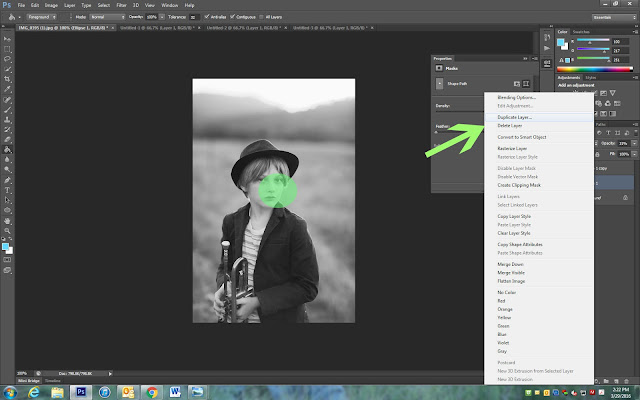
- Right click on the Shape Layer
- Duplicate Layer
- A copy of the shape has been made ontop. Your shape will now look a lot darker.
Step 8:
- Choose the Move Tool
- Move your Duplicated Shape so that part of the shape is overlapping your Original Shape
Step 9:
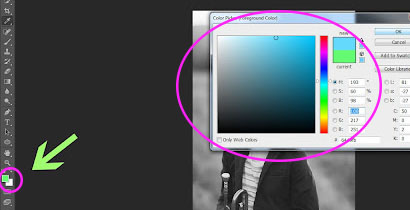
- Click on the color boxes at the bottom left
- Pick a different color (you may want to start thinking ahead as to what colors/ color pattern you will want to use).
Step 10:
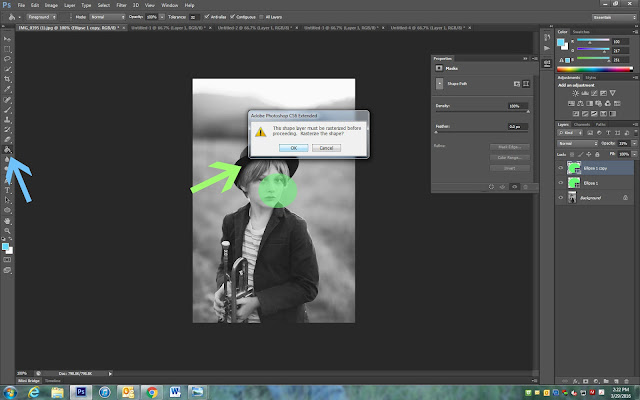
- Click on the the Paint Bucket Tool
- Click on the Shape you duplicated
- A screen will pop up that says “the shape layer must be……..”
- Click OK
Step 11:
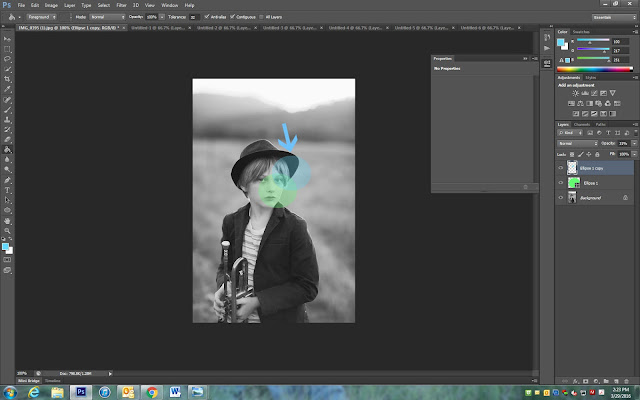
- Click on the Shape again with the Paint Bucket Tool and it will change the color
Step 12:
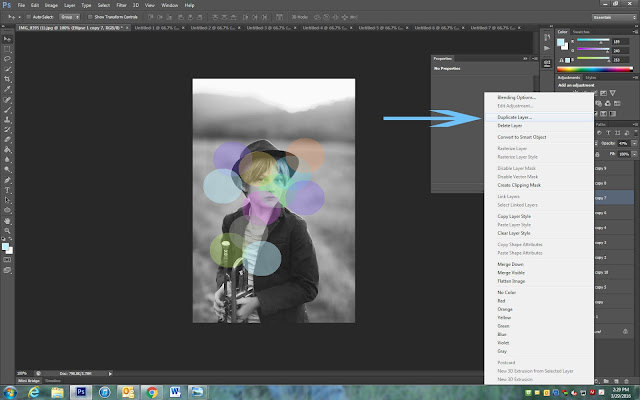
- On the Layers Pallet
- Right click on the second shape
- Dulicate the layer
- Right click on the second shape
- Choose the Move Tool
- Move your Duplicated Shape so that part of the shape is overlapping your Original Shape
- Pick another new color
- Use the Paint Bucket to change the color on the Shape
Step 13:
- Repeat steps 7-11 until you have filled 3/4ths of your entire photo
- If you would like to fill in the entire photograph you may.

