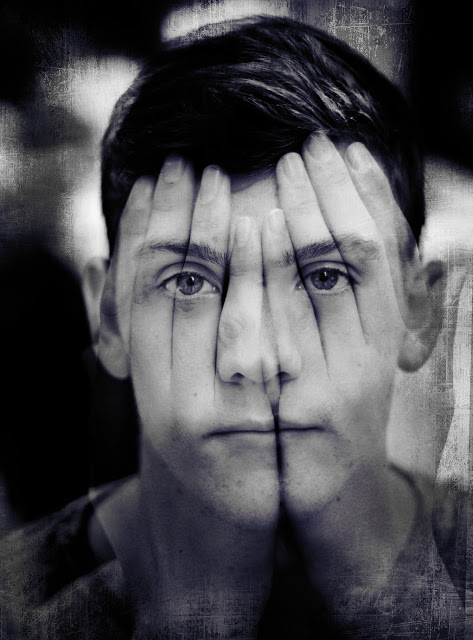

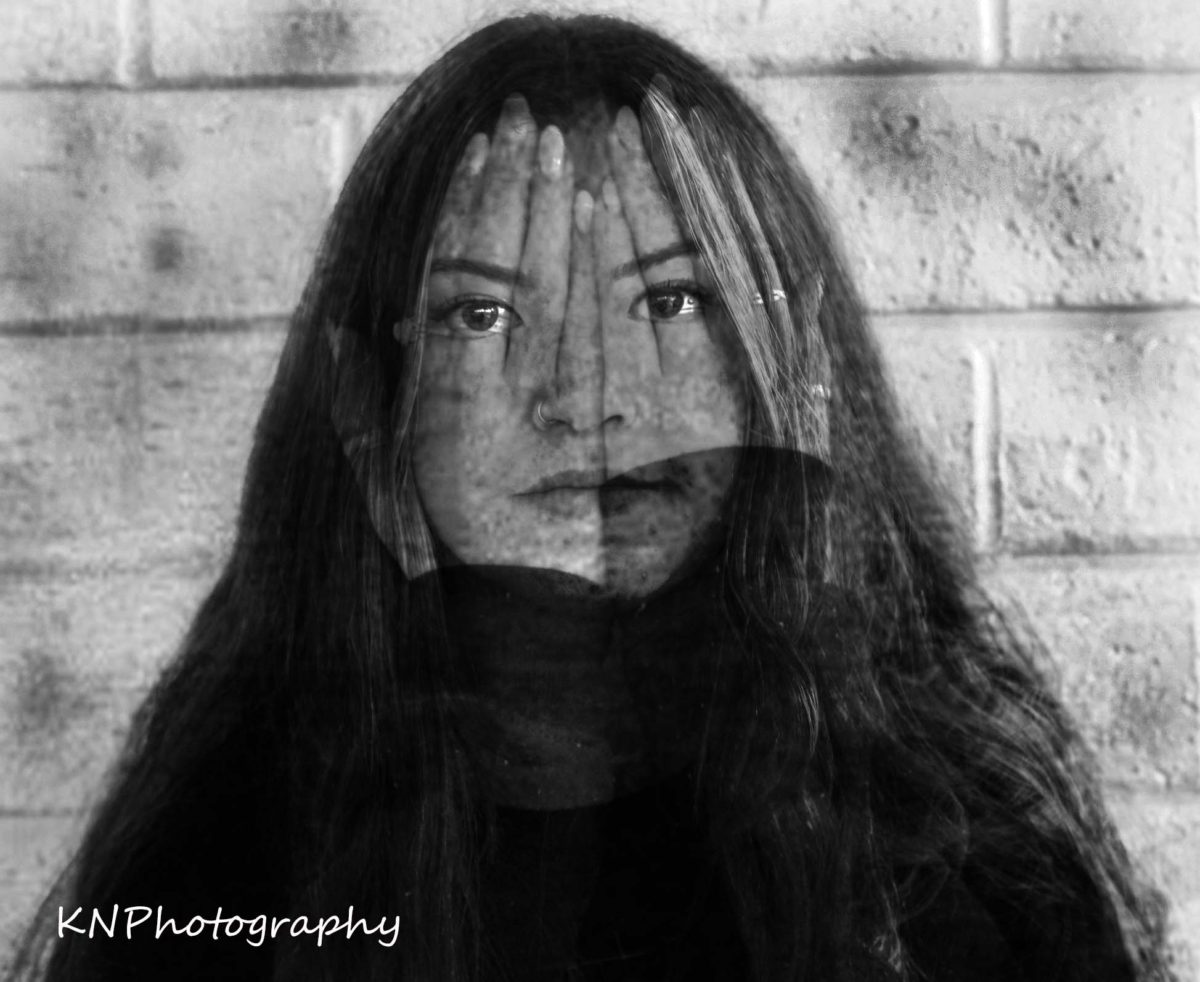
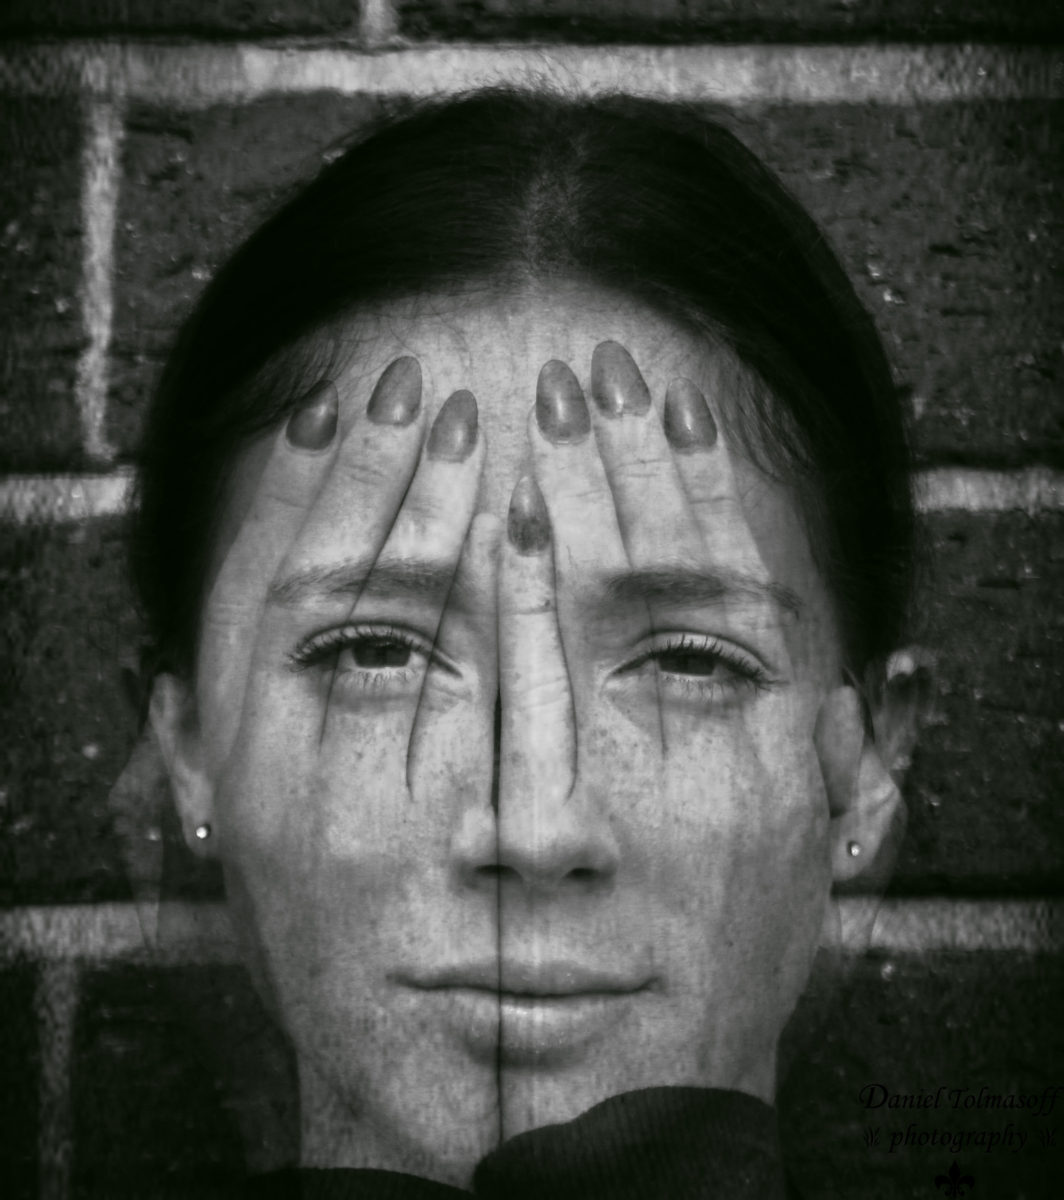
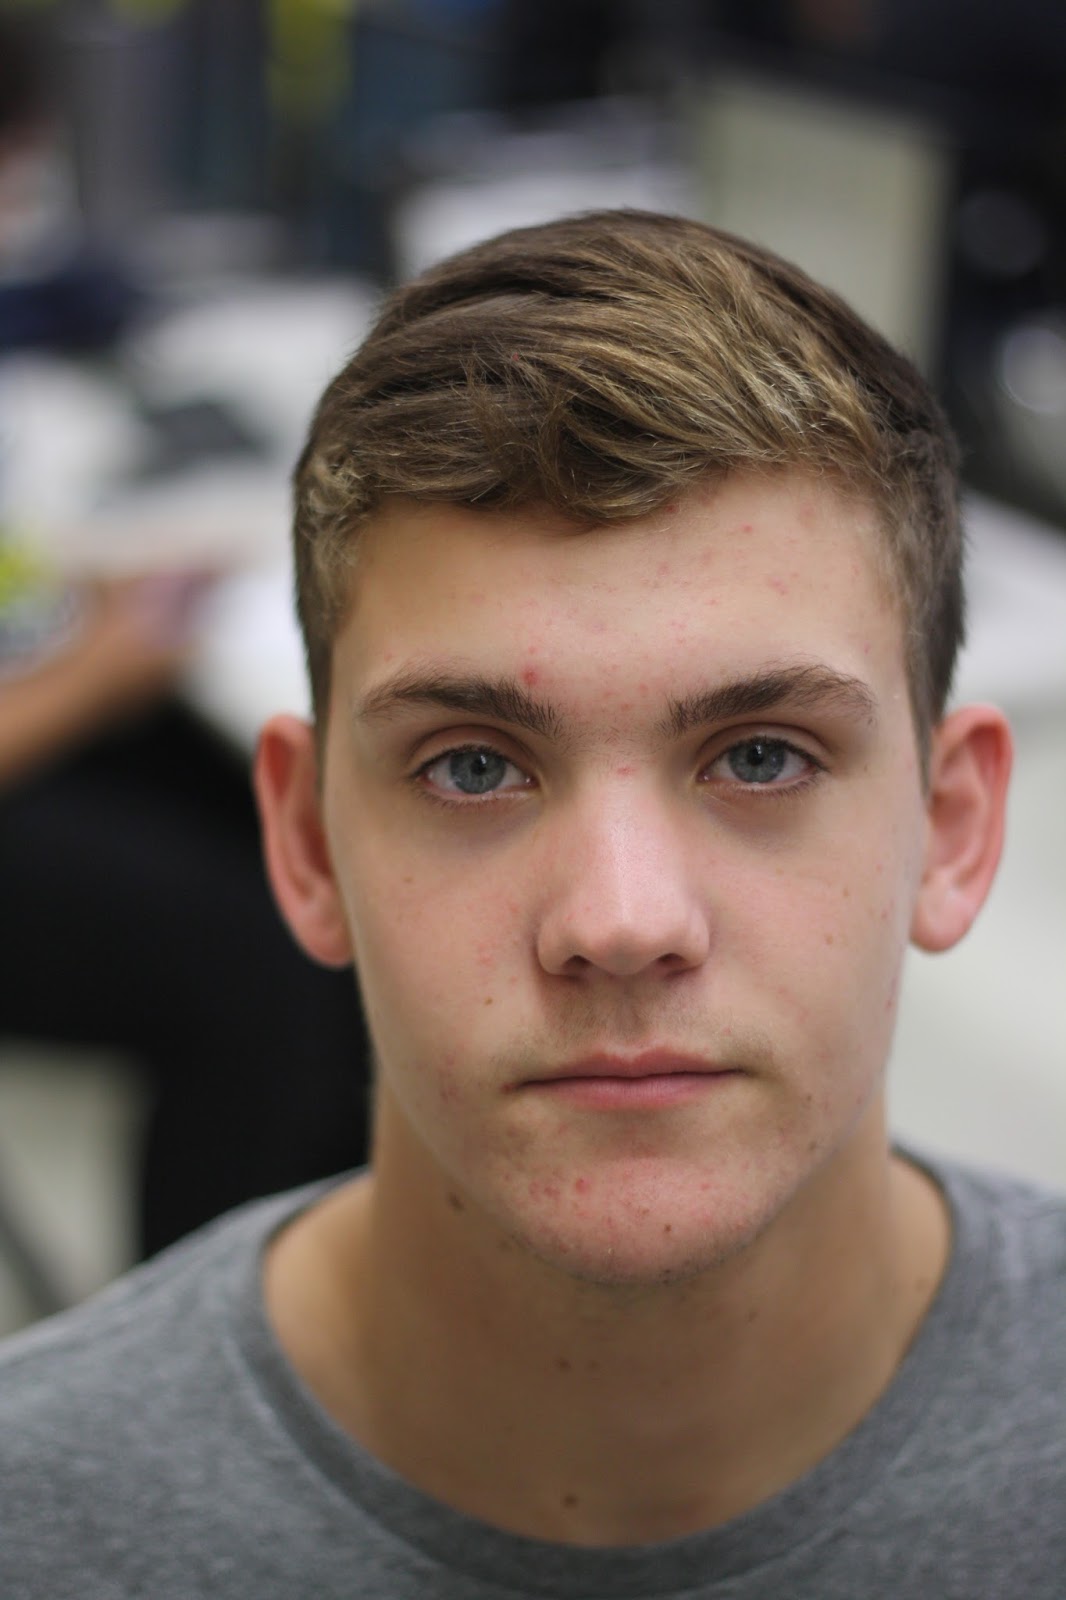
Part 1: Photo
First Photo
- Have a person sit with a plain and empty background
- Focus on the eyes so they are sharp
- Take photo
- Focus on the eyes so they are sharp
- DO NOT let the person move at ALL
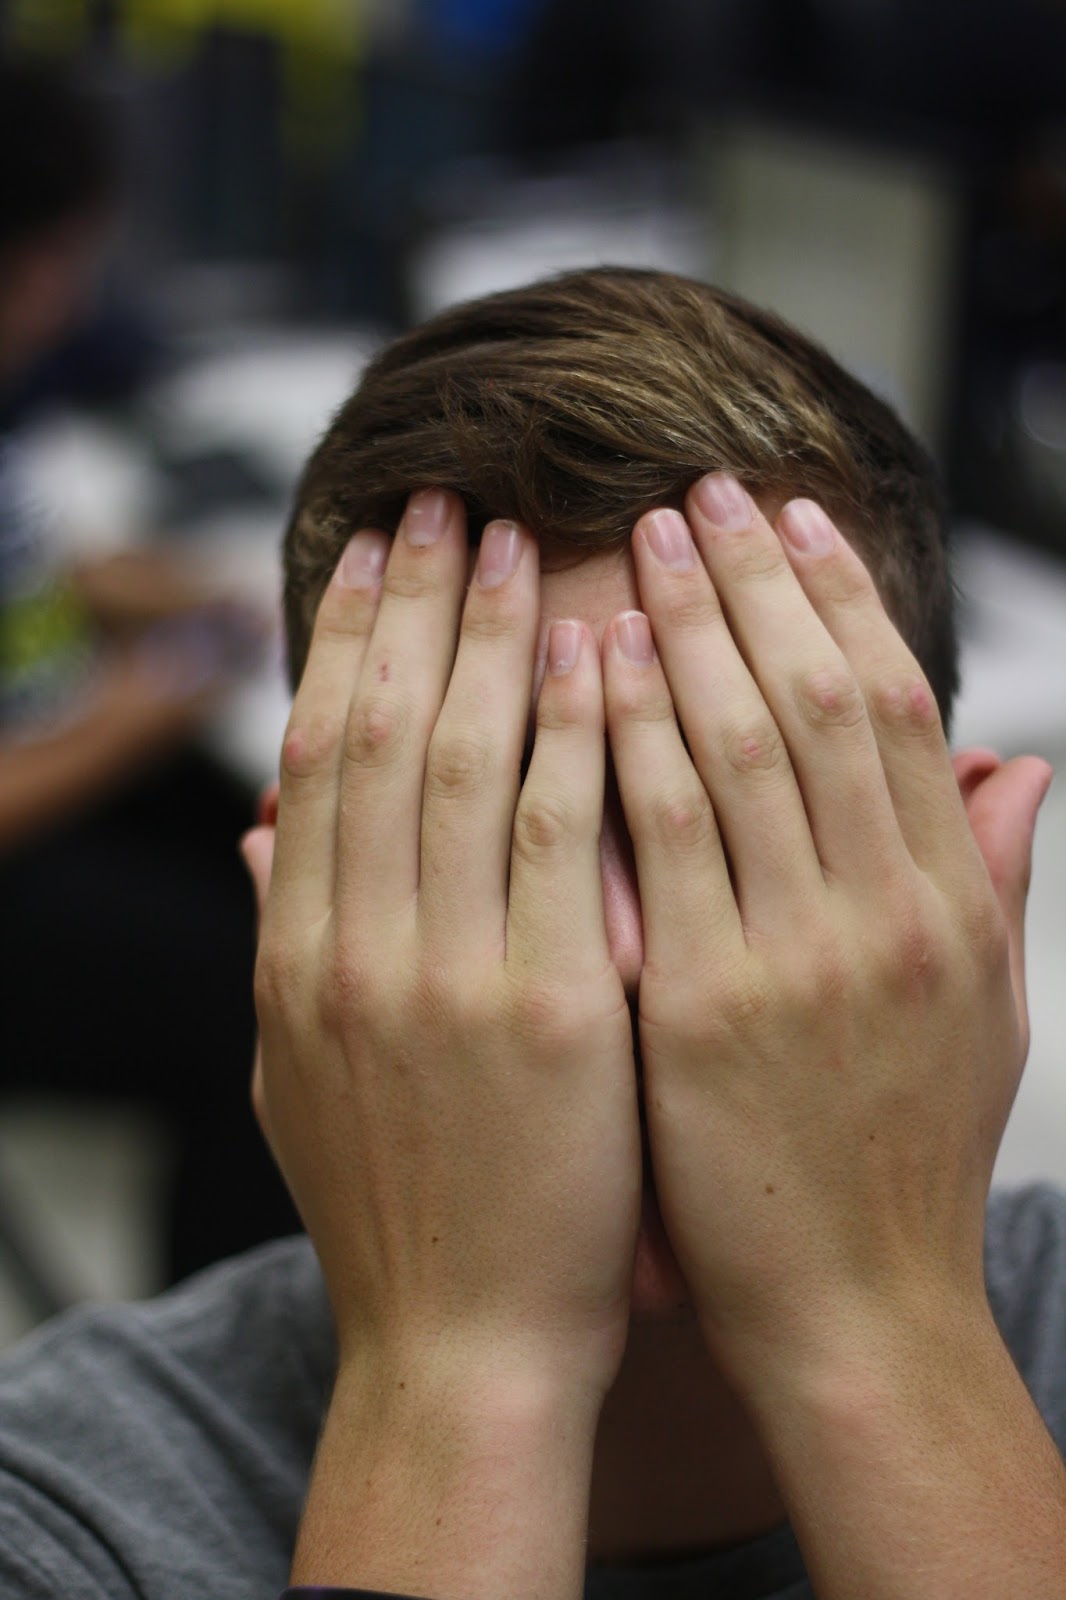
Second Photo
- Have the person cover their face with their hands without moving.
- Make sure the hands are even against their nose
- Take photo
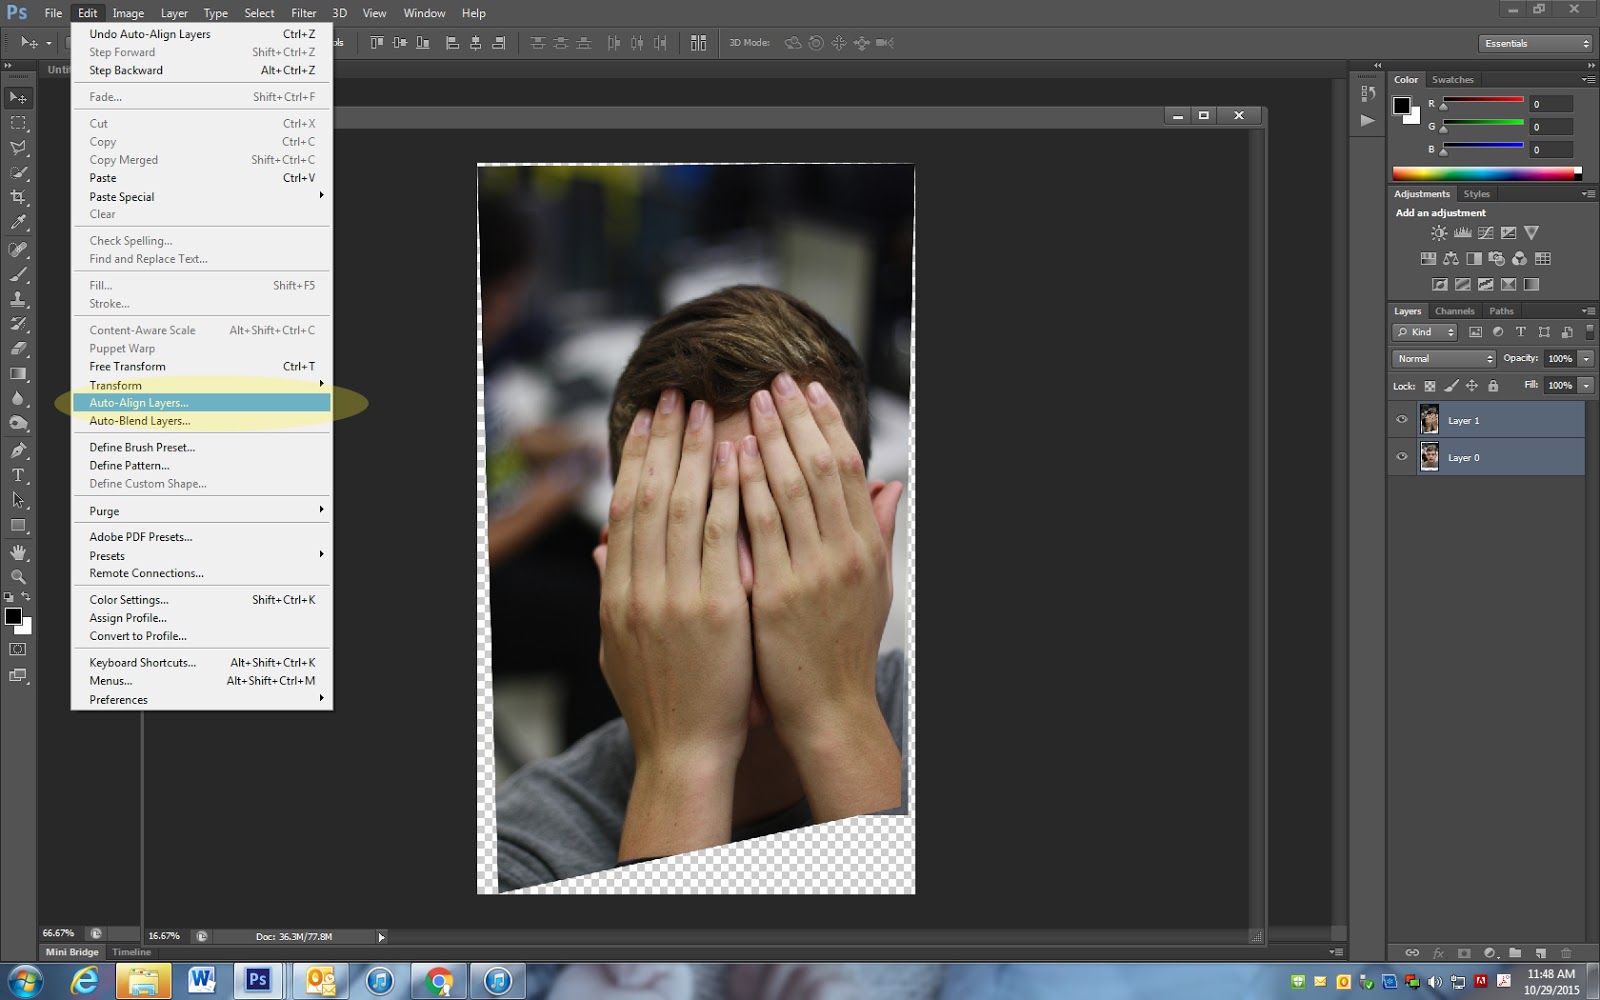
Part 2: Photoshop
Step 1
- Open both photos
Step2
- Move the hands photo ON-TOP of the face photo

Step 3
- Hold the shift key
- Highlight both layers
Step 4
- Edit
- Auto Aline Layers
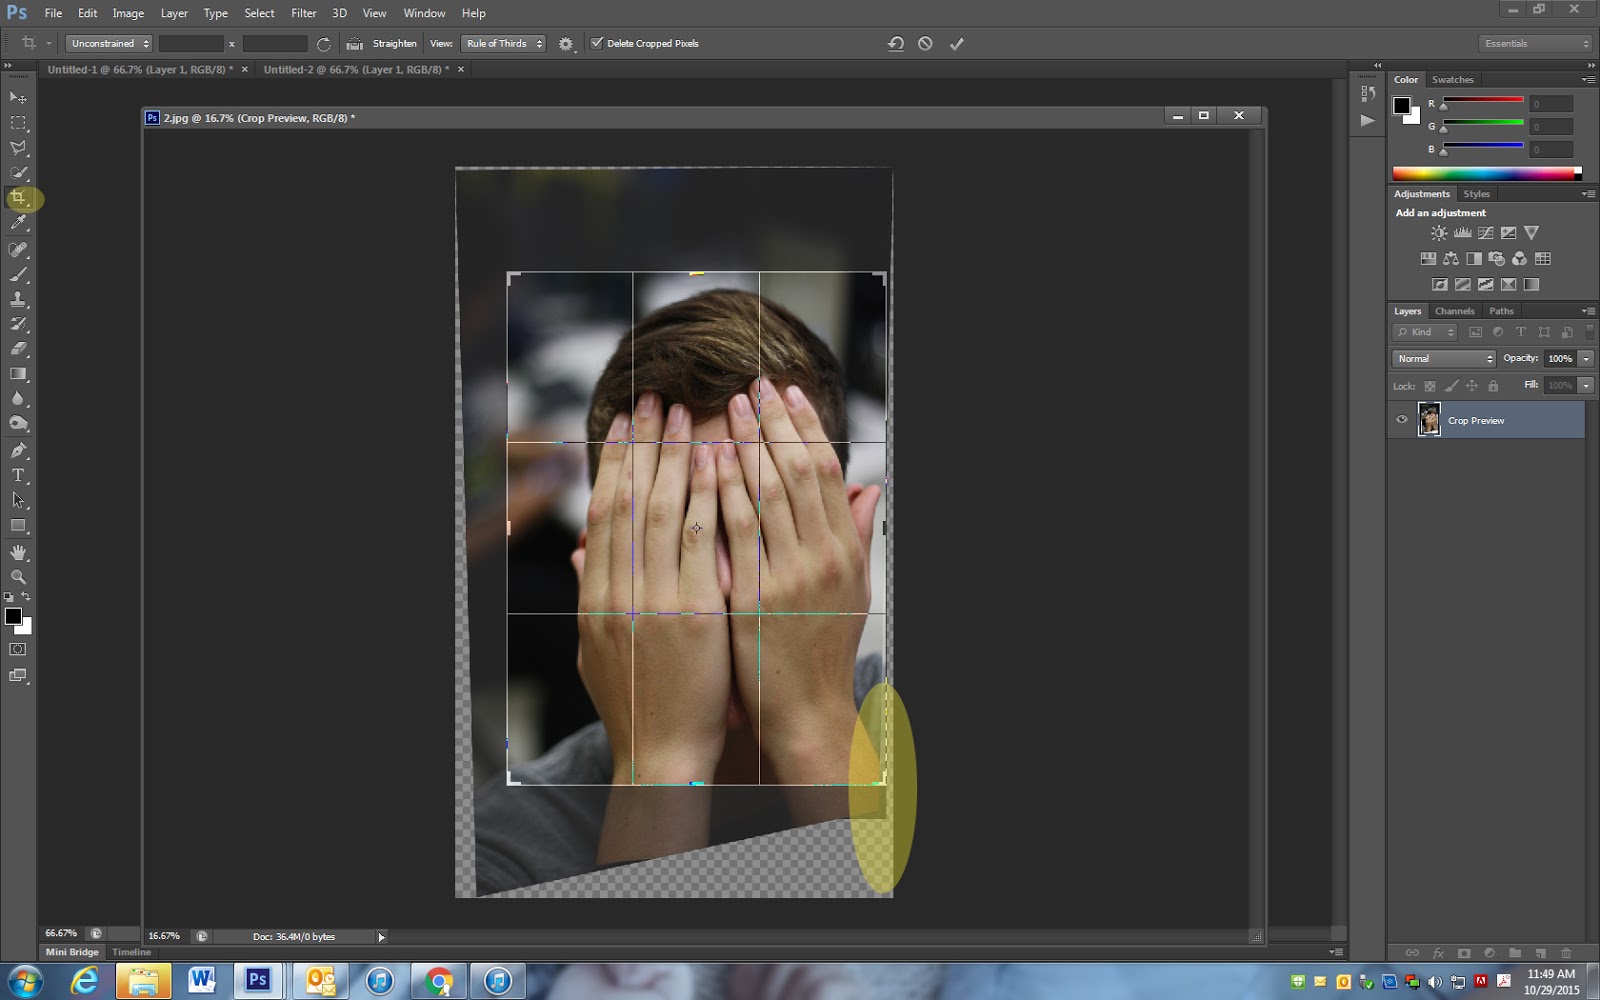
Step 5
- Crop out the extra around the photo


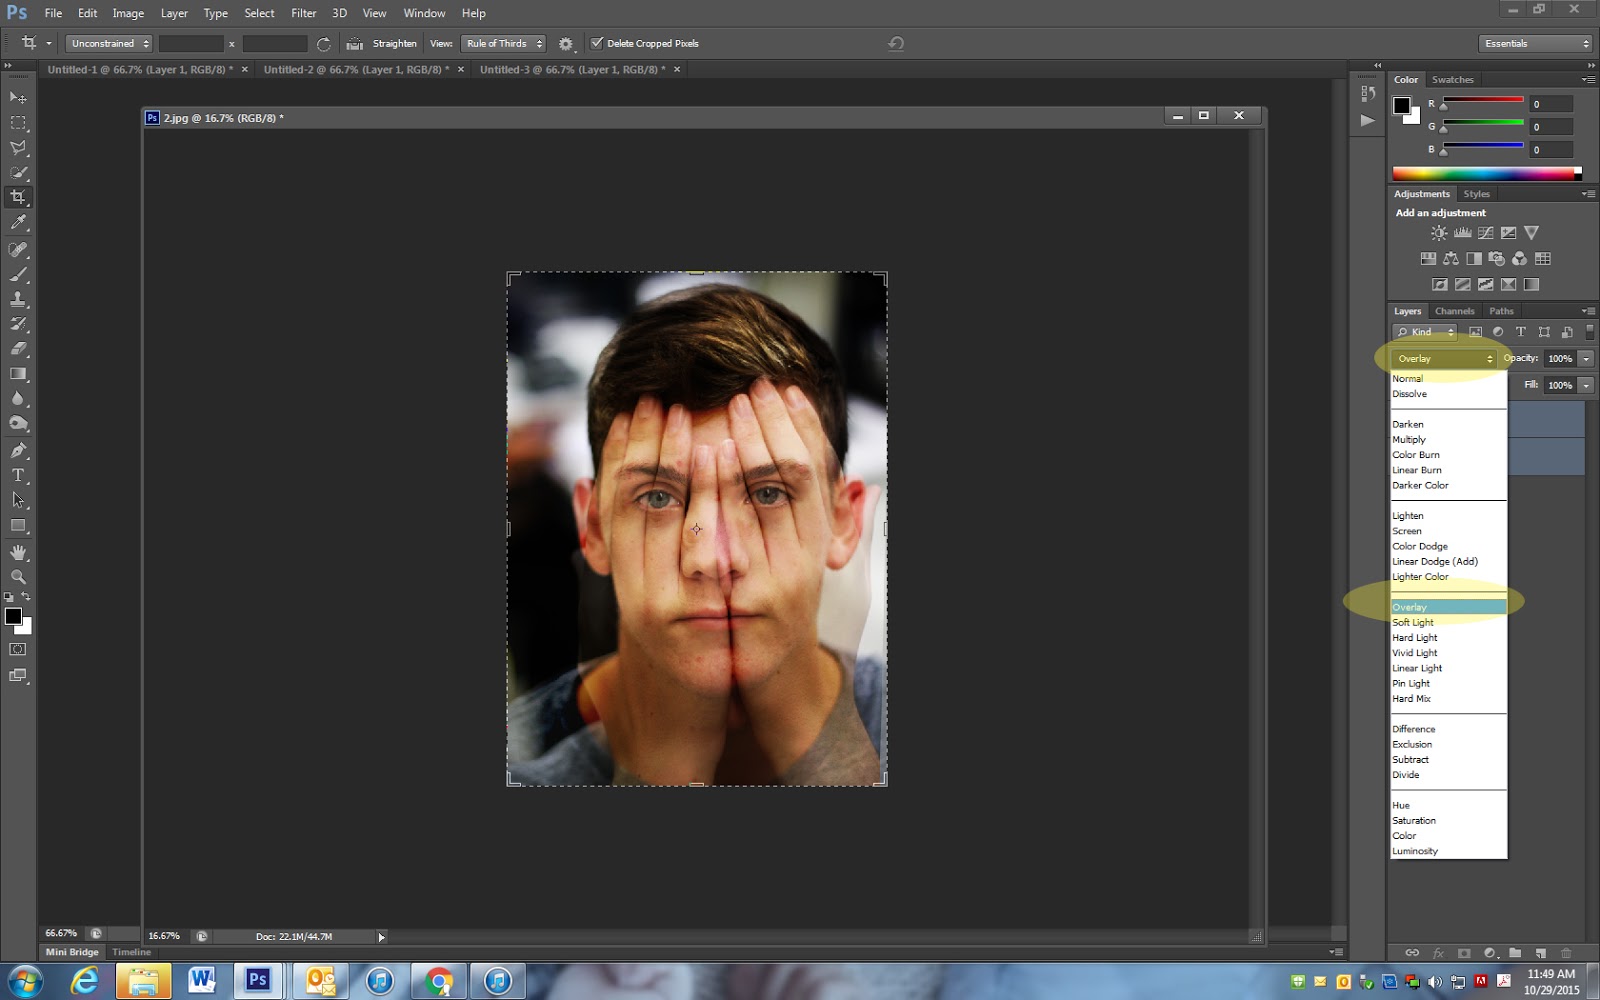
Step 6
- Go to the top left area of the layers
- Change Normal to Overlay
- Flatten Image
 8.
8.
Step 7
- Save one of the following textures to your computer
- Open Texture in Photoshop
Step 8
- Move the texture on top of the portrait
- Make the texture fit over the entire photo

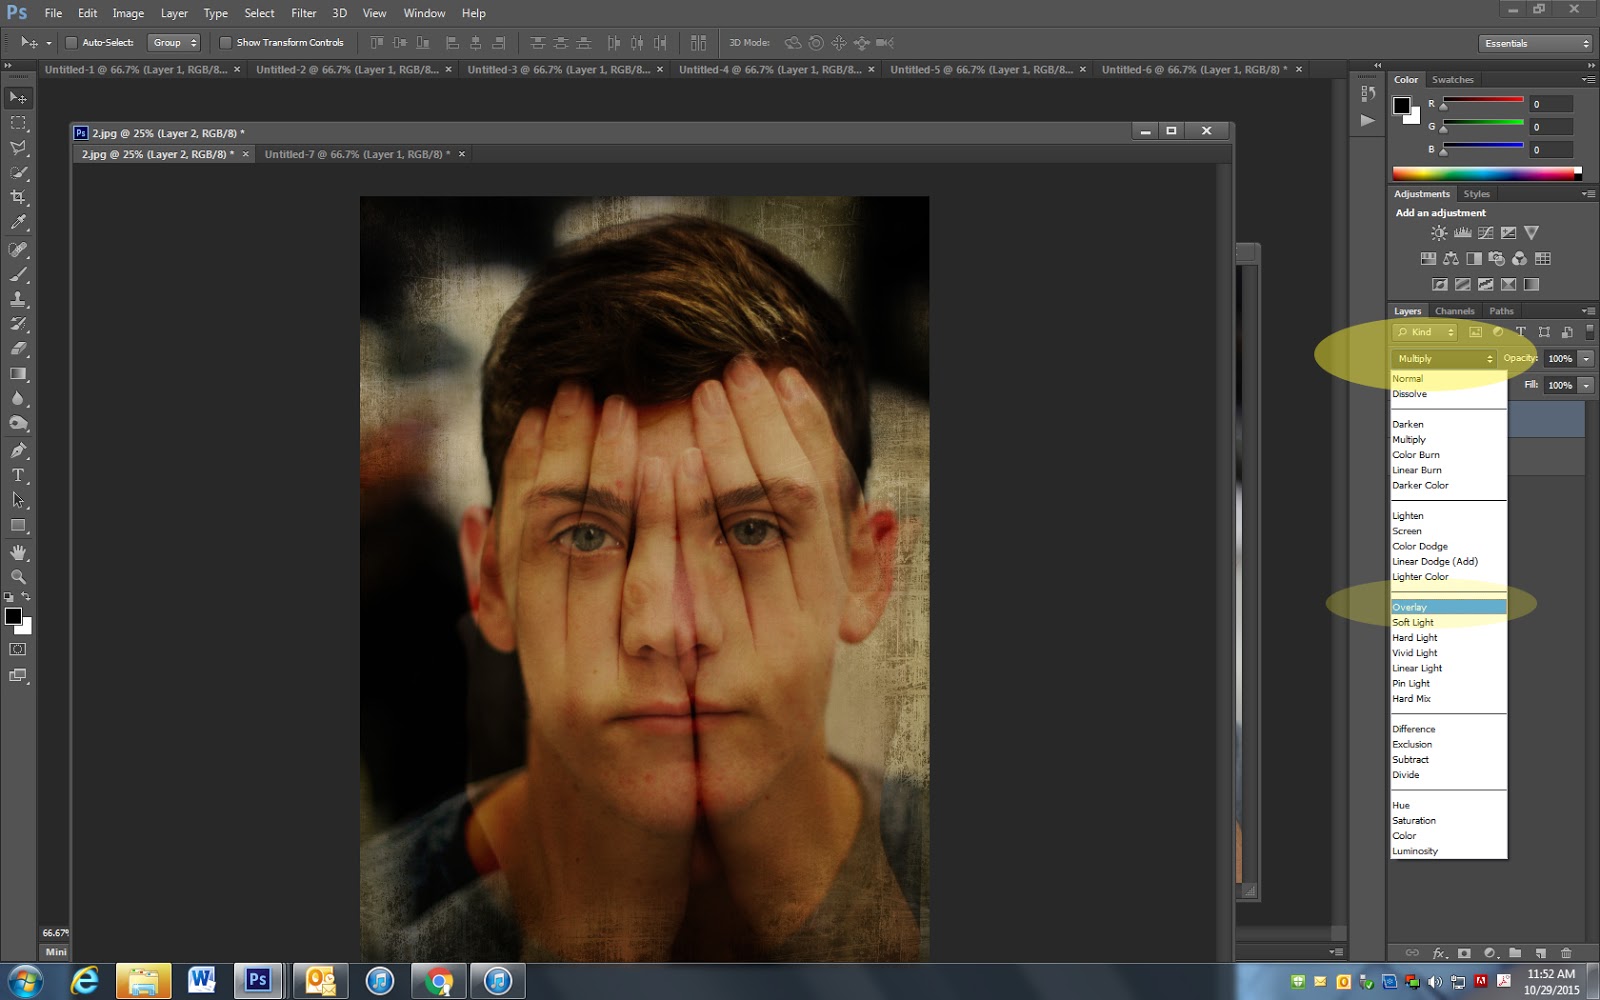
Step 9
- Go to the top left area of the layers
- Change Normal to Overlay or Multiple
- Flatten Image
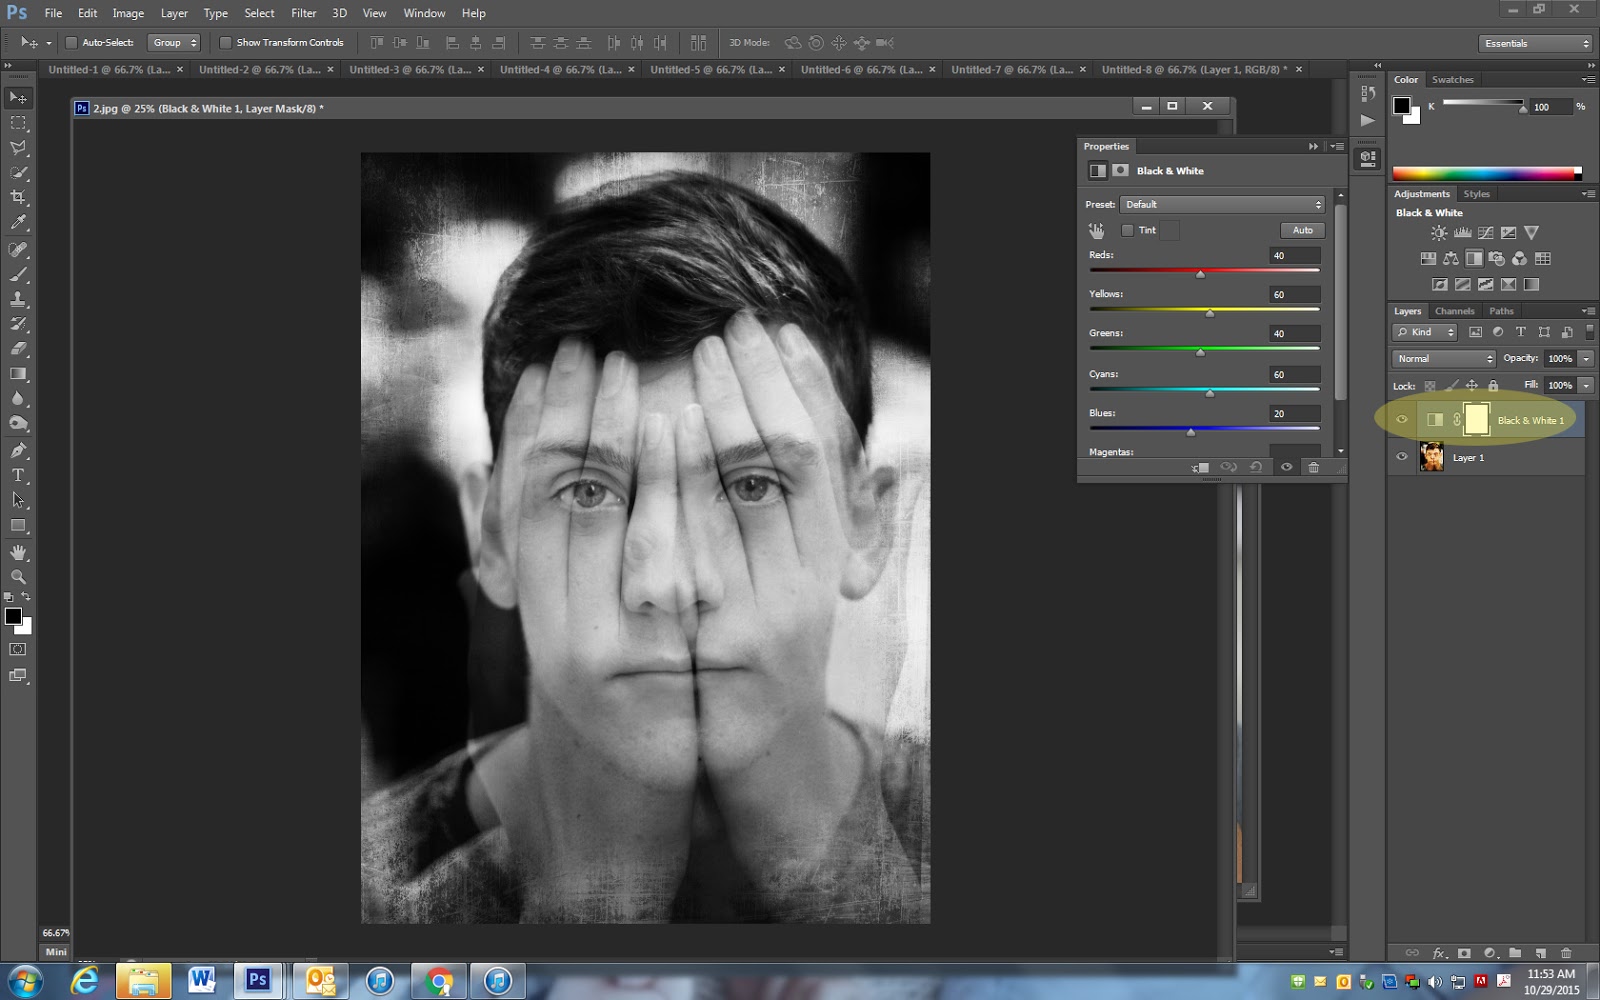
Step 10
- Click the little black/white circle at bottom of layers
- Pick the Black and White Adjustment
Step 10
- Click on Selective Color
- Change color to Black
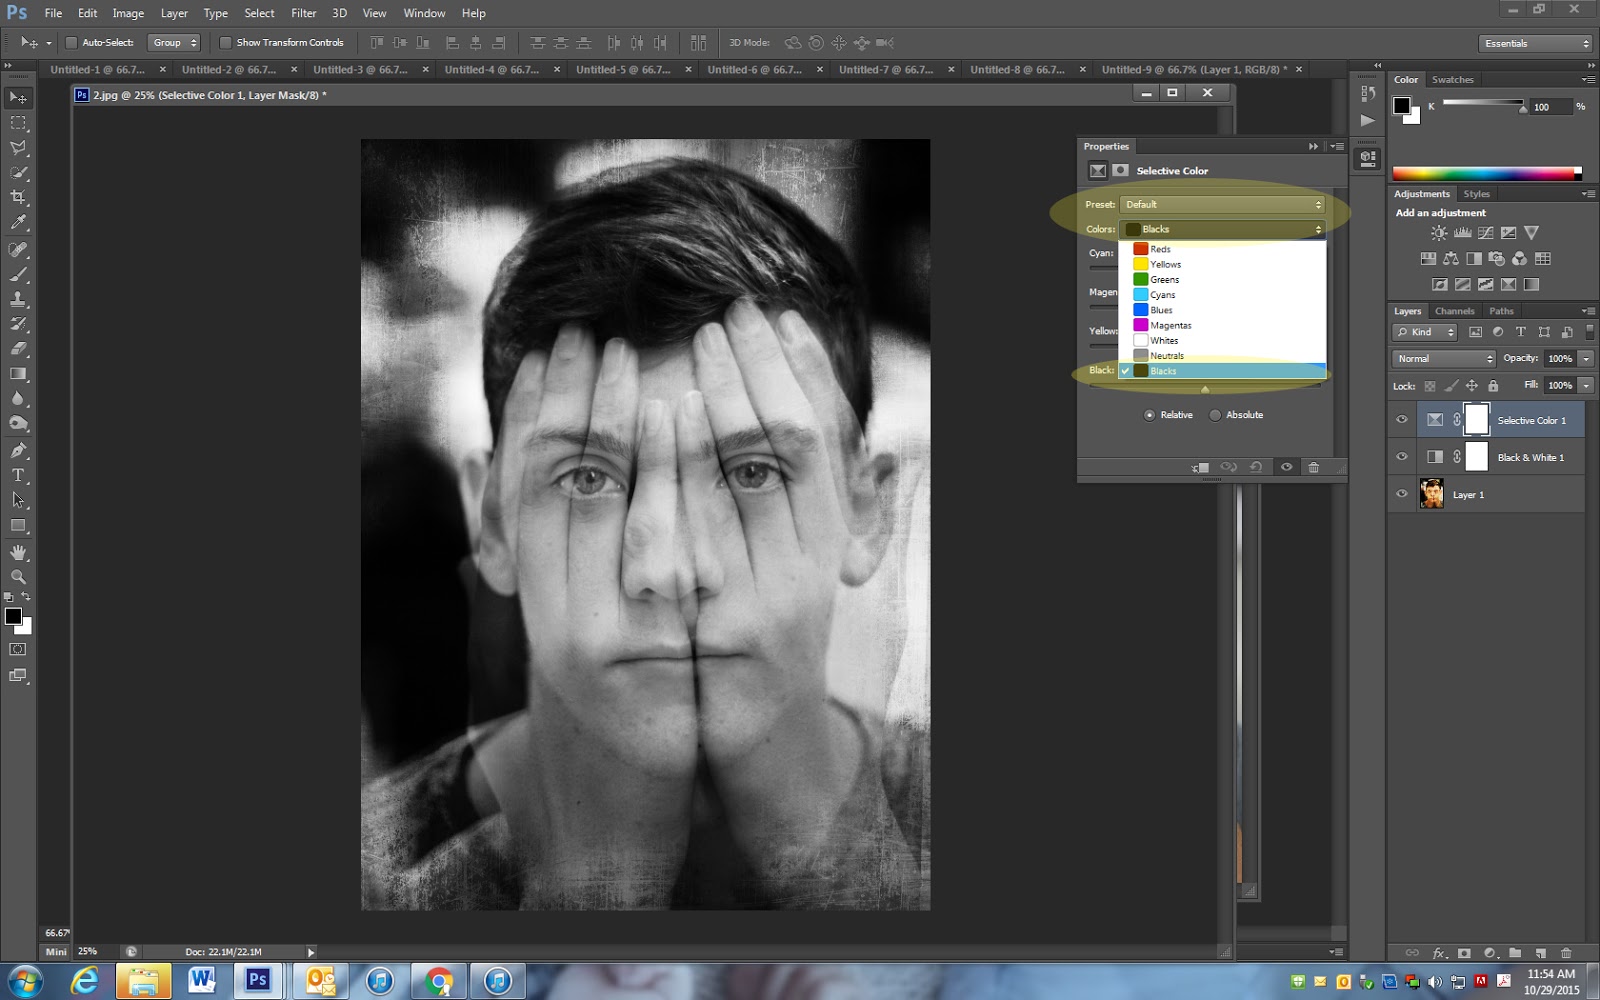
Step 11
- Move the black slider to the right until it looks good for your photo
- Move the other sliders a little to the left adding a slight color to the photo. (I made mine look a little blue)
- Flatten Image
- Move the other sliders a little to the left adding a slight color to the photo. (I made mine look a little blue)
