Part 1: Building the Graph
Step 1:
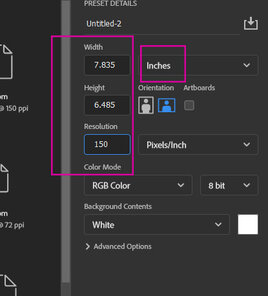
- Make a new file in photoshop
- File
- New
- Width: 7.833 Inches
- Heigth: 7.833 Inches
- Resolution: 150
- Background Contents: White
- Resolution: 150
- New
- File
Step 2:
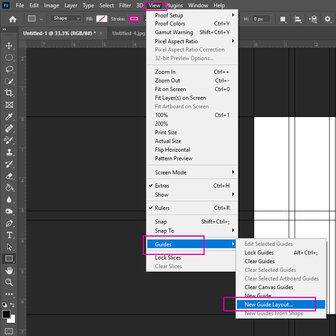
- Go to View
- Guides
- New Guide Layout
- Guides
Step 3:
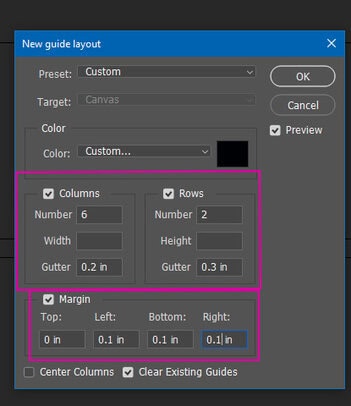
- Color: Custom: Black
- Columns
- Number: 6
- Gutter: 0.2 in
- Rows
- Number: 2
- Gutter: 0.3 in
- Margins
- Top: 0
- Left: 0.1 in
- Bottom: 0.1 in
- Right: 0.1 in
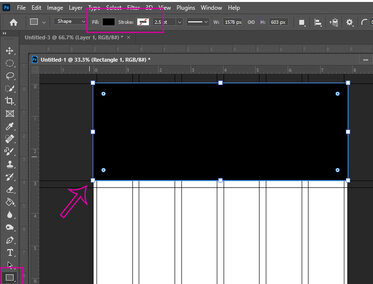
Step 4:
- Select the Rectangle Shape Tool
- Fill: Black
- Stroke: White box with red line through it
- Fill: Black
- Draw a box that fit into the top section of the graph
Step 5:
- Select the Rectangle Shape Tool again
- Fill: Black
- Stroke: White box with red line through it
- Fill: Black
- Draw a box that fit into the left side of the graph
- Leave white space around the box (stay in graph lines)

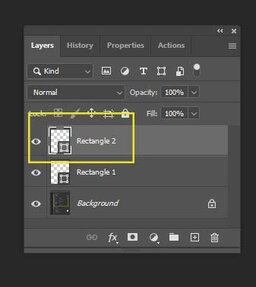
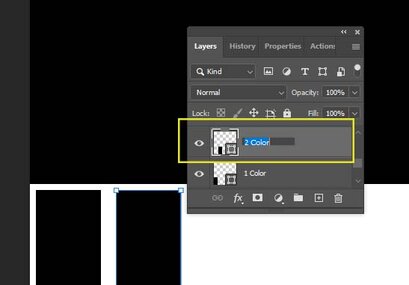
Step 6:
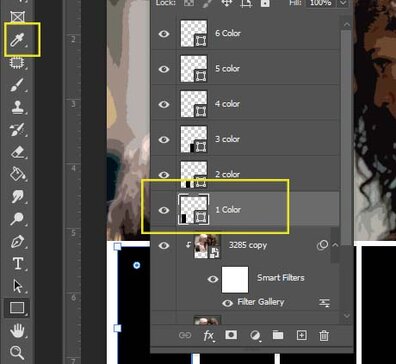
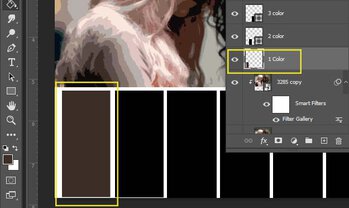
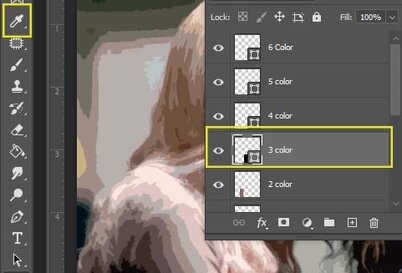
- Go to Layers Pallet
- Double click on layer Rectangle 2
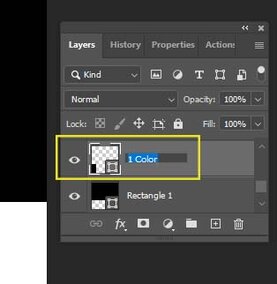
- Remain it 1 Color
- Double click on layer Rectangle 2
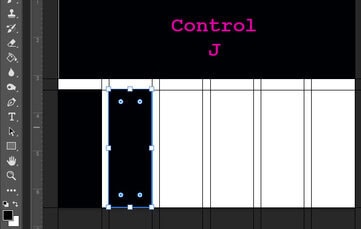
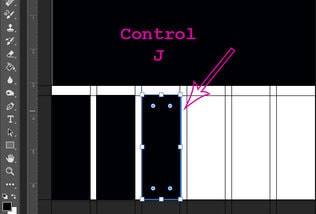
Step 7:
- We are now going to duplicate 1 Color Box
- Click Control J
- Move the duplicated box to the right
- Click Control J
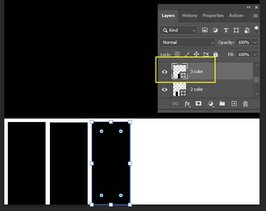
Step 8:
- Double click on layer 1 Color Copy
- Remain it 2 Color
Step 7:
- Click Control J
- Move the duplicated box to the right
- Double click on layer 2 Color Copy
- Remain it 3 Color
Step 8:
- Continue duplicating the boxes, moving and remaining them until you have 6
- You will now have 8 layers
- 6 color layers, rectangle 1 layer and background layer
- You will now have 8 layers

Step 9:
- Click on the Rectangle Layer
- Go to File-
- Place Embeded
- Go to File-

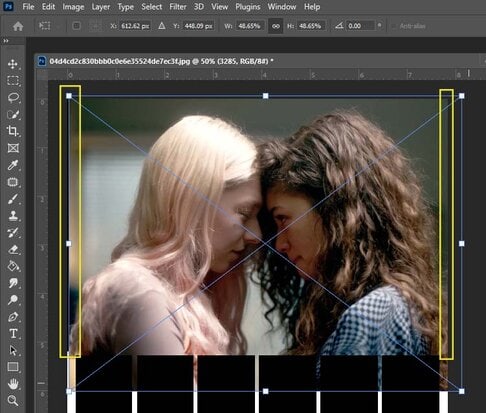
Step 10:
- Move the photo so that it fits the edges of the canvas
- It is ok if it’s bigger than the black box because we will fix this in the next step
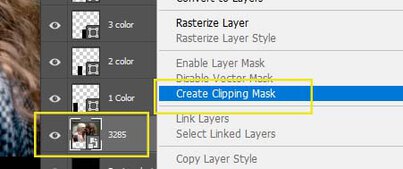
Step 11:
- Right click on the photo you just inserted
- Create Clipping Mask
- The photo will now be locked into place
- Create Clipping Mask
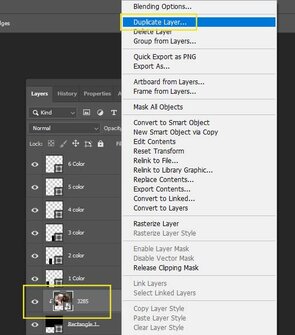
Step 12:
- Right click again on the image
- Duplicate Layer
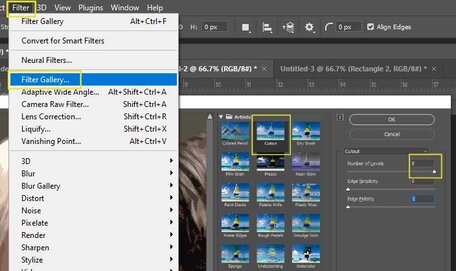
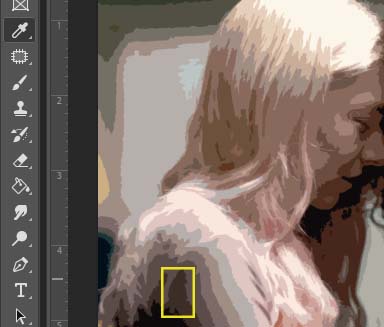
Step 13:
- Go to Filter
- Filter Gallery
- Artistic
- Cutout
- Number of Levels: 8
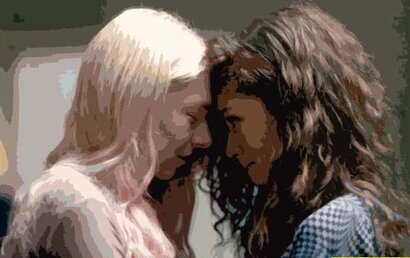
- The photo will now look like cutout shapes/colors
- Number of Levels: 8
- Cutout
- Artistic
- Filter Gallery
Part 2: Creating the Colors
Step 1:
- Click on
- 1 Color Layer
- Choose the Eye Dropper Tool
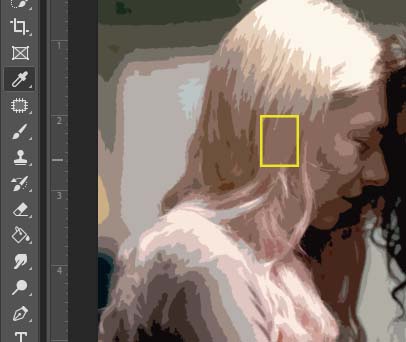
Step 2:
- You will be starting at the left of the photo
- Choose an area which is very dark, but NOT BLACK
- Click the Eye Dropper Tool over this area of color
- The color has now been selected
- Click the Eye Dropper Tool over this area of color
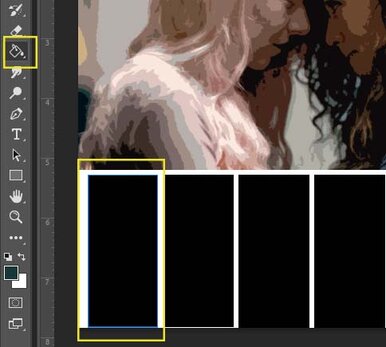
Step 3:
- Select the Paint Bucket Tool
- Click on the far left box (1 Color layer)
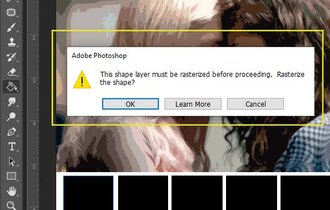
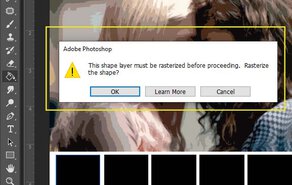
Step 4:
- Click Ok when the box shows up that says “Shape layer be raterized……”
- The box will now become the color you selected
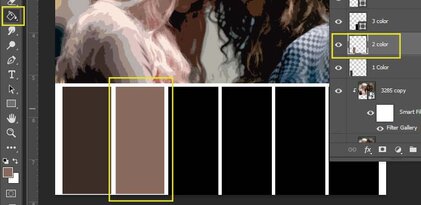
Step 5:
- Click on
- 2 Color Layer
- Choose the Eye Dropper Tool
- Pick an area in the photo that is lighter than the first color you picked
- This should NOT be the lightest color. That will come next
- Pick an area in the photo that is lighter than the first color you picked
- Click the Eye Dropper Tool over this area of color
- The new color has now been selected
Step 6:
- Select the Paint Bucket Tool
- Click on the 2nd box (2 Color layer)
- Click Ok when the box shows up that says “Shape layer be raterized……”
- The box will now become the color you selected
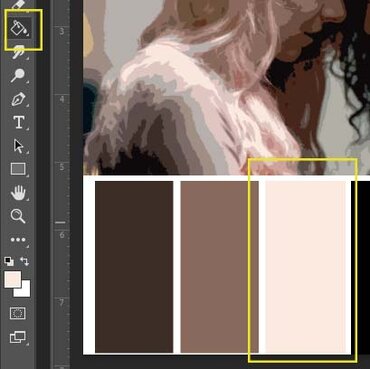
Step 7:
- Click on
- 3 Color layer
- Choose the Eye Dropper Tool
Step 8:
- Choose an area which is the lightest, but NOT WHITE!
- Click the Eye Dropper Tool over this area of color
- The color has now been selected
- Click the Eye Dropper Tool over this area of color

Step 9:
- Select the Paint Bucket Tool
- Click on the 3rd box (3 Color layer)
- Click Ok when the box shows up that says “Shape layer be raterized……”
- The box will now become the color you selected
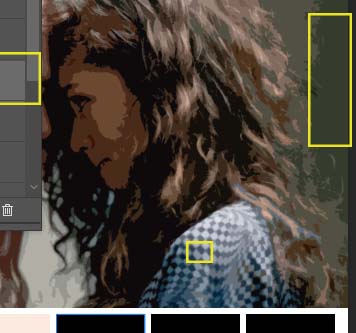
Step 10:
- Click on
- 4 Color Layer
- Choose the Eye Dropper Tool
- Look at the middle or right side of the photo
- Choose an area which is very dark, but NOT BLACK
- I used the blue of her shirt but I could have also used the dark green of the background
- Click the Eye Dropper Tool over this area of color
- Choose an area which is very dark, but NOT BLACK
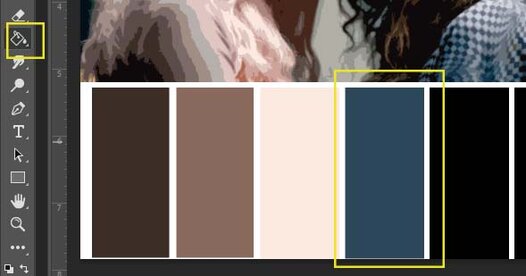
Step 11:
- Select the Paint Bucket Tool
- Click on the 4nd box (4 Color layer)
- Click Ok when the box shows up that says “Shape layer be raterized……”
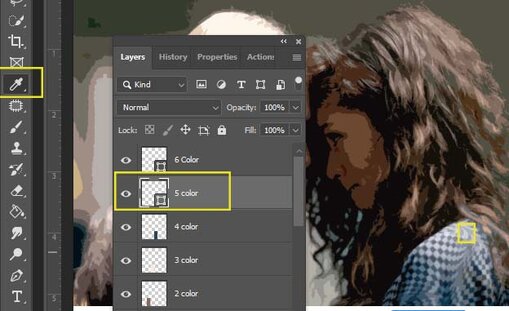
Step 12:
- Click on
- 5 Color Layer
- Choose the Eye Dropper Tool
- Pick an areathat is lighter than the last color you picked
- This should NOT be the lightest color.
- Pick an areathat is lighter than the last color you picked
- Click the Eye Dropper Tool over this area of color
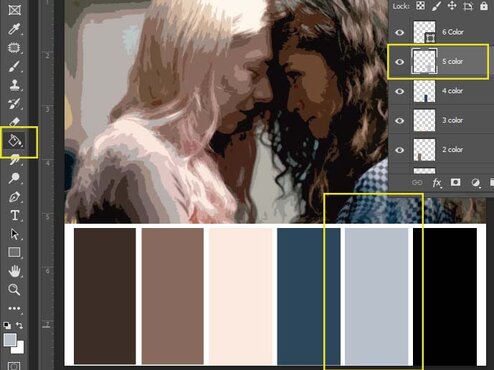
Step 13:
- Select the Paint Bucket Tool
- Click on the 5th box (5 Color layer)
- Click Ok when the box shows up that says “Shape layer be raterized……”
Step 14:
- Choose an area which is the lightest, but NOT WHITE
- If there is not a lighter color you can select a different color that hasn’t been used yet.
- (My photo did not have another shade of blue so I used the green)
- Click the Eye Dropper Tool over this area of color
- If there is not a lighter color you can select a different color that hasn’t been used yet.

Step 15:
- Select the Paint Bucket Tool
- Click on the 6th box (6 Color layer)
- Click Ok when the box shows up that says “Shape layer be raterized……”

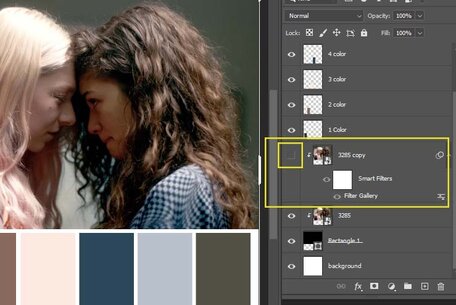
Step 16:
- Go to the Layer that is the main photo copy with the cutout
- Click the eye off
- The cut out will now be gone and the original photo is showing
- Click the eye off
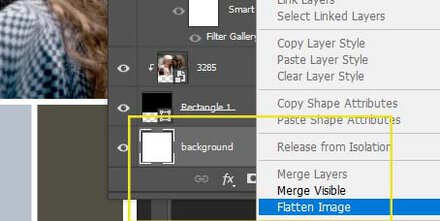
Step 17:
- Right click on the Background Layer
- Flatten Image
- Save as jpeg
- Flatten Image