Warhol: Elvis Style Print
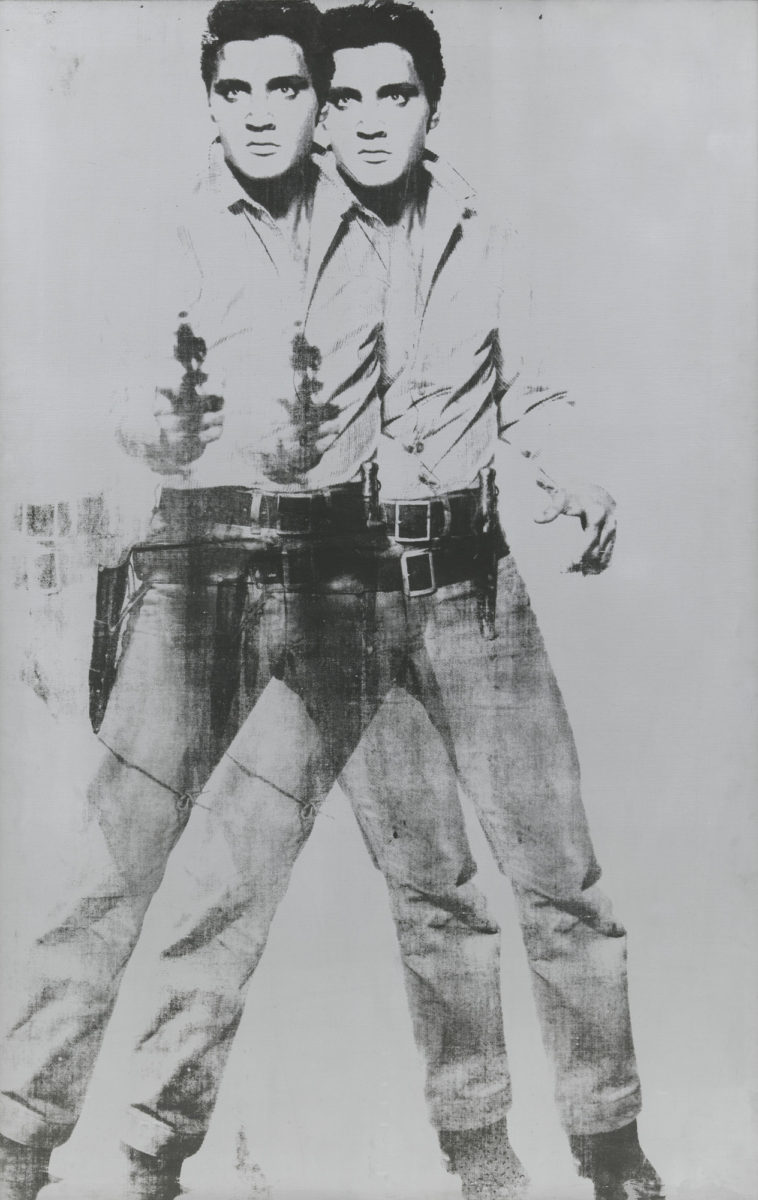
Warhol’s Double Elvis is a silkscreen painting, which reproduces the second image, almost as a shadow
A Triple Elvis’ was sold for $81.9m in 2014


Photoshop Project


Step 1:
- Pick a person or character from Popular Culture or a Personal Photo
- This can be from today or past
- Make sure it is a FULL body image


Step 2:
- If your image is not black and white you MUST turn it black and white first
- Image
- Adjustments
- Black and White
- Adjustments
- Image
- Make sure your layers are flattened (only 1 layer)


Step 3:
- Open the Person Image
- Pick the Quick Select Tool
- Select the image

Step 4:
- Add a Mask to the image (background will disappear)
- Right click
- Convert to Smart Object
Step 5:
- Save and Open one of the background papers below or find your own image


Step 6:
- Select the Move Tool
- Drag the Image onto the paper
Step 7:
- Make the image fit
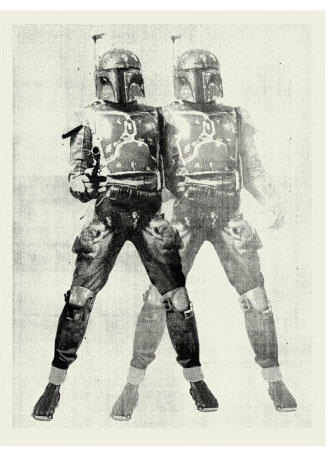
- A border should be left around the image in the spots indicated in the sample

Step 8:
- Go to
- Filter
- Filter Gallery
- Filter

Step 9:
- Artstic
- Posters Edge
- Edge Thickness 0
- Edge Intensity 0
- Posterization 2-6
- Do NOT make the image look high contrast!


Step 10:
- Right Click on the person layer
- Duplicate Layer

Step 11:
- Select the Move Tool
- Move the duplicated images to the right
- Make sure that it overlaps the first image
- Move the duplicated images to the right

Step 12:
- Change the Opacity between 45-70% depending on how transparent you want the second image

Step 13:
- Click on Adjustments (black/white circle)
- Solid Color

Step 14:
- Pick ANY color you would like. It doesn’t matter

Step 15:
- Right Click on the Color Fill Layer
- Create Clipping Mask

Step 16:
- Click at top left of layers where it says Normal
- Pick Screen

Step 17:
- Click on the box on Color Fill Layer
- Pick the color you want to change your image to
- You do NOT have to do a color
- You may want to just leave it black and white
- You do NOT have to do a color
- Pick the color you want to change your image to


Step 18:
- Highlight both
- Color Fill and Layer 1 Copy

Step 19:
- Once they are both highlighted
- Right Click
- Merge Layers
- Right Click

Step 20:
- Move Color Fill 1 Layer
- BELOW Layer 1

Step 21:
- The Image will now be behind the main image
- You may move it around if needed

***********************
Step 22 – Step 25 is optional
These steps are to be used only if you’d like to add a 3 person
Skip to Step 26 if you only want 2 people in your project
********************************
Step 22:
- Duplicate the Color Fill 1 Layer (Control J)

Step 23:
- Move the Color Fill 1 Copy to the left

Step 24:
- Image
- Adjustments
- Hue Saturation
- Adjustments

Step 25:
- Change the Hue Slider to any color you’d like

Step 26:
- Save the two grunge images below to computer


Step 27:
- File
- Place Embedded
- Pick black-grunge-background-1.jpg file
- Place Embedded

Step 28:
- Move the Texture until it covers entire paper
- It is ok if it looks pixelated
- Click Enter
- It is ok if it looks pixelated

Step 29:
- Click at top left of layers where it says Normal
- Pick Screen
- Lower the Opacity to your liking
- Pick Screen


Step 30:
- Repeat Steps 29 and 30 for the second texture
- File
- Place Embedded
- Scratch-Texture.jpg
- Move the Texture until it covers entire paper
- Click at top left of layers where it says Normal
- Pick Screen
- Lower the Opacity to your liking
- Pick Screen
- Click at top left of layers where it says Normal
- Move the Texture until it covers entire paper
- Scratch-Texture.jpg
- Place Embedded
- Right Click on Background Layer
- Merge Visable

Step 31:
- Pick the Eye Dropper Tool
- Zoom in to find the whitest area of the background
- Click the eye dropper tool over the whitest area
- Zoom in to find the whitest area of the background

Step 32:
- Image
- Canvas Size

Step 33:
- Add 2 inches to Width
- Add 2 Inches to Height
- Canvas Extension Color
- Click Other and the colored box next to it


Step 34:
- The Color Picker will open
- Locate the two color boxes on the bottom of tool bar
- Click on the top color box
- This is the color you picked with the eye dropper
- Click on the top color box
- Locate the two color boxes on the bottom of tool bar

Step 35:
- There will now be a boarder around your image which should match in color
- Flatten your image
- Save as jpeg
- Flatten your image


