


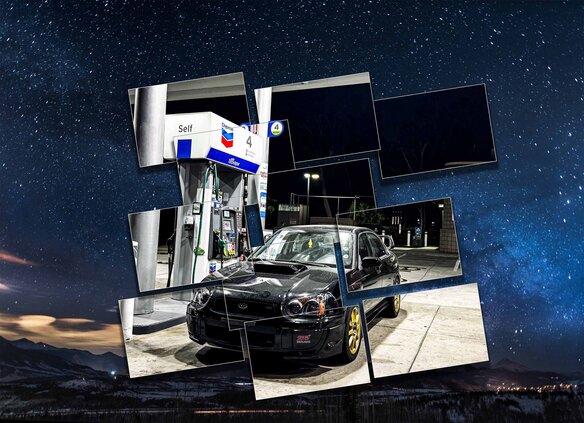
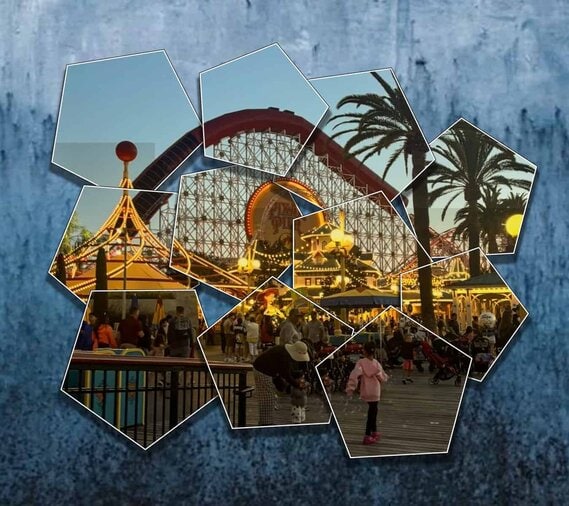
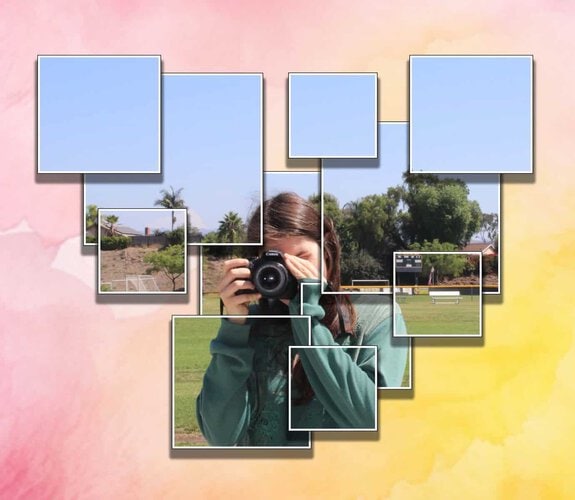
This project must be done with a photograph that is personal to you.
It can be a photograph you took yourself or one of family/friends/pets!


________________________________________________________________________
Step 1:
- File
- New
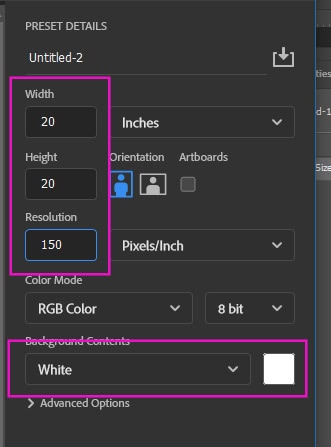
- Width: 20
- Height: 20
- Resolution: 150
- Background: White
- Resolution: 150
- Height: 20
- Width: 20
- New
Step 2:
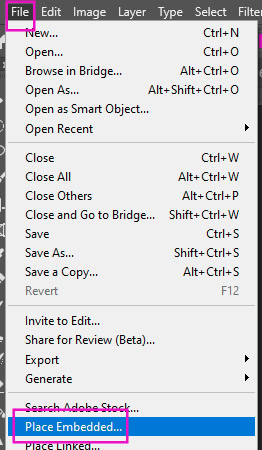
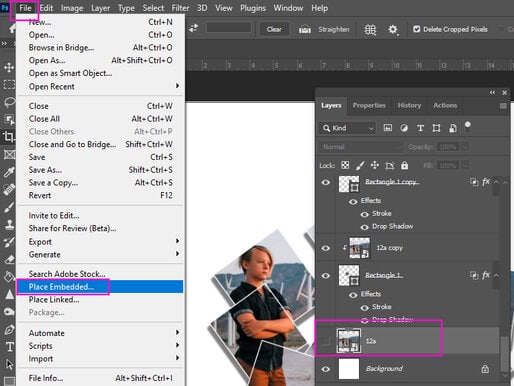
- File
- Place Embedded
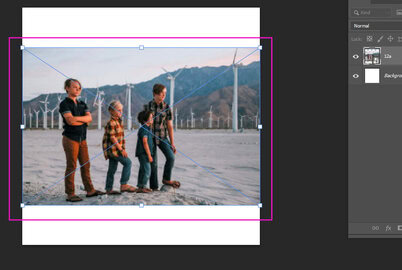
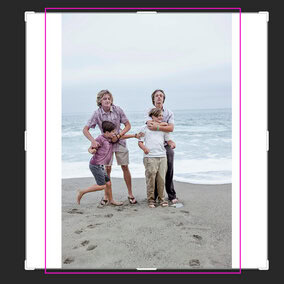
- Choose the photograph you want to use for this project. Remember that it MUST be a photograph from your world or photograph you took
- Place Embedded
Step 3:
- Make the photograph go to the edge of the white background
- You will have white around the edges depending if you have a verticle or horizontal image
Step 4a:
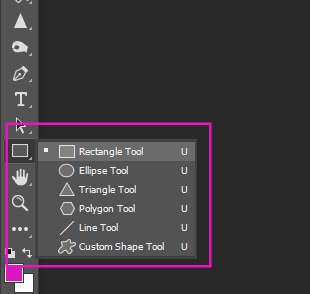
- Right click on the Shape tool to pick a shape (I will be using a square in the project)
Step 5:
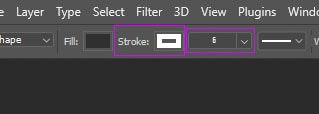
- At the top of Photoshop below Select/Filter
- Fill: Can be any color
- Stroke: White
- 6 – 9pt (depending on how thick you want the boarder of the shapes to be)
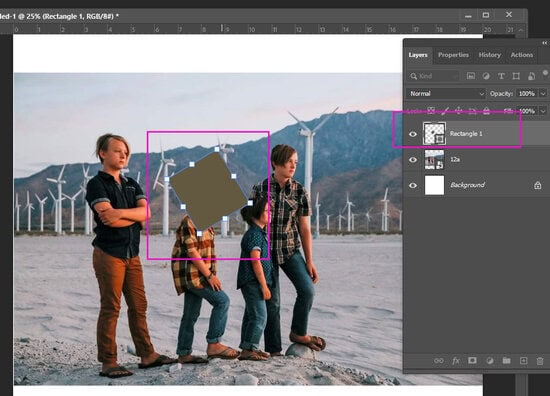
Step 6:
- Draw the shape somewhere on your photograph
- Do NOT make it to big or to small
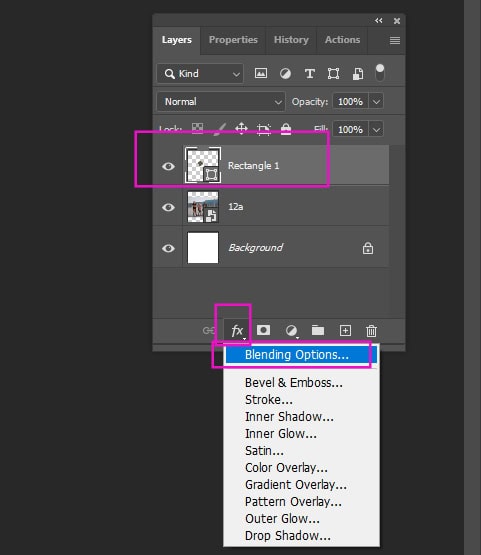
Step 7:
- Make sure you are on the Shape layer
- Click the fx at the bottom of Layers
- Pick Blending Options
- Click the fx at the bottom of Layers
Step 8:
- Click to Select: Stroke
- Opacity 100%
- Do NOT click ok

Step 9:
- Click : Drop Shadow
- Blend Mode: Multiply
- Opacity: 50%
- Distance: 30px
- Spread: 50%
- Size: 20px
- Spread: 50%
- Distance: 30px
- Opacity: 50%
- Blend Mode: Multiply

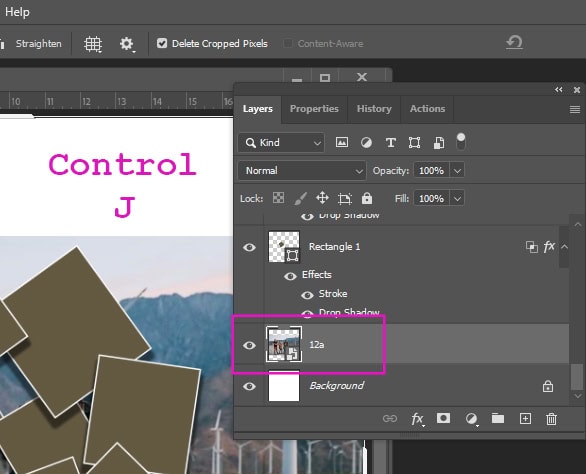
Step 10:
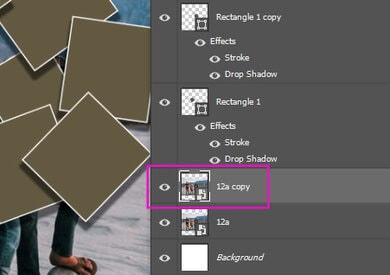
- You will now be duplicating this shape
- Click on Rectangle 1 Layer
- Click Control J
- This will duplicate the shape
- Click Control J
- Click on Rectangle 1 Layer

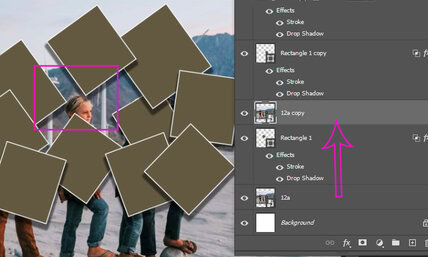
Step 11:
- Select the move tool
- Move the duplicated shape to another spot on the photograph

Step 12:
- Click on Rectangle 1 Layer Copy
- Click
- Control J
- This will duplicate the shape again
- Move the duplicated shape to another spot
- This will duplicate the shape again
- Control J
- Click

Step 13:
- Click on Rectangle 1 Layer Copy 2
- Click
- Control J
- This will duplicate the shape again
- Move the duplicated shape to another spot
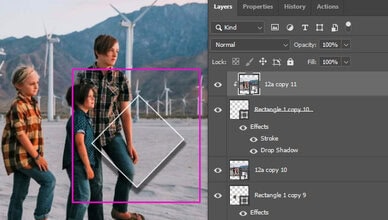
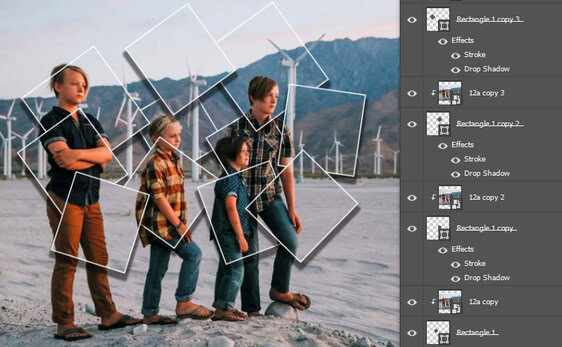
- Continue to Copy and move the shape until you have at Least 11 shapes
- You may do more shapes if you’d like


Step 14:
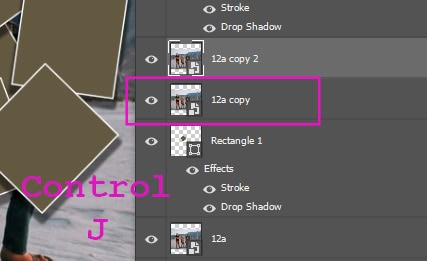
- You will now be duplicating the photograph
- Click on Layer with your main photograph
- Click
- Control J
- This will duplicate the Photograph
- Control J
- Click
- Click on Layer with your main photograph
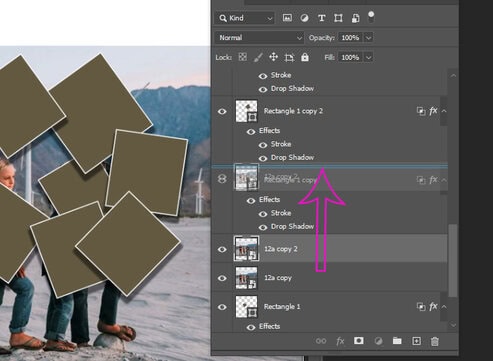
Step 15:
- Click on the Copied photograph
Step 16:
- Move the Copied Photograph Layer
- UPOVE the first shape
- This will cause the shape to disappear
Step 16:
- Click on the Copied photograph
- click Control J
- This will copy the photograph again
- click Control J
Step 17:
- Move the copied photograph
- UPOVE the second shape
- This will cause the second shape to disappear
- UPOVE the second shape
Step 18:
- Continue to copy the main photograph
- move it ubove each of the shapes until they are all gone

Step 19:
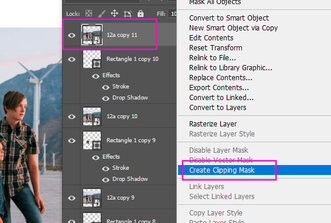
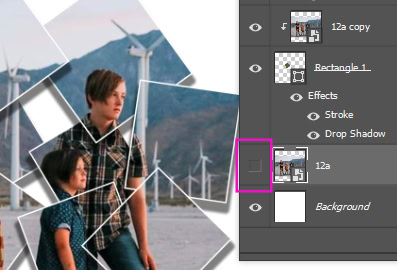
- Click on the top layer on the layers pallet
- This should be a copy of the main photograph
- Right click
- Create Clipping Mask
- Only the outline and shadow of the box will be left
- Create Clipping Mask
Step 20:
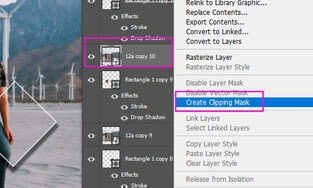
- Click on the next main photograph layer
- Right click on it
- Create Clipping Mask
- The outline will be left
- Create Clipping Mask
- Right click on it
Step 21:
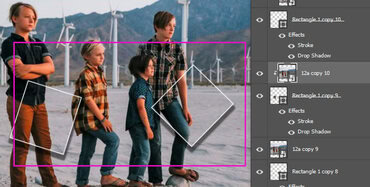
- Continue on each photograph layer until you have all 11 shapes with the outlines showing
Step 22:
- Unclick the eyeball for the second layer (the main photograph)
- Everything but the shapes will disappear
Step 23:
- Pick a background color that will match your photograph
- If you want to use white you can do that also
- Go to
- Google- Images
- Texture Backgrounds + Color
- Save the image you’d like to use
- Texture Backgrounds + Color
- Google- Images


Step 24:
- Go to
- File
- Place Embedded
- File
Step 25:
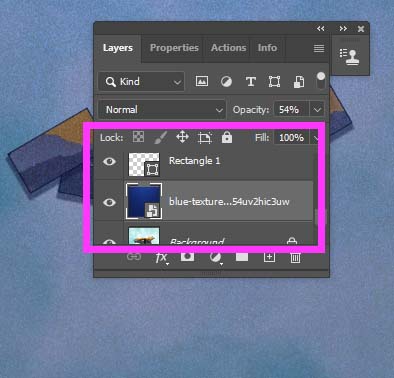
- Click on the Background Layer (bottom layer)
- Go to
- File
- Place Embedded

Step 26:
- The colored Background should be behind the shapes
- If it is not, move the color background so it is below all the shapes on the layer pallets
- Crop out any extra areas
- Make the Background fit behind your shapes
- Crop out any extra areas

