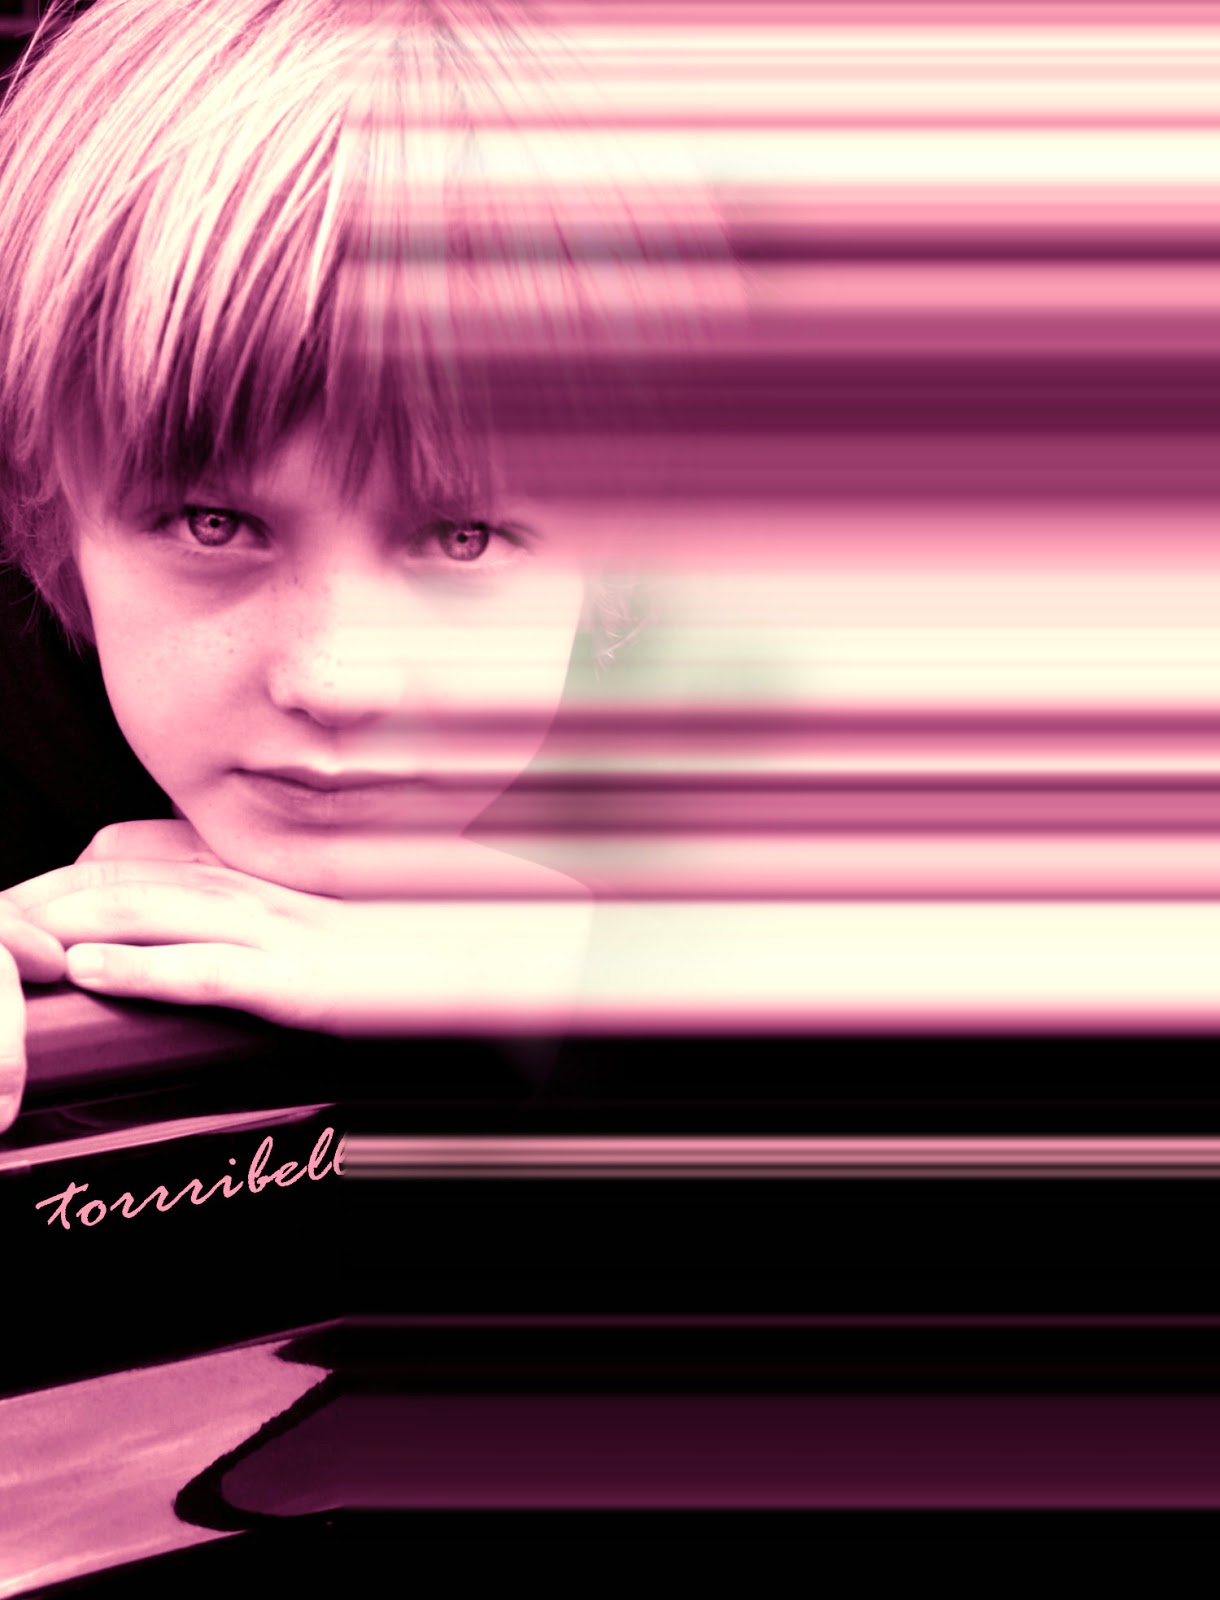
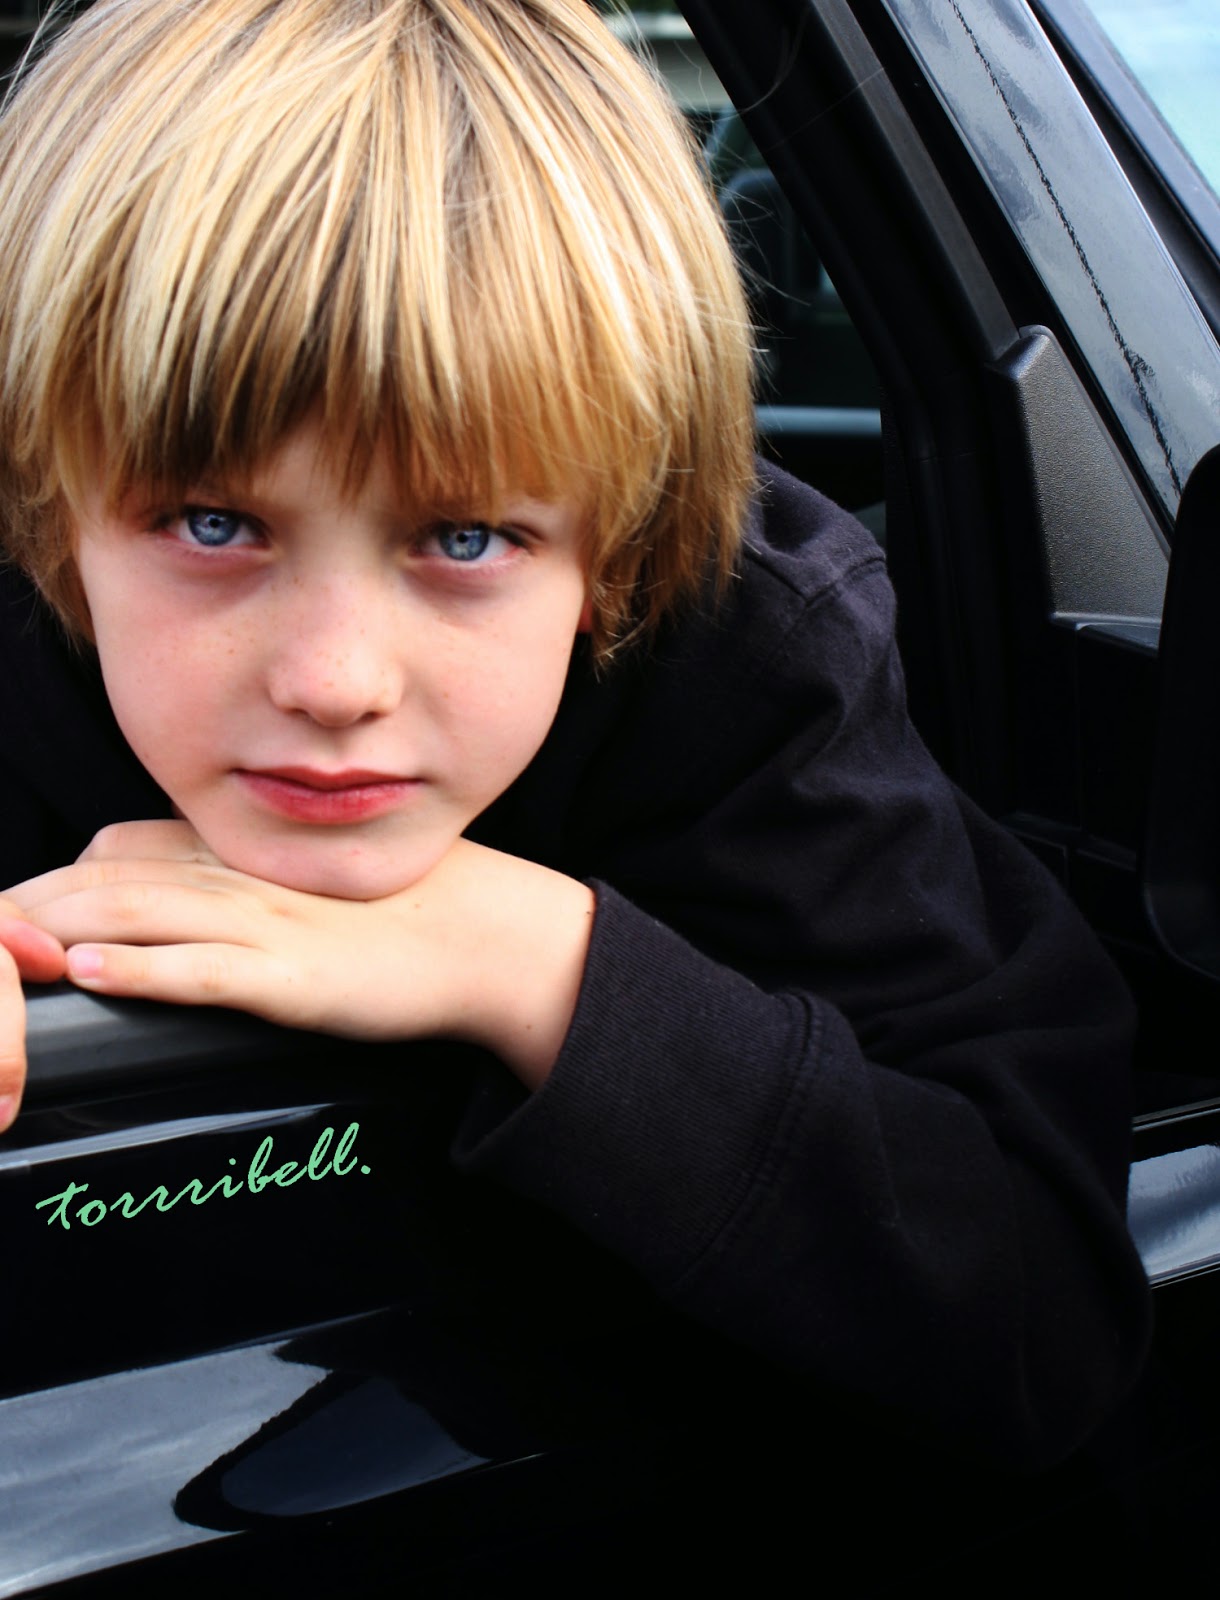
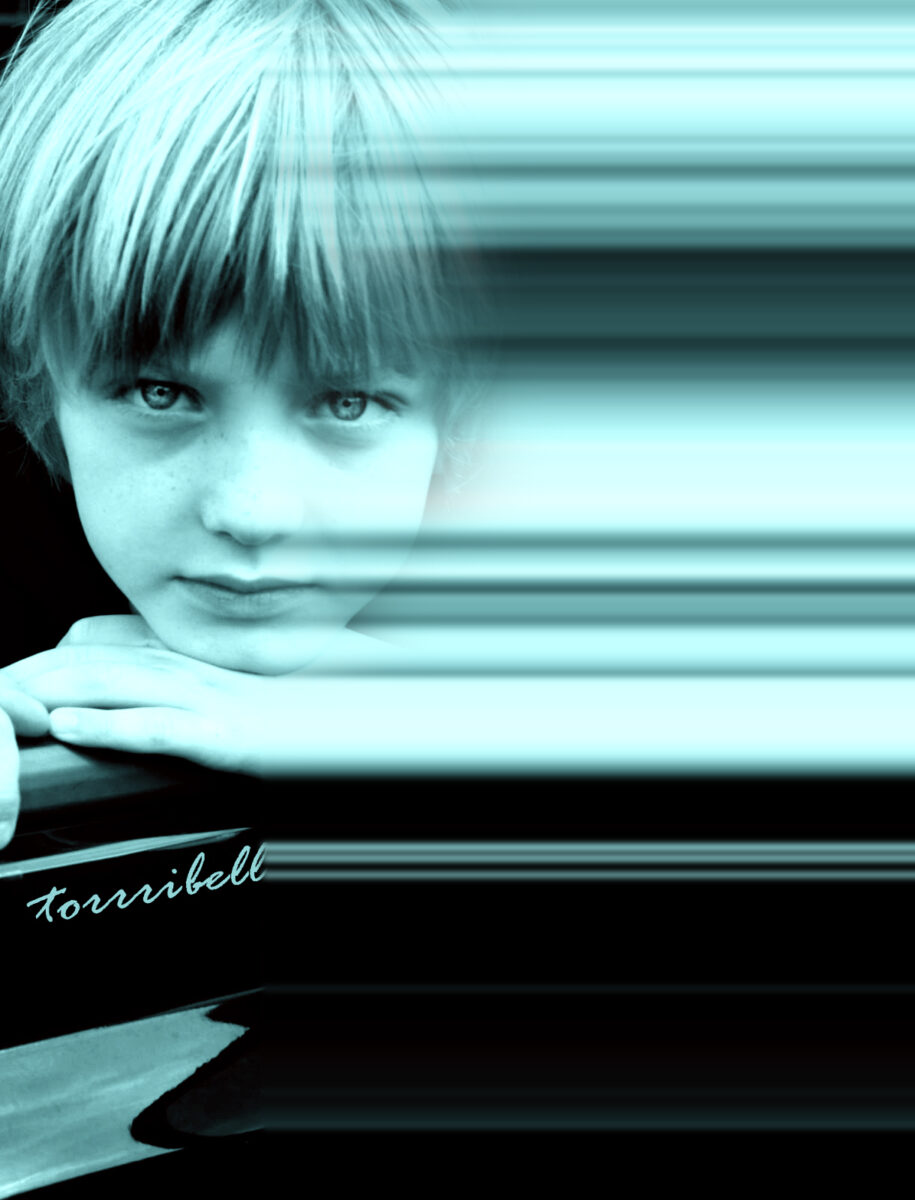
Face Stretched
Photography Section
Step 1:
- Use the black backdrop in class to take the photo
- Set your camer to AV
- Pick a low aperture ( F/5 or lower)
- Take a closeup photo of a person
- Focus on the EYES. The eyes HAVE TO BE IN FOCUS
- You may also do a person wearing a mask
Photoshop Section
Step 1:
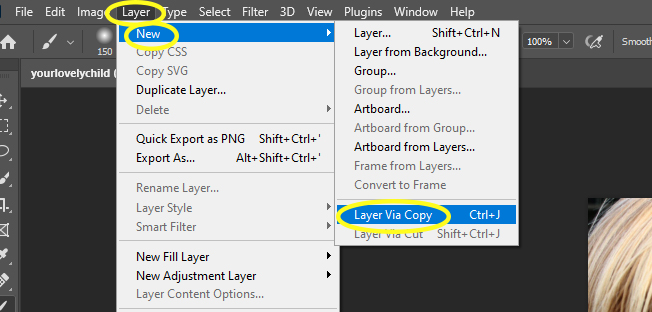
- Layer
- New
- Layer via Copy
- New
Step 2:
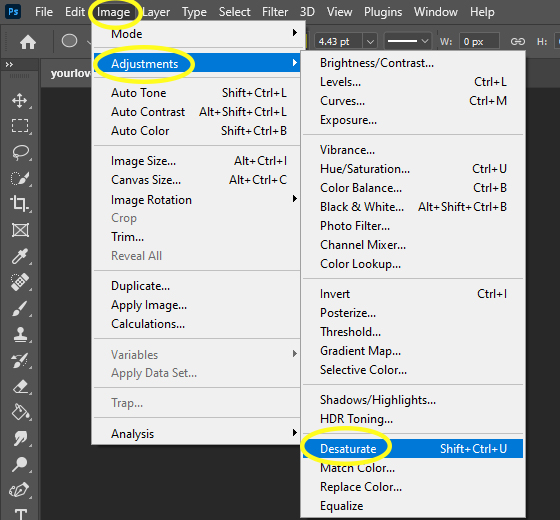
- Image
- Adjustments
- Desaturate
- Adjustments
- This will turn your photograph black and white
Step 3:
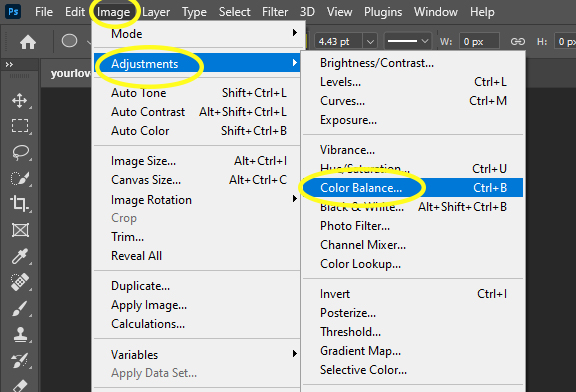
- Image
- Adjustments
- Color Balance
- Adjustments
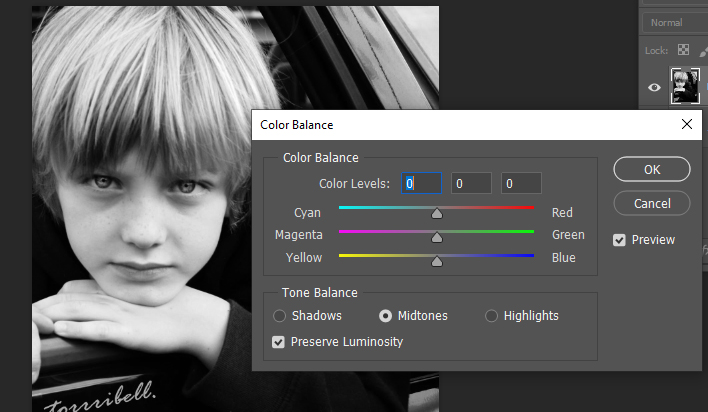
- The Color Balance Sliders will show up
Step 4:
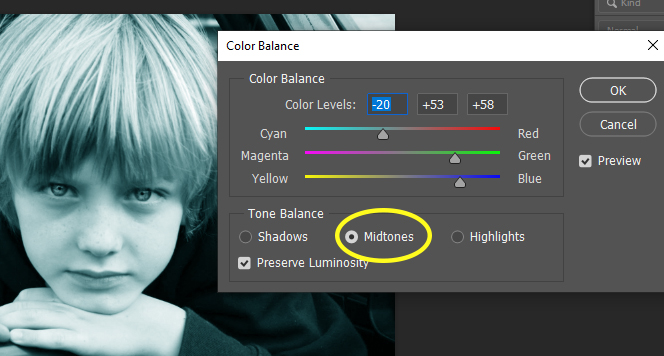
- Click on Midtones
- Move the sliders and pick any color you would like
Step 5:
- Click on Highlights
- Move the sliders so that the face area is slightly lighter than the surrounding parts of the photo
-
- Do not make it look to white
-
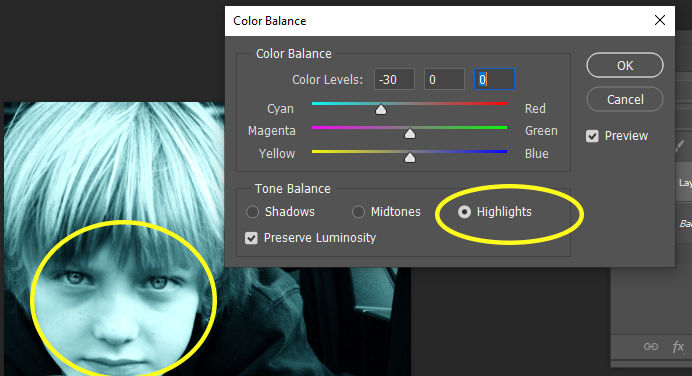
Step 6:
- Click on Shadows
- Move the sliders so that the area around the face/hair is slightly darker
-
- Do not make it look to dark
-
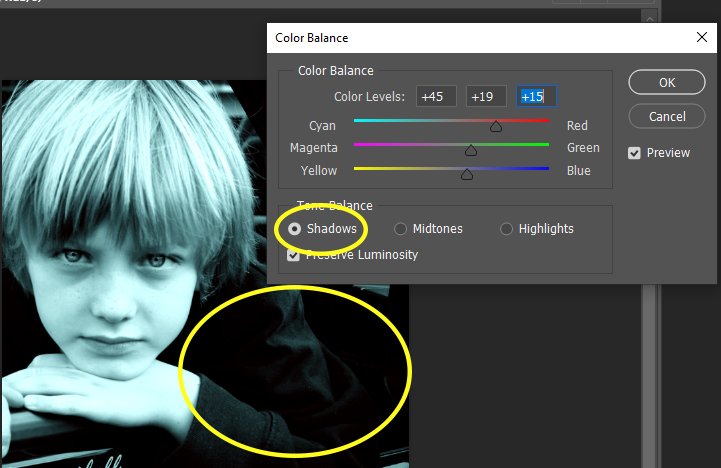
Step 7:
- Make sure you are still on the second layer (the one you changed the color on)
- Right click on this tool
- Pick the Single Column Marquee Tool
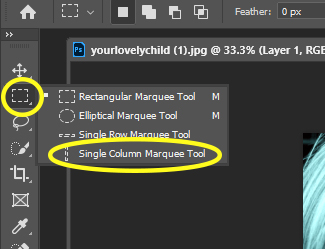
Step 8:
- You will be drawing a line down the MIDDLE of the person’s face
- With Single Column Marquee Tool
- Click anywhere in the Middle of their face
- A line will appear
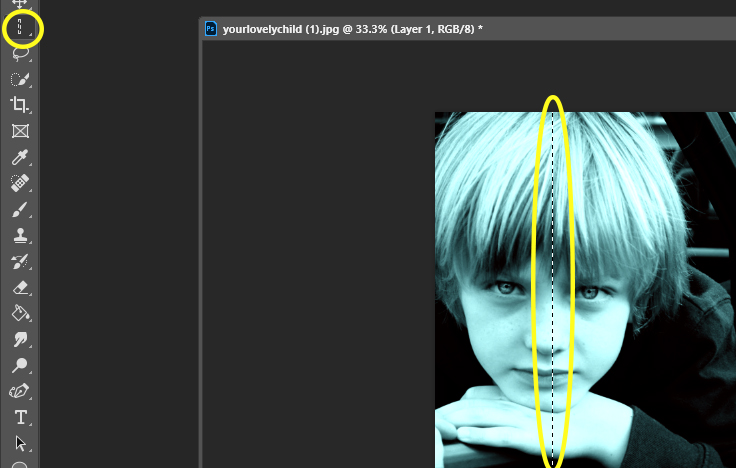
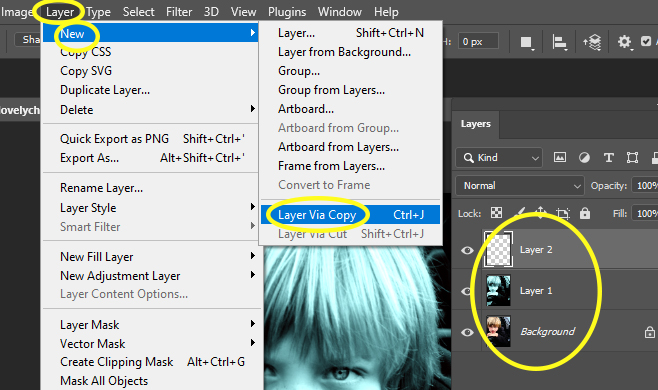
Step 9:
- Go to
- Layer
- New
- Layer Via Copy
- New
- You will now have 3 layer
- Layer
Step 10:
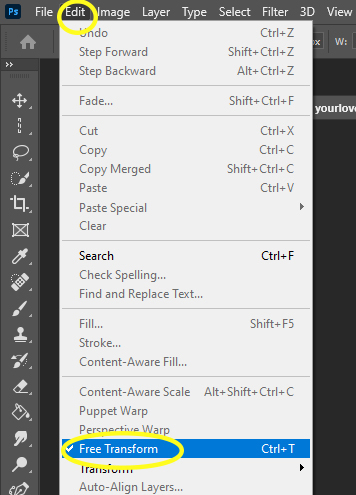
- Go to
- Edit
- Free Transform
- Edit
Step 11:
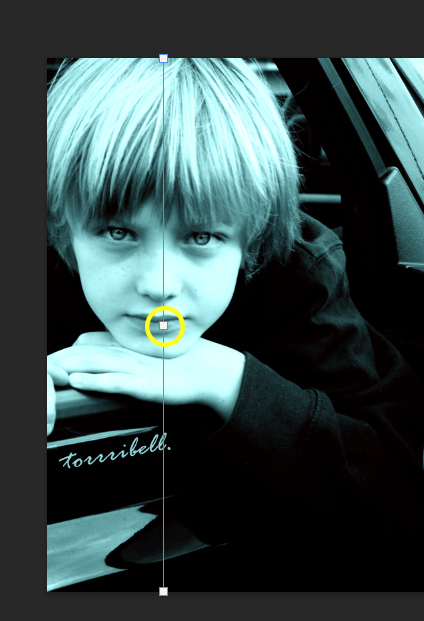
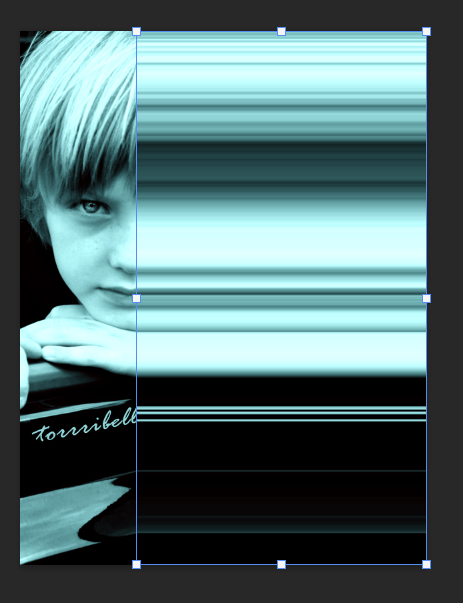
- The line down the face will reappear
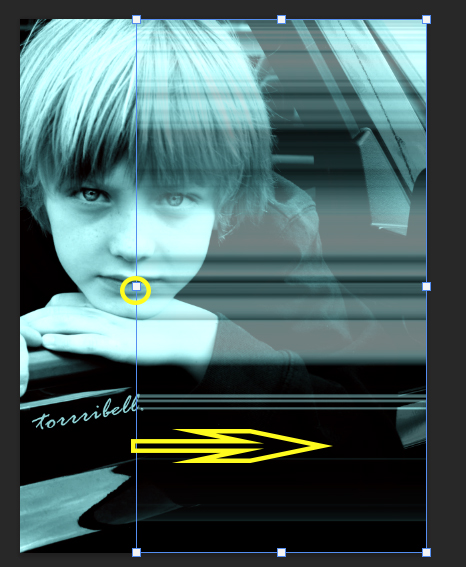
- Click on the middle little box on the line
- Hold down the Shift Key
- Drag the box to the right until you reach the edge of the photo
- Let go of mouse and shift when you are at the edge of the photo
- Drag the box to the right until you reach the edge of the photo
- Hold down the Shift Key
- Click on the middle little box on the line
Step 12:
- Click Enter
Step 13:
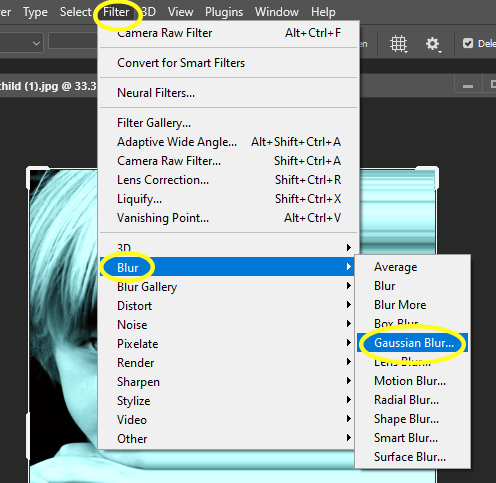
- Go to
- Filter
- Blur
- Gaussian Blur
- Blur
- Filter
Step 14:
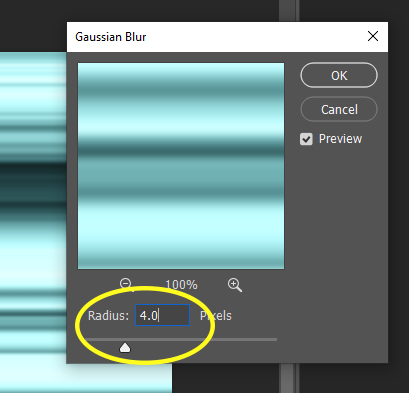
- The Gaussian Blur Box will open
- Change Radius: 4.0
Step 15:
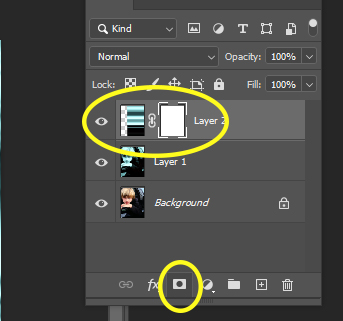
- Make sure you are on the 3rd Layer
- Click on the Layer Mask at the bottom of the Layers Pallet (Box with Circle in it)
- This will add a white mask
- Click on the Layer Mask at the bottom of the Layers Pallet (Box with Circle in it)
Step 16:
- Select a Black Paint Brush
- Change brush to
- Flow 30%
- Change brush to
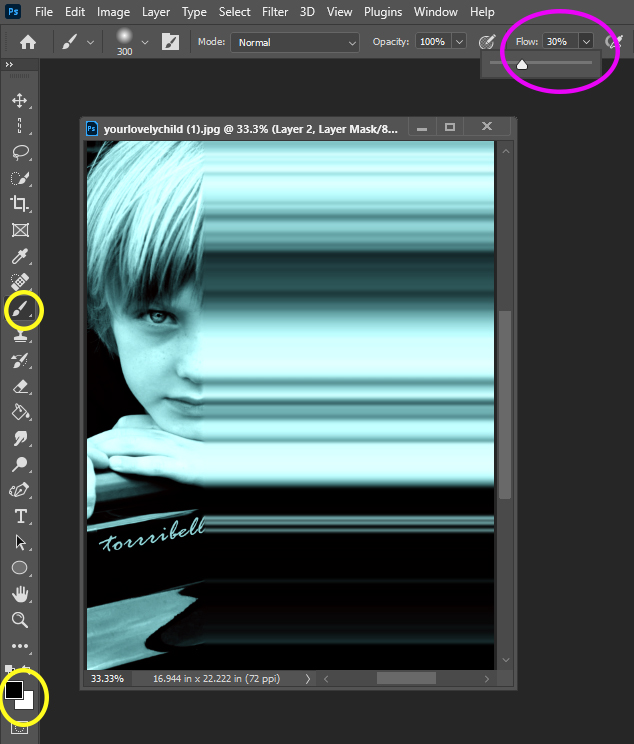
Step 17:
- Start to paint over the right eye and remove parts of the blur
- Click slowly so you do not take off to much
- Lightly remove the blur in parts of the face and the hair
- Do NOT take off to much
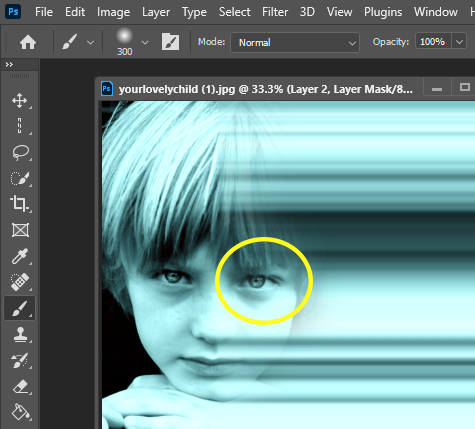
Step 18:
- If you remove to much blur
- Flip your brush to a White Brush
- Paint back on the blur
- Flip your brush to a White Brush
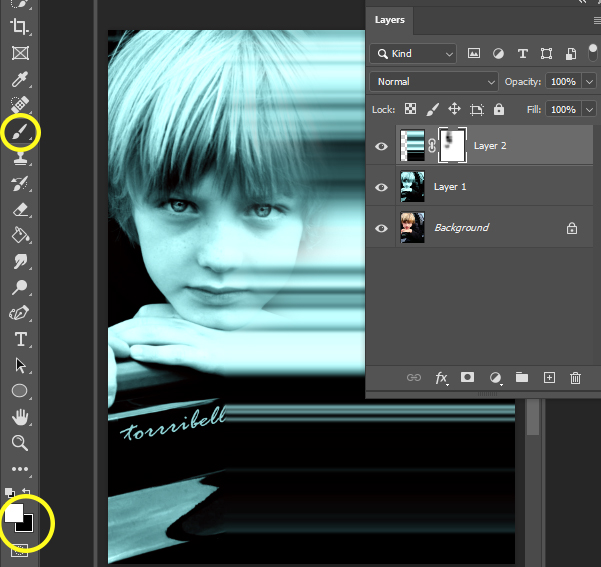
Step 19:
- Add Logo
- Flatten Image

