

When you take a group photo the chances of everyone looking good in the same photograph is a challenge. Learning to swap people in a photograph can really come in handy.
Step 1
- Choose the Photograph were most of the people looking at the camera
- Everyone is looking but the little boy at the far right

- Choose a second photo to use where the person is looking
- This will be the photo you use to swap the person/head

Step 2:
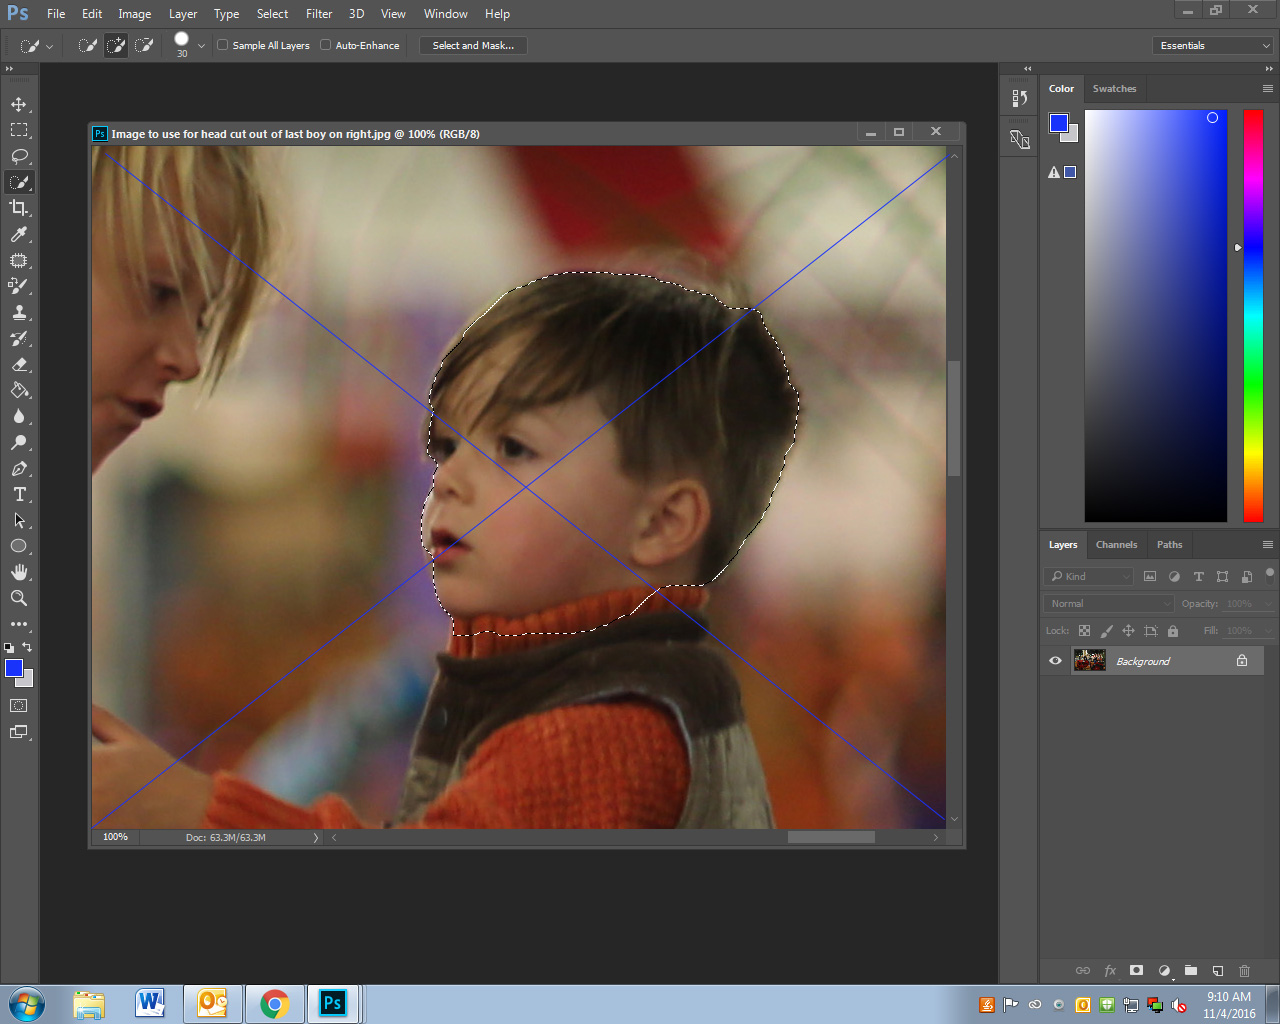
- Select the Lasso Tool
- Draw around the person and extra area around the person
- You want to select MORE then you need!
- Draw around the person and extra area around the person
Step 3:
- Select the Move tool
- Drag the person you selected onto the other photo

Step 4:
- Pull down the Opacity of cut out person to about 40-60%
- You can now see both images
- Move the image until it is lined up as best as possible
- If the photo is the wrong size
- click Control T to adjust the size.
- If the photo is the wrong size
- Move the image until it is lined up as best as possible
- You can now see both images

Step 5:
- Increase the Opacity back to 100% when you finished lining up the two photos
- On Layer 1
- add a Layer mask (looks like a box at the bottom of the layers pallet)
- On Layer 1

Step 6:
- Select the Brush tool
- Select a Black brush
- Paint out areas you want to remove
- If you paint out to much, Flip your Color so white is on top and paint it back in
- Paint out areas you want to remove
- Select a Black brush

Step 7
- Flatten Image
- If you have areas that do not match or blend in correctly
- Use the Lasso Tool or Clone stamp tool to fill in and fix