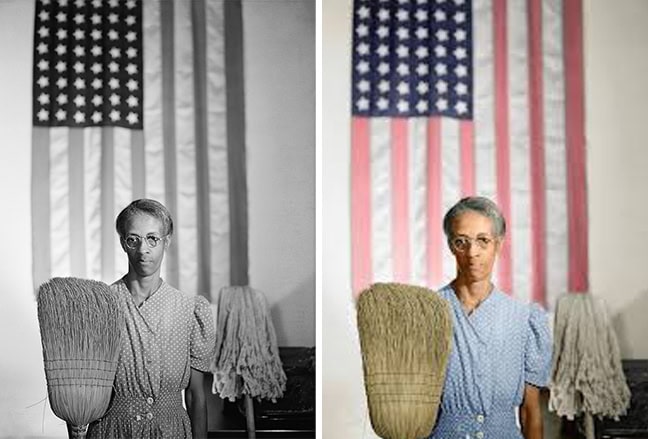

Use your own family photo

Step 1:
You must add color to EVERY SECTION of the photograph
- Open the black and white image in Photoshop
- Pick the Quick Selection Tool
- Select ALL of the face/skin
- Avoid going into the hair
- Select ALL of the face/skin
- Pick the Quick Selection Tool

Step 2:
- If you select to much of the face
- Choose the Paintbrush
- Deselect that area
- Choose the Paintbrush

Step 3:
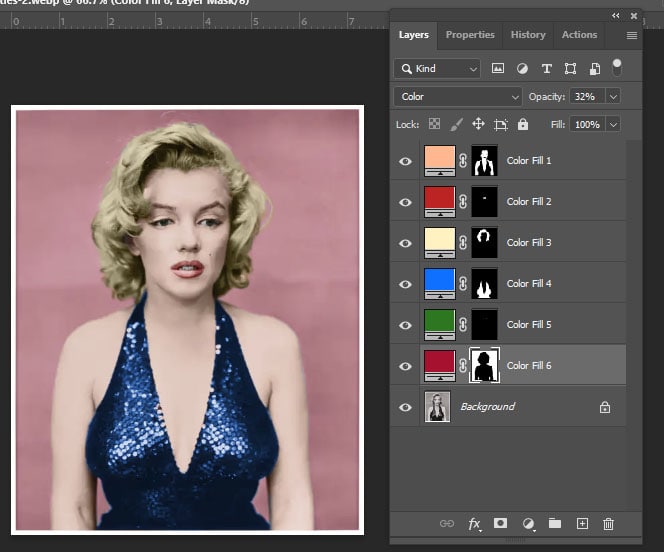
- Click the black/white circle at the bottom of the layers pallet
- Pick Solid Color

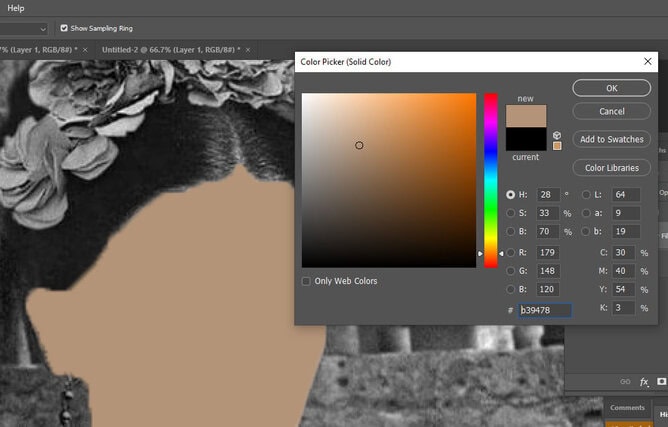
Step 4:
- Choice a brownish/orange/yellow color for the skin depending on the person’s nationality
- Click ok
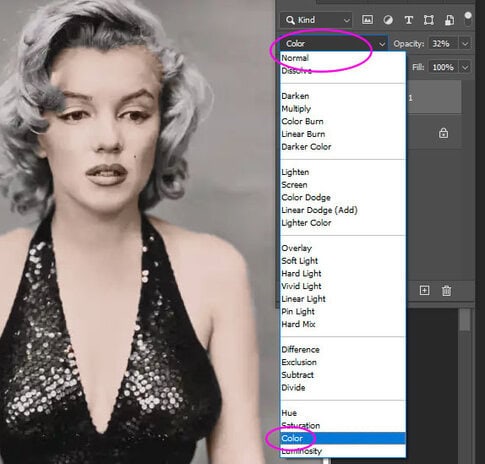
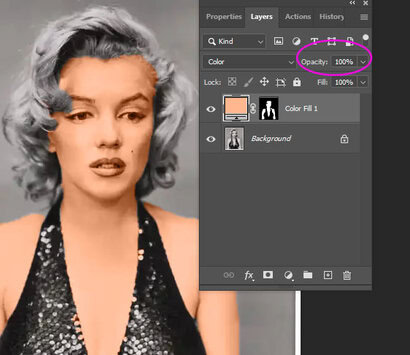
Step 5a:
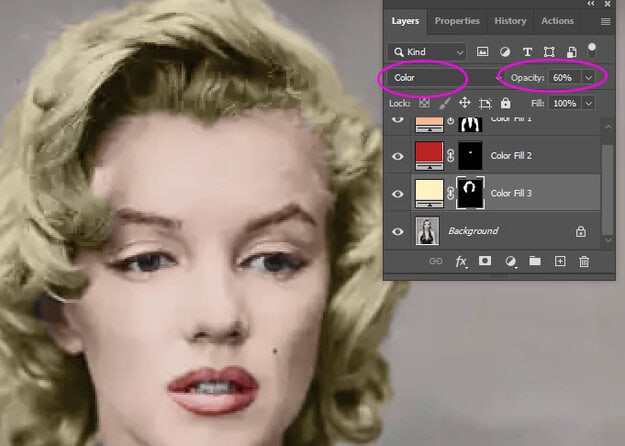
- On the layers pallet where it says Normal
- Change to Color
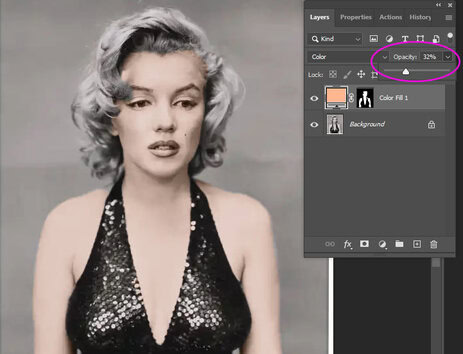
Step 5b:
- If the color does not look natural
- Lower the opacity
Step 5c:
- If you picked the wrong color you can change it
- Click on the box with color
- Pick a new color from the color picker
- Click on the box with color

Step 6a
- If you painted outside of the skin you can remove it
- Click on the Mask on Color Fill Layer
- Select the Brush Tool
- Make sure Black color is selected
- Paint off the color
- Make sure Black color is selected
- Select the Brush Tool
- Click on the Mask on Color Fill Layer

Step 6b
- If you missed coloring the parts of the skin, you can add more color to it
- Click on the mask on Color Fill Layer
- Select the Brush Tool
- Make sure White color is selected
- Paint on the color
- Make sure White color is selected
- Select the Brush Tool
- Click on the mask on Color Fill Layer

Step 7
- You MUST paint the color OFF the eyes and lips
- Click on the mask on Color Fill Layer
- Select the Brush Tool
- Make sure Black color is selected
- Paint out the color from the eyes and the lips
- Make sure Black color is selected
- Select the Brush Tool
- Click on the mask on Color Fill Layer

Step 8:
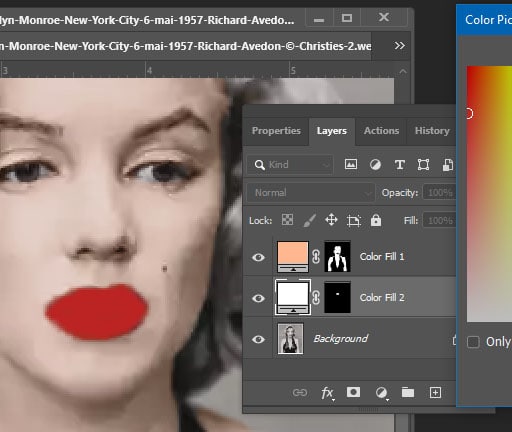
- Click on BACKGROUND Layer
********You must ALWAYS be on the background layer before starting a new color/section*********
- Quick Select the Lips

Step 9:
- At the bottom of layers, click the black/white circle
- Pick Solid Color
Step 10:
- Choice a nutral red color for the lips
- Click ok
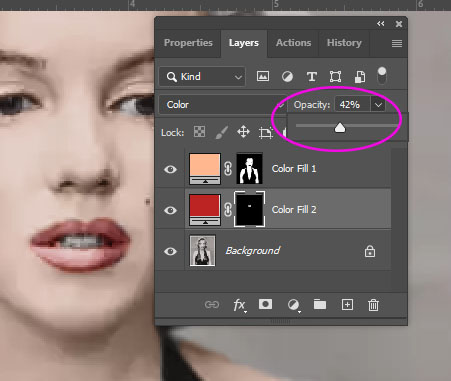
Step 11:
- On Layers Pallet
- Change Normal to Color

Step 12:
- Lower the Opacity of the lip color to look natural
- If you do not like the color you can go back and change the color
- Click on the colored box that you want to change the color
- If you do not like the color you can go back and change the color
Step 13:
- Return to the BACKGROUND Layer!!!!!!
- You must ALWAYS be on the background layer before starting a new color/section
- Quick Select another section of the photo
- You must ALWAYS be on the background layer before starting a new color/section

Step 14:
- At the bottom of layers, click the black/white circle
- Pick Solid Color
- Pick a Color
- Pick Solid Color
Step 15:
- On the layers pallet
- Change Normal to Color
- Lower the Opacity
- Change Normal to Color
Step 16:
- Return to the BACKGROUND Layer
You must ALWAYS be on the background layer before starting a new color/section
- Quick Select around another section of the photo
- Follow the steps 3-6 again for each section of color
- Quick Select around another section of the photo
******You must do seperate sections of color for each section of the photo. DO NOT make everything the same color.*******
Step 17:
- When you are done you should have 5-10+ color layers. The more the better!!!!
- Don’t forget to do the background
- *********You must add color to EVERY SECTION of the photograph you pick!!!!!!*******
- When you are finished, Flatten the image
- Do NOT put your logo on it. This is not your photo
- When you are finished, Flatten the image
- *********You must add color to EVERY SECTION of the photograph you pick!!!!!!*******
- Don’t forget to do the background