Changing Colors


Step 1:
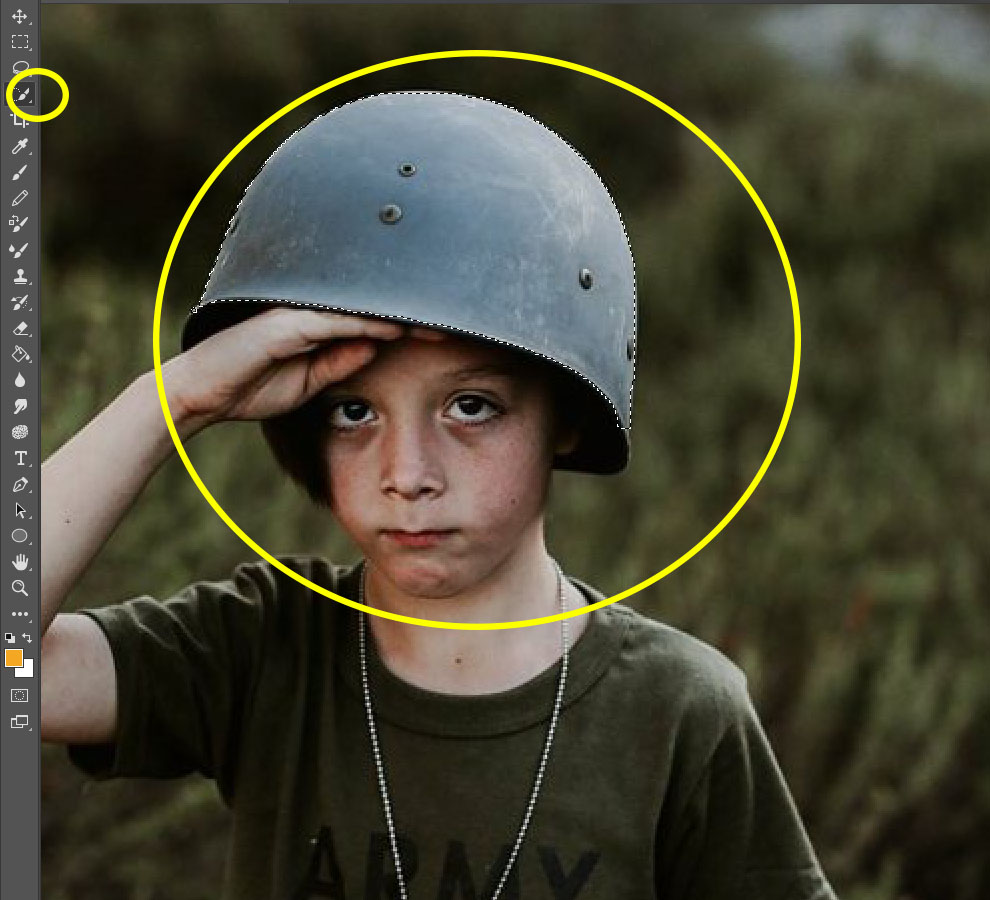
- Decide what part of the photo you want to change the color
- Use the Quick Selection Tool to select the area that will be changing color
- Be sure that you select all of it and nothing else around it.
Step 2
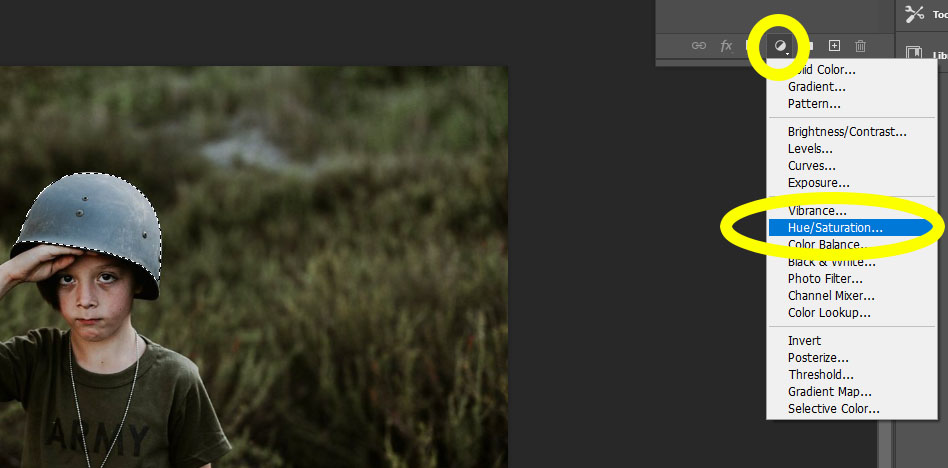
- Cick on the Black/white Circle at the bottom of the layers pallet
- Pick Hue/Saturation
Step 3
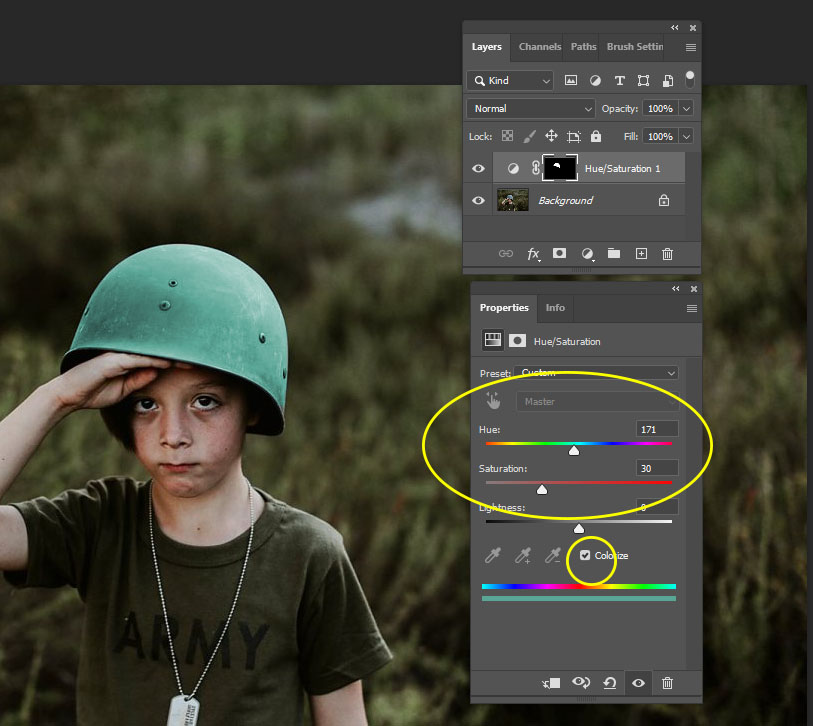
- Click Colorize next to the eye droppers
- Start to move the Hue sliders to pick a different color
Step 4
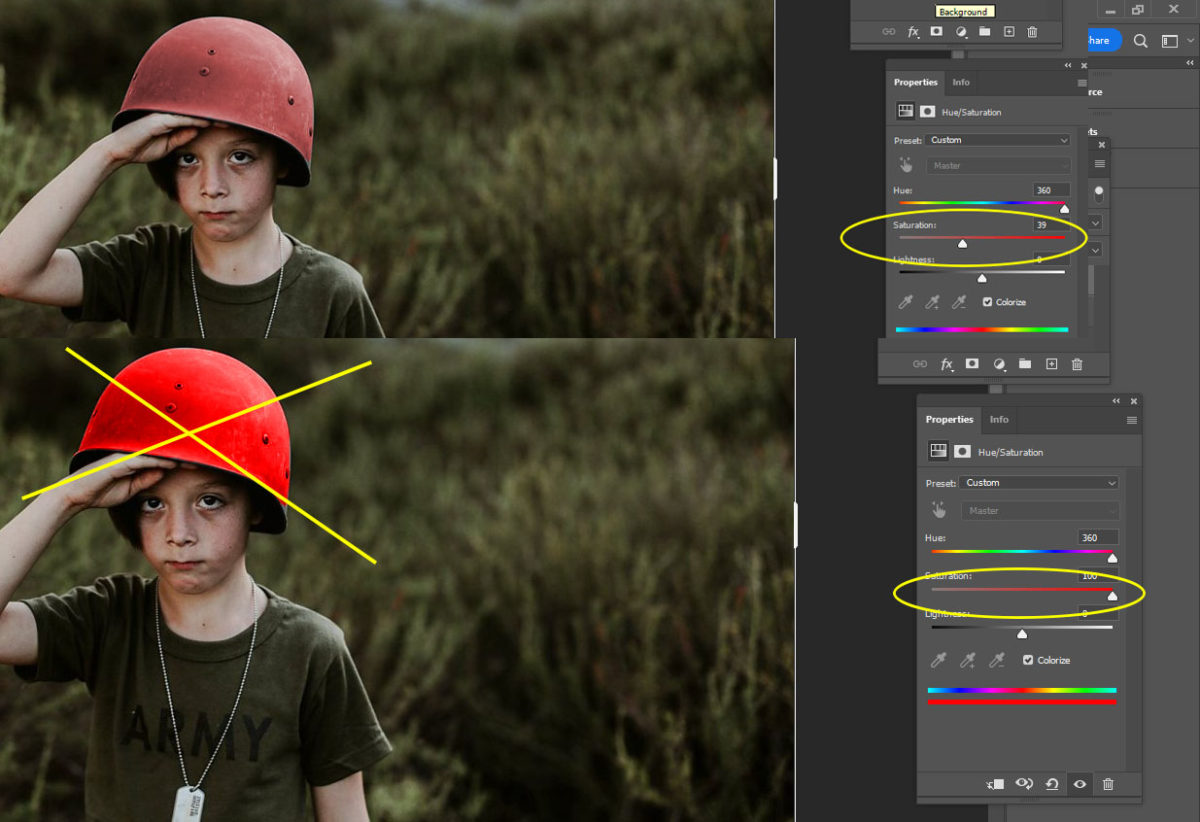
- You can move the Saturation slider slightly to the left or right to create the look you would like…..but……
- DO NOT over saturate the photo by moving the slider all the way to the right.
