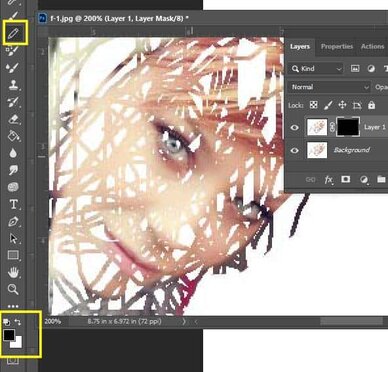
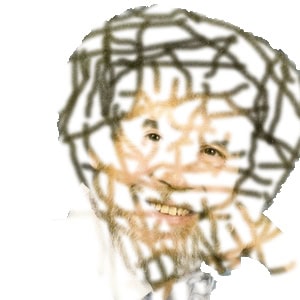
What NOT to do!


Step 1:
- Pick any image you would like but make sure it is at least 1000 px or larger
- Open your image
- Go to Image- Image size
- This will give you the size of your image
- Write down the width and height and resolution in INCHES

Step 2:
- Go to File- New
- Make your width, height and resolution the same as the numbers you wrote down and are in INCHES
- Background color white

Step 3:
- Return to your main photograph
- Using the Quick Selection Tool select around the entire object/person.
- It doesn’t have to be perfectly cut out for this project

Step 4:
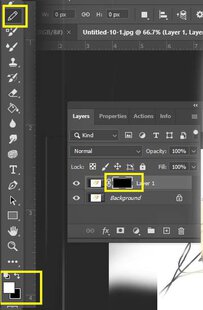
- Select MOVE tool
- Move your photo onto the new white canvas

Step 5:
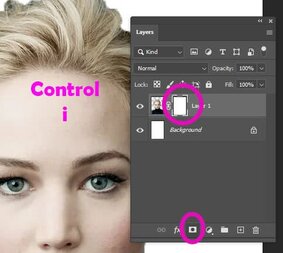
- Add a MASK to the photo layer
- Hold the Control and i keys.
- This will change your mask from white to black and your photograph will disappear
Step 5:
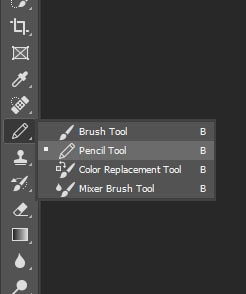
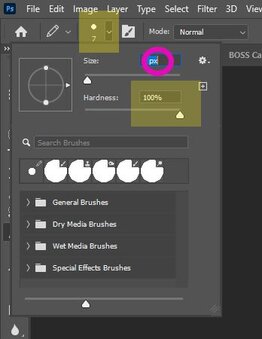
- Go to the Brush Tool
- Right click on the Brush Tool to show other tools
- Choose the Pencil Tool
- Pencil size is 3
- Hardness is at 100%
- Choose the Pencil Tool
- Right click on the Brush Tool to show other tools
Step 5:
- Make sure white color of the pencil is selected at the bottom of the tool bar
- Make sure you are click on the Black square on the Layers Pallet
- Draw lines so that you will began to bring back in parts of the photos
- Leave a lot of white spacing except for the eyes
- Make the eyes more solid.
- Leave a lot of white spacing except for the eyes

Step 6:
- If you bring back much of the photo
- You can remove it and bring back the white
- Flip pencil color to black
- Draw back in the white area