

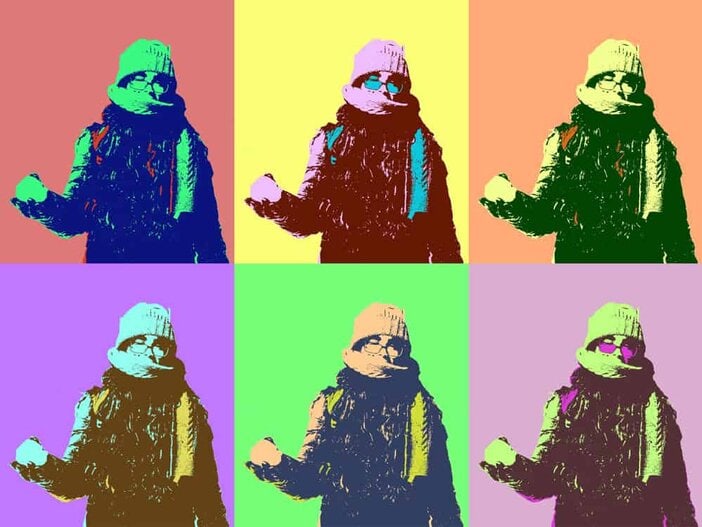
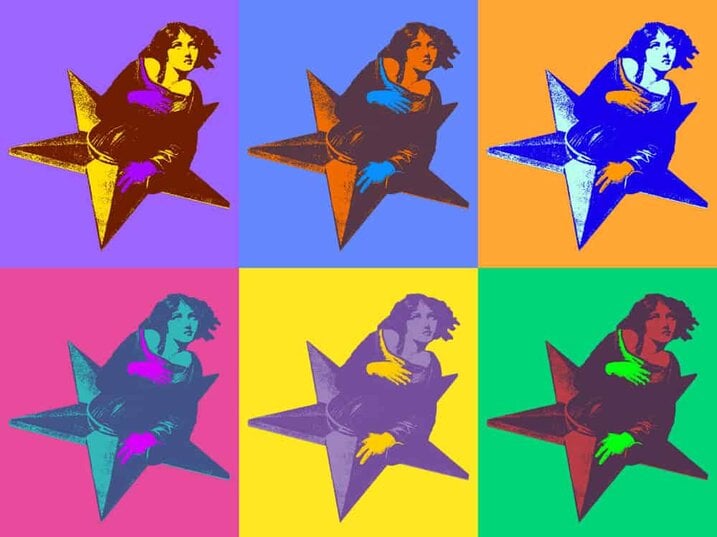
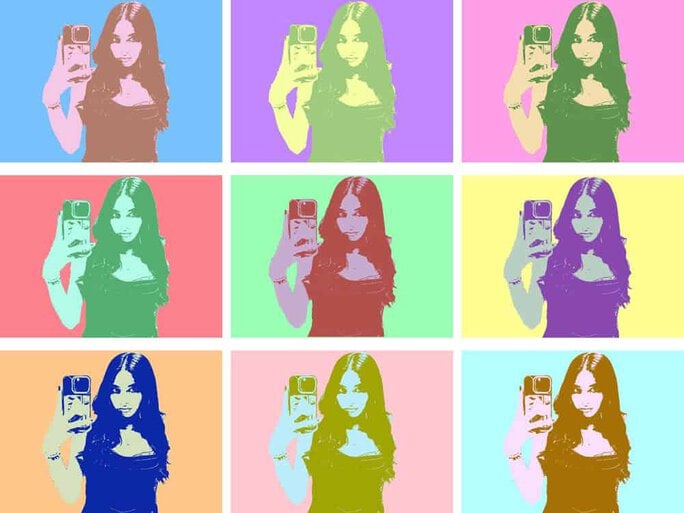
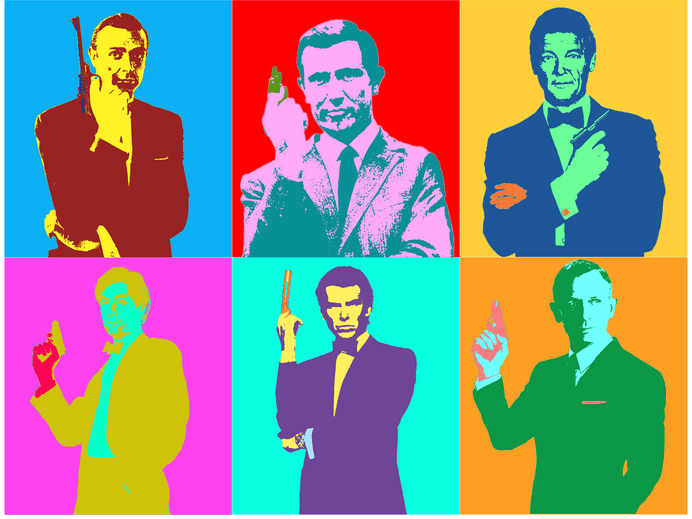
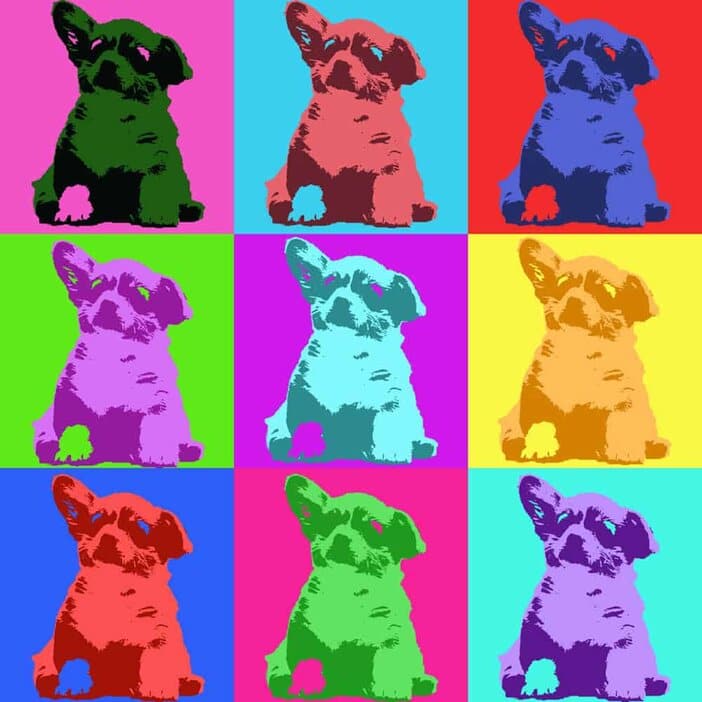
Warhol Repetitive Image
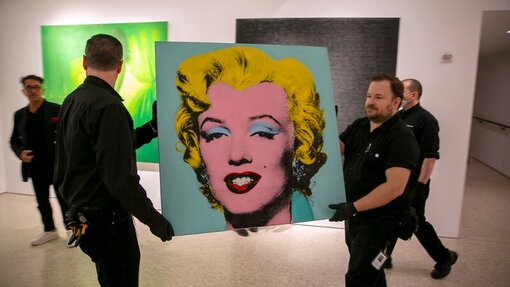
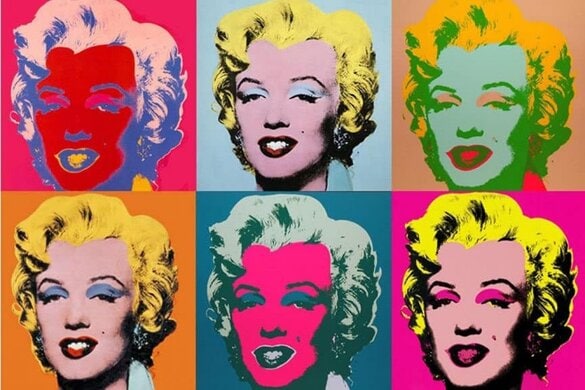
Andy Warhol Marylin
- The highest-paid Andy Warhol artwork sold Shot Sage Blue Marilyn, $195 million in 2022.
- This painting also holds the record for the most expensive 20th-century artwork ever sold.
The Photoshop Project
Step 1:
- Pick an image of a person (this can be online or a personal photo)
- or
- Item from POPULAR culture


Step 2:
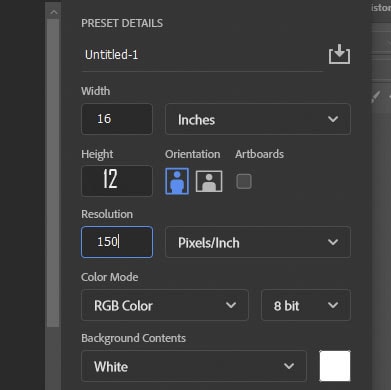
- Create a blank canvas
- File- New
- Width 16 Inches
- Height 12 Inches
- Resolution 150
- File- New
Step 3:
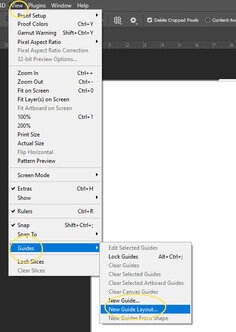
- Go to
- View
- Guides
- New Guide Layout
- Guides
- View
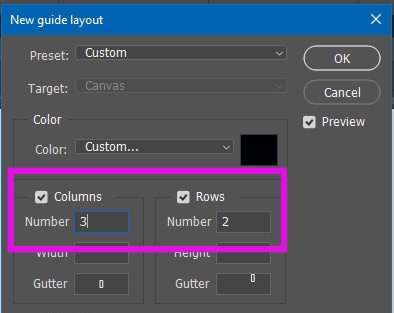
Step 4:
- Columns: 3
- Rows: 2
- Gutters: 0
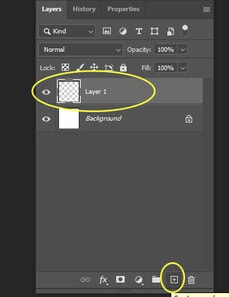
Step 5:
- Bottom of the Layers Pallet click the + sign
- This will add New Layer
- Double click where it says Layer 1
- Rename it Box
- Double click where it says Layer 1
- This will add New Layer
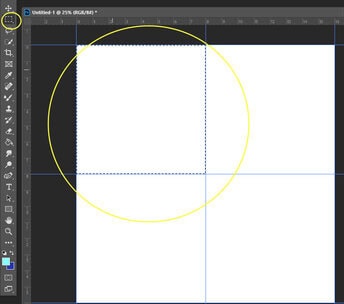
Step 6:
- Select the Rectangle Marquee Tool (not the shape tool!)
- Draw a box in the top square so it fits perfectly
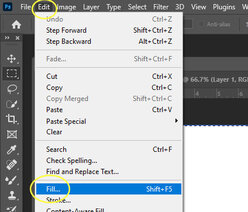
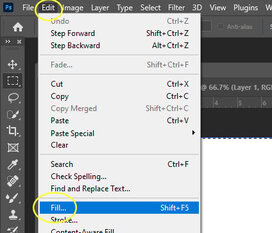
Step 7:
- Go to
- Edit
- Fill
- Edit
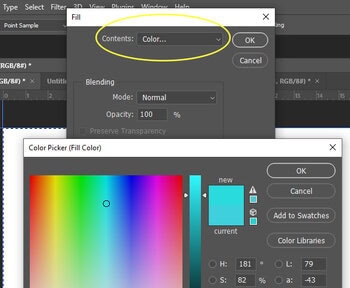
Step 8:
- Click on Contents
- Color
- Pick the color you would like for the box
- Click ok
- Box will now be filled with this color
- Click ok
- Pick the color you would like for the box
- Color
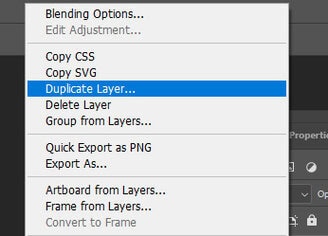
Step 9:
- Right Click on the Boxes Layer
- Duplicate Layer
- Name this Layer Box 2
- Duplicate Layer
Step 10:
- Click on the Move Tool
- Drag box 2 to the right

- Go to
- Edit
- Fill
- Edit
 Step 12:
- Click on Contents and pick Color
- Pick a different color for Box 2
- Click ok
- Your box will now be filled with this color
- Click ok
- Pick a different color for Box 2

Step 13:
- Repeat the above steps until you have 6 boxes in different colors

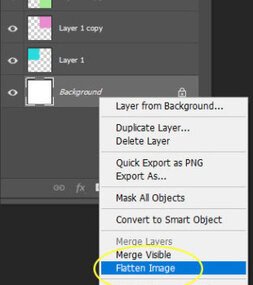
Step 14:
- When you have finished creating 6 boxes in different colors
- Flatten Image
Step 15:
- Open the Person or Object you picked from step 1
- Using the Quick Selections Tool
- Select the Person/object
- Be sure you have cut out any space in between the person/object
- You do not want to have any extra area left when you move this image
- Be sure you have cut out any space in between the person/object
- Select the Person/object
- Using the Quick Selections Tool
Step 16:
- Select the Move Tool
- Move the person/object onto the 4 square
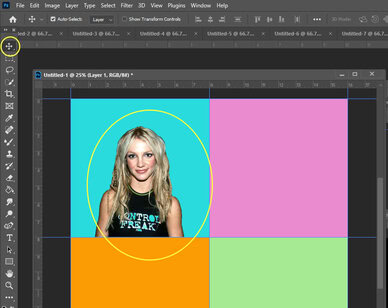
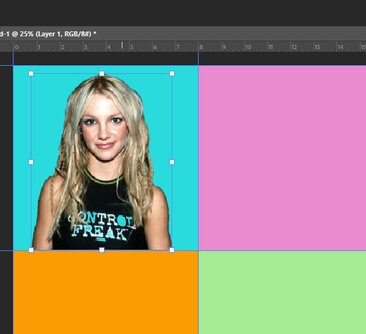
Step 17:
- Click Control – T
- Make the image fit into most of the square
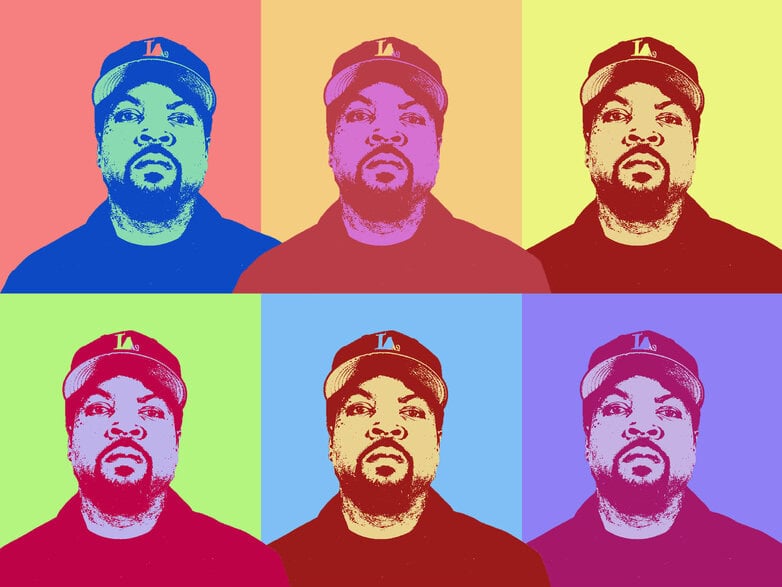
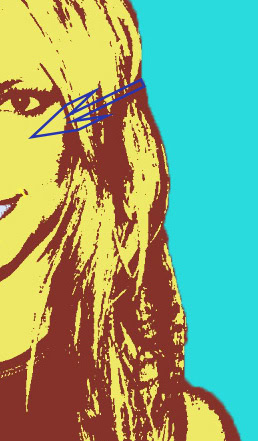
- Do not make it to big or to small (see my example below)
- Make the image fit into most of the square
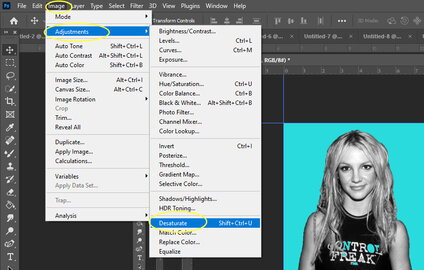
Step 18:
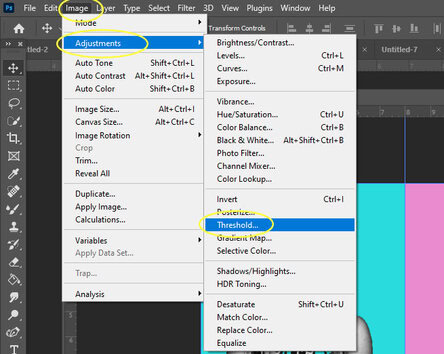
- Go to
- Image
- Adjustments
- Desaturation
- Your image will now be black/white
- Desaturation
- Adjustments
- Image
Step 19:
- Go to
- Image
- Adjustments
- Threshold
- Adjustments
- Image
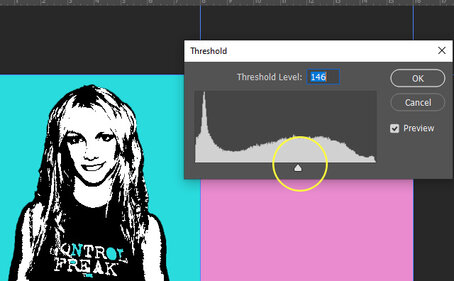
Step 20:
- Move the arrow to center of the graph
- Threshold Level number does not matter because it will be different for each photograph
- Use your judgement on how much black to white areas you have
- Do not have toooooooooo much white or toooooooooo much black
- Use your judgement on how much black to white areas you have
- Threshold Level number does not matter because it will be different for each photograph
Step 21:
- Right Click on Person/object layer
- Duplicate Layer
- With the Move Tool
- Drag the duplicated person/object to the next square
- With the Move Tool
- Duplicate Layer

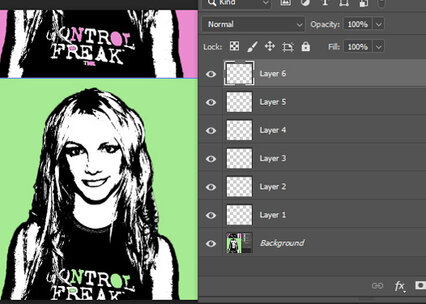
Step 22:
- Repeat Step 21 (duplicate the person/object and moving them into the 6 boxes)
- You will have 7 Layers when done
Step 23:
- Click on your Layer 1
- Go to
- Image
- Adjustments
- Gradient Map
- Adjustments
- Image

Step 23:
- The Gradient box will pop up. It does not matter what the colors are
- Click anywhere in the middle of the color graph
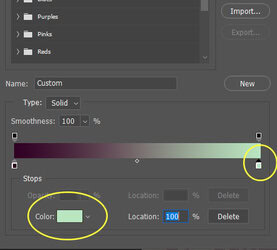
 Step 24:
- Click on the Bottom Left little box
- Click on the Color Box below the box
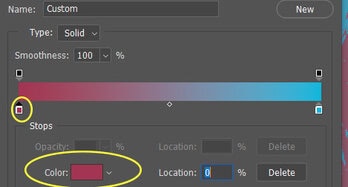 Step 25:
- Pick any Dark Color from the Color Picker area
- This will change the black area to the new dark color
- Click OK
- This will change the black area to the new dark color
 Step 26:
- The Gradient Map box will still be there
- Click anywhere on the Gradient Map box
 Step 27:
- Click on the Bottom Right little box
- Click on the Color Box
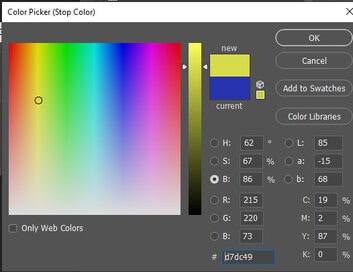
 Step 28:
- Pick any Light Color from the Color Picker
- This will change the White area to the new Light color
- Click OK
- This will change the White area to the new Light color
 Step 29:
- Repeate steps 23-28 for each person/object
- When you have finished changing all the colors of all 6 people/objects
- Flatten Image

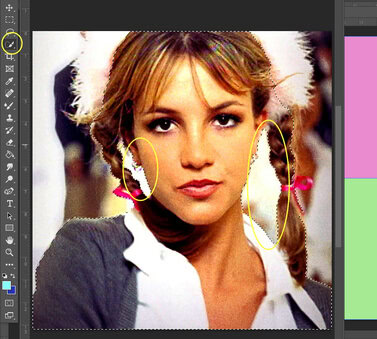
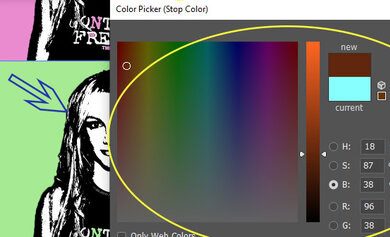
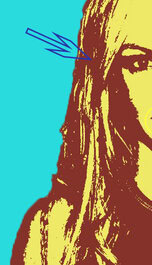
Step 30:
- We will now be changing the color of small areas on your image
- Pick a SMALL area in your photo
- This can be anything you want
- shirt, lips, eyes, hair, ect
- This can be anything you want
- Pick a SMALL area in your photo

Step 31:
- Select the Paint Bucket Tool
- Pick a color
- Click on the SMALL area that you wish to change
- You must be very careful where you paint so that it doesn’t change a Large are of color!!!!!!!!!!!!!!!!!!!!!!!!!!!!!!!!!
- Click on the SMALL area that you wish to change
- Pick a color

Step 32:
- Pick another SMALL area in your photo
- Select another color
- Use the paint bucket tool to change the color of this second area
- Select another color

Step 33:
- Repeate Steps 31 & 32 for all 6 squares
- Make sure you are using DIFFERENT colors each time
