

Photography Section
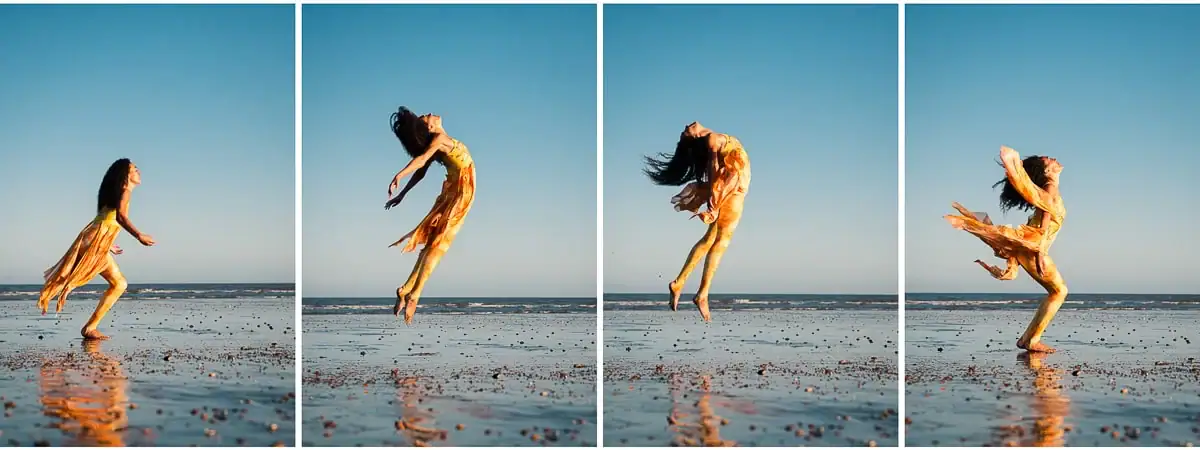
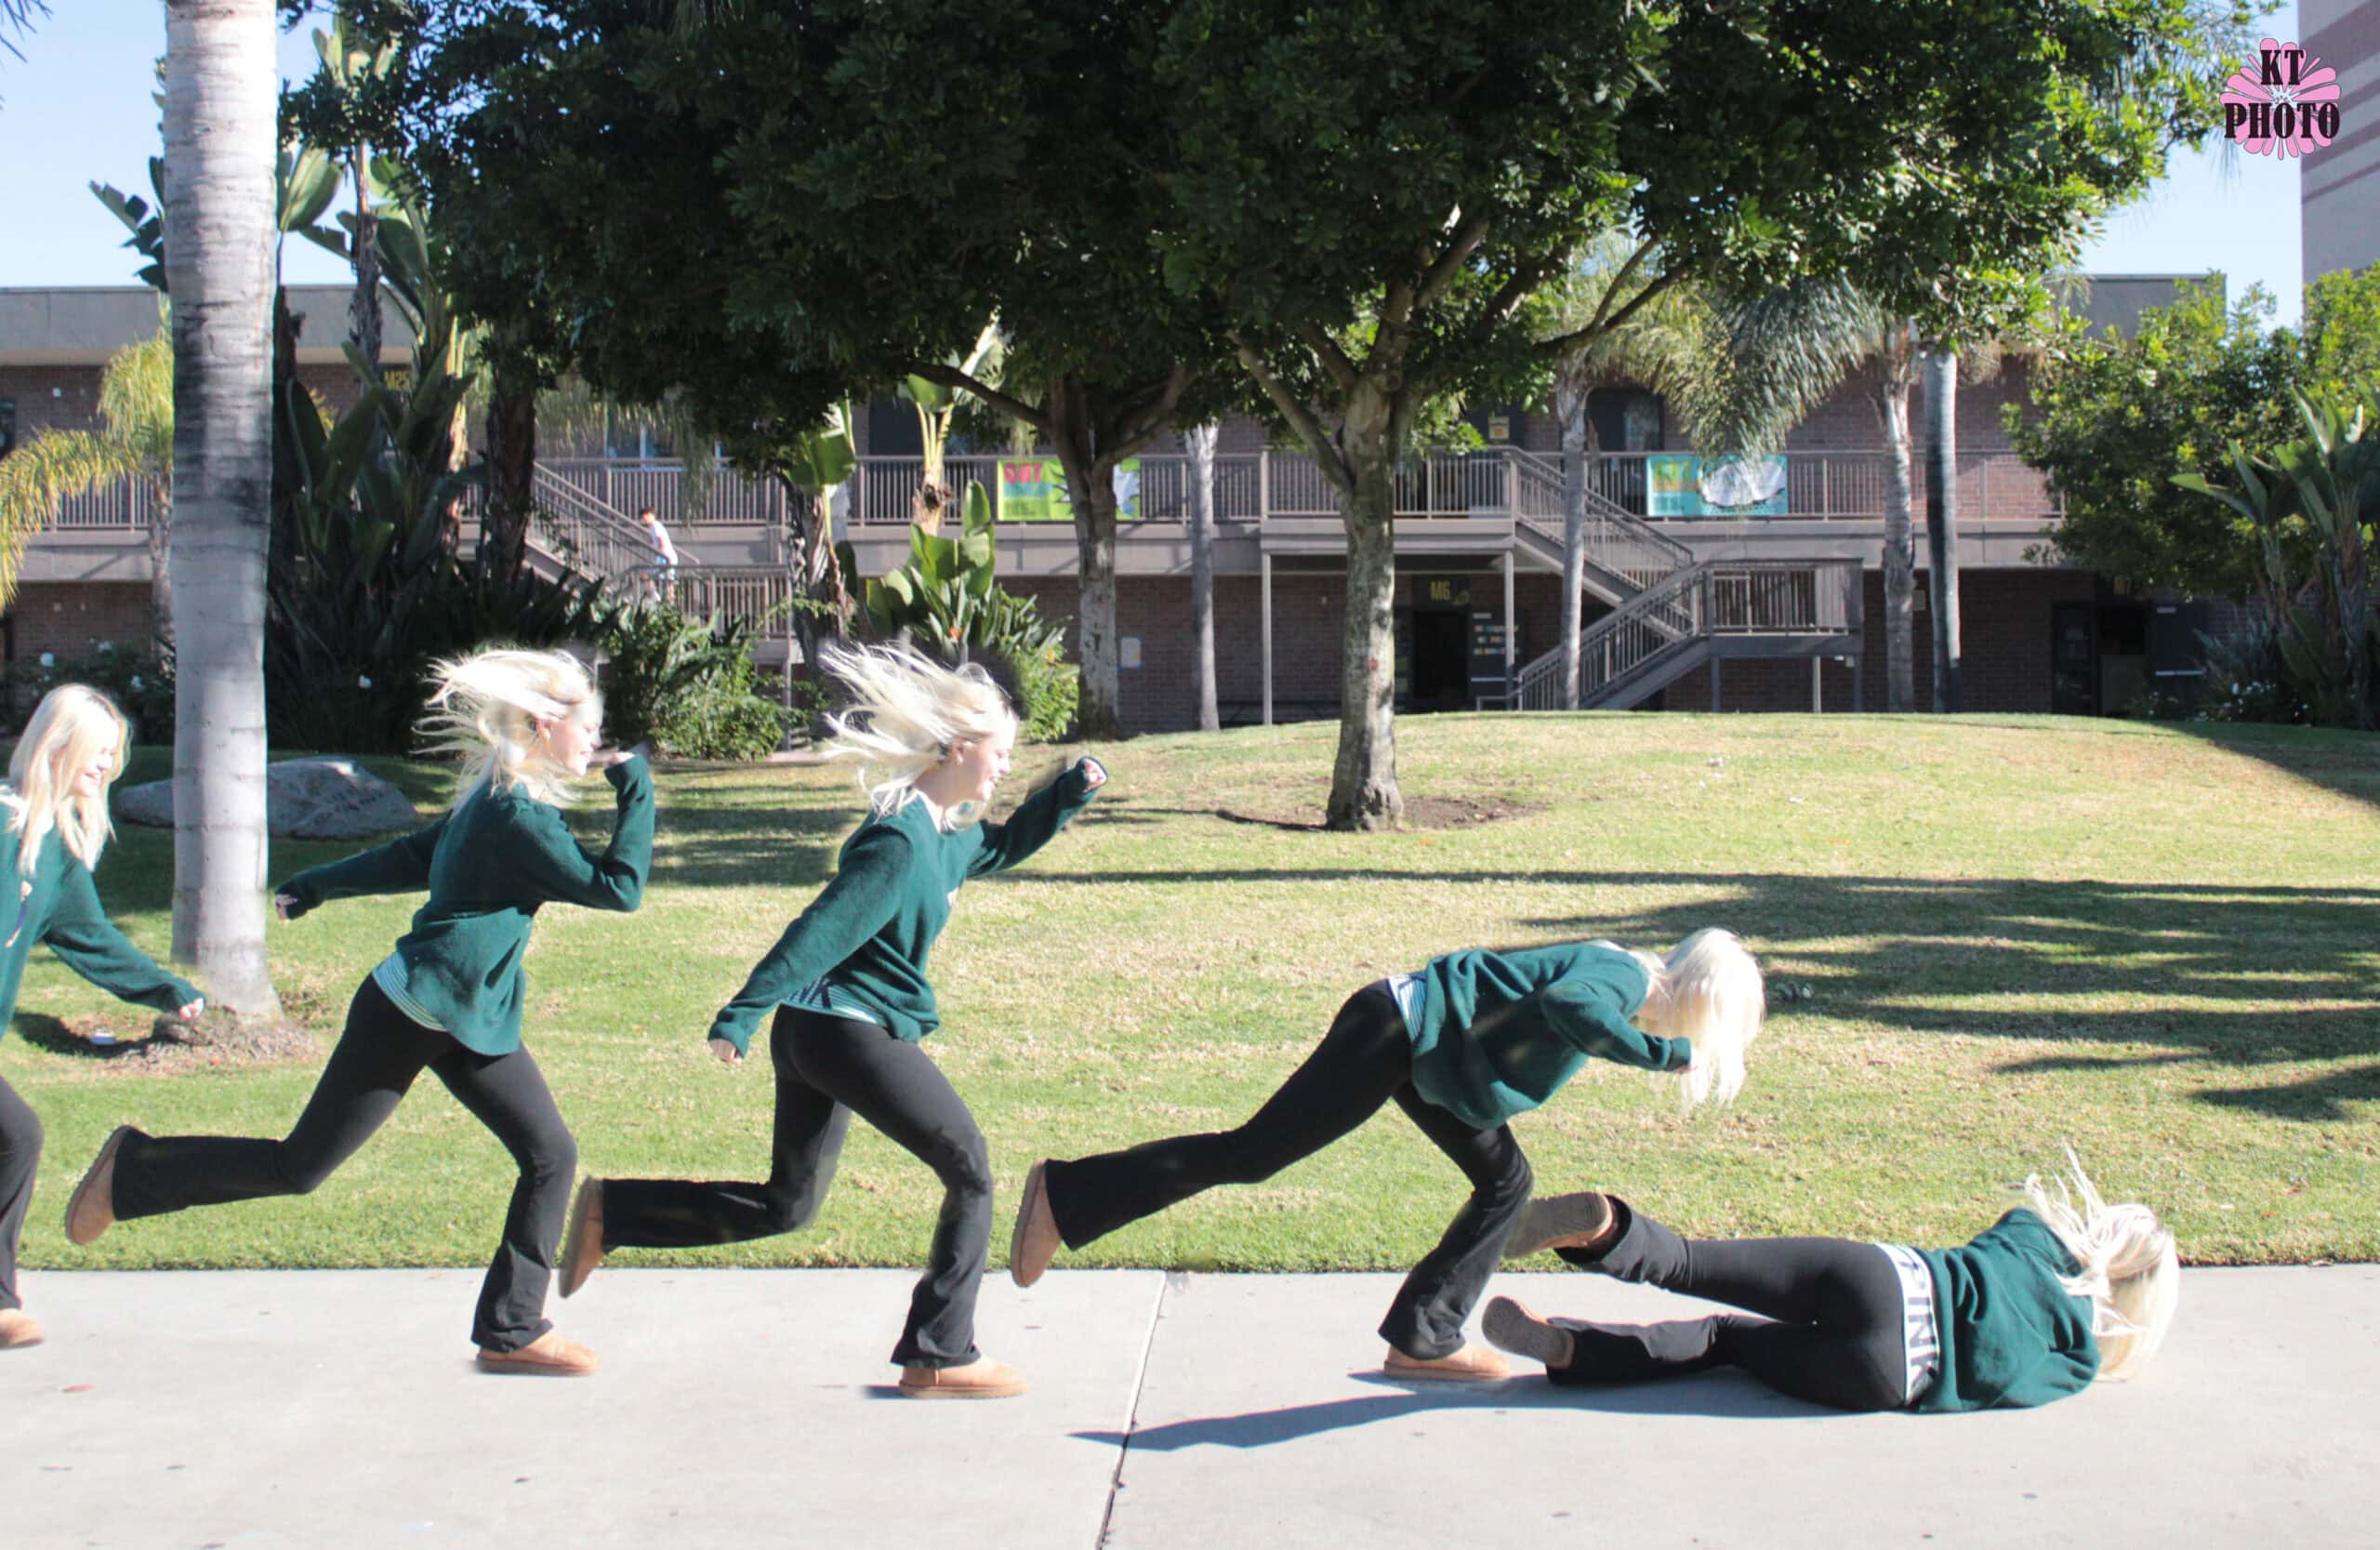
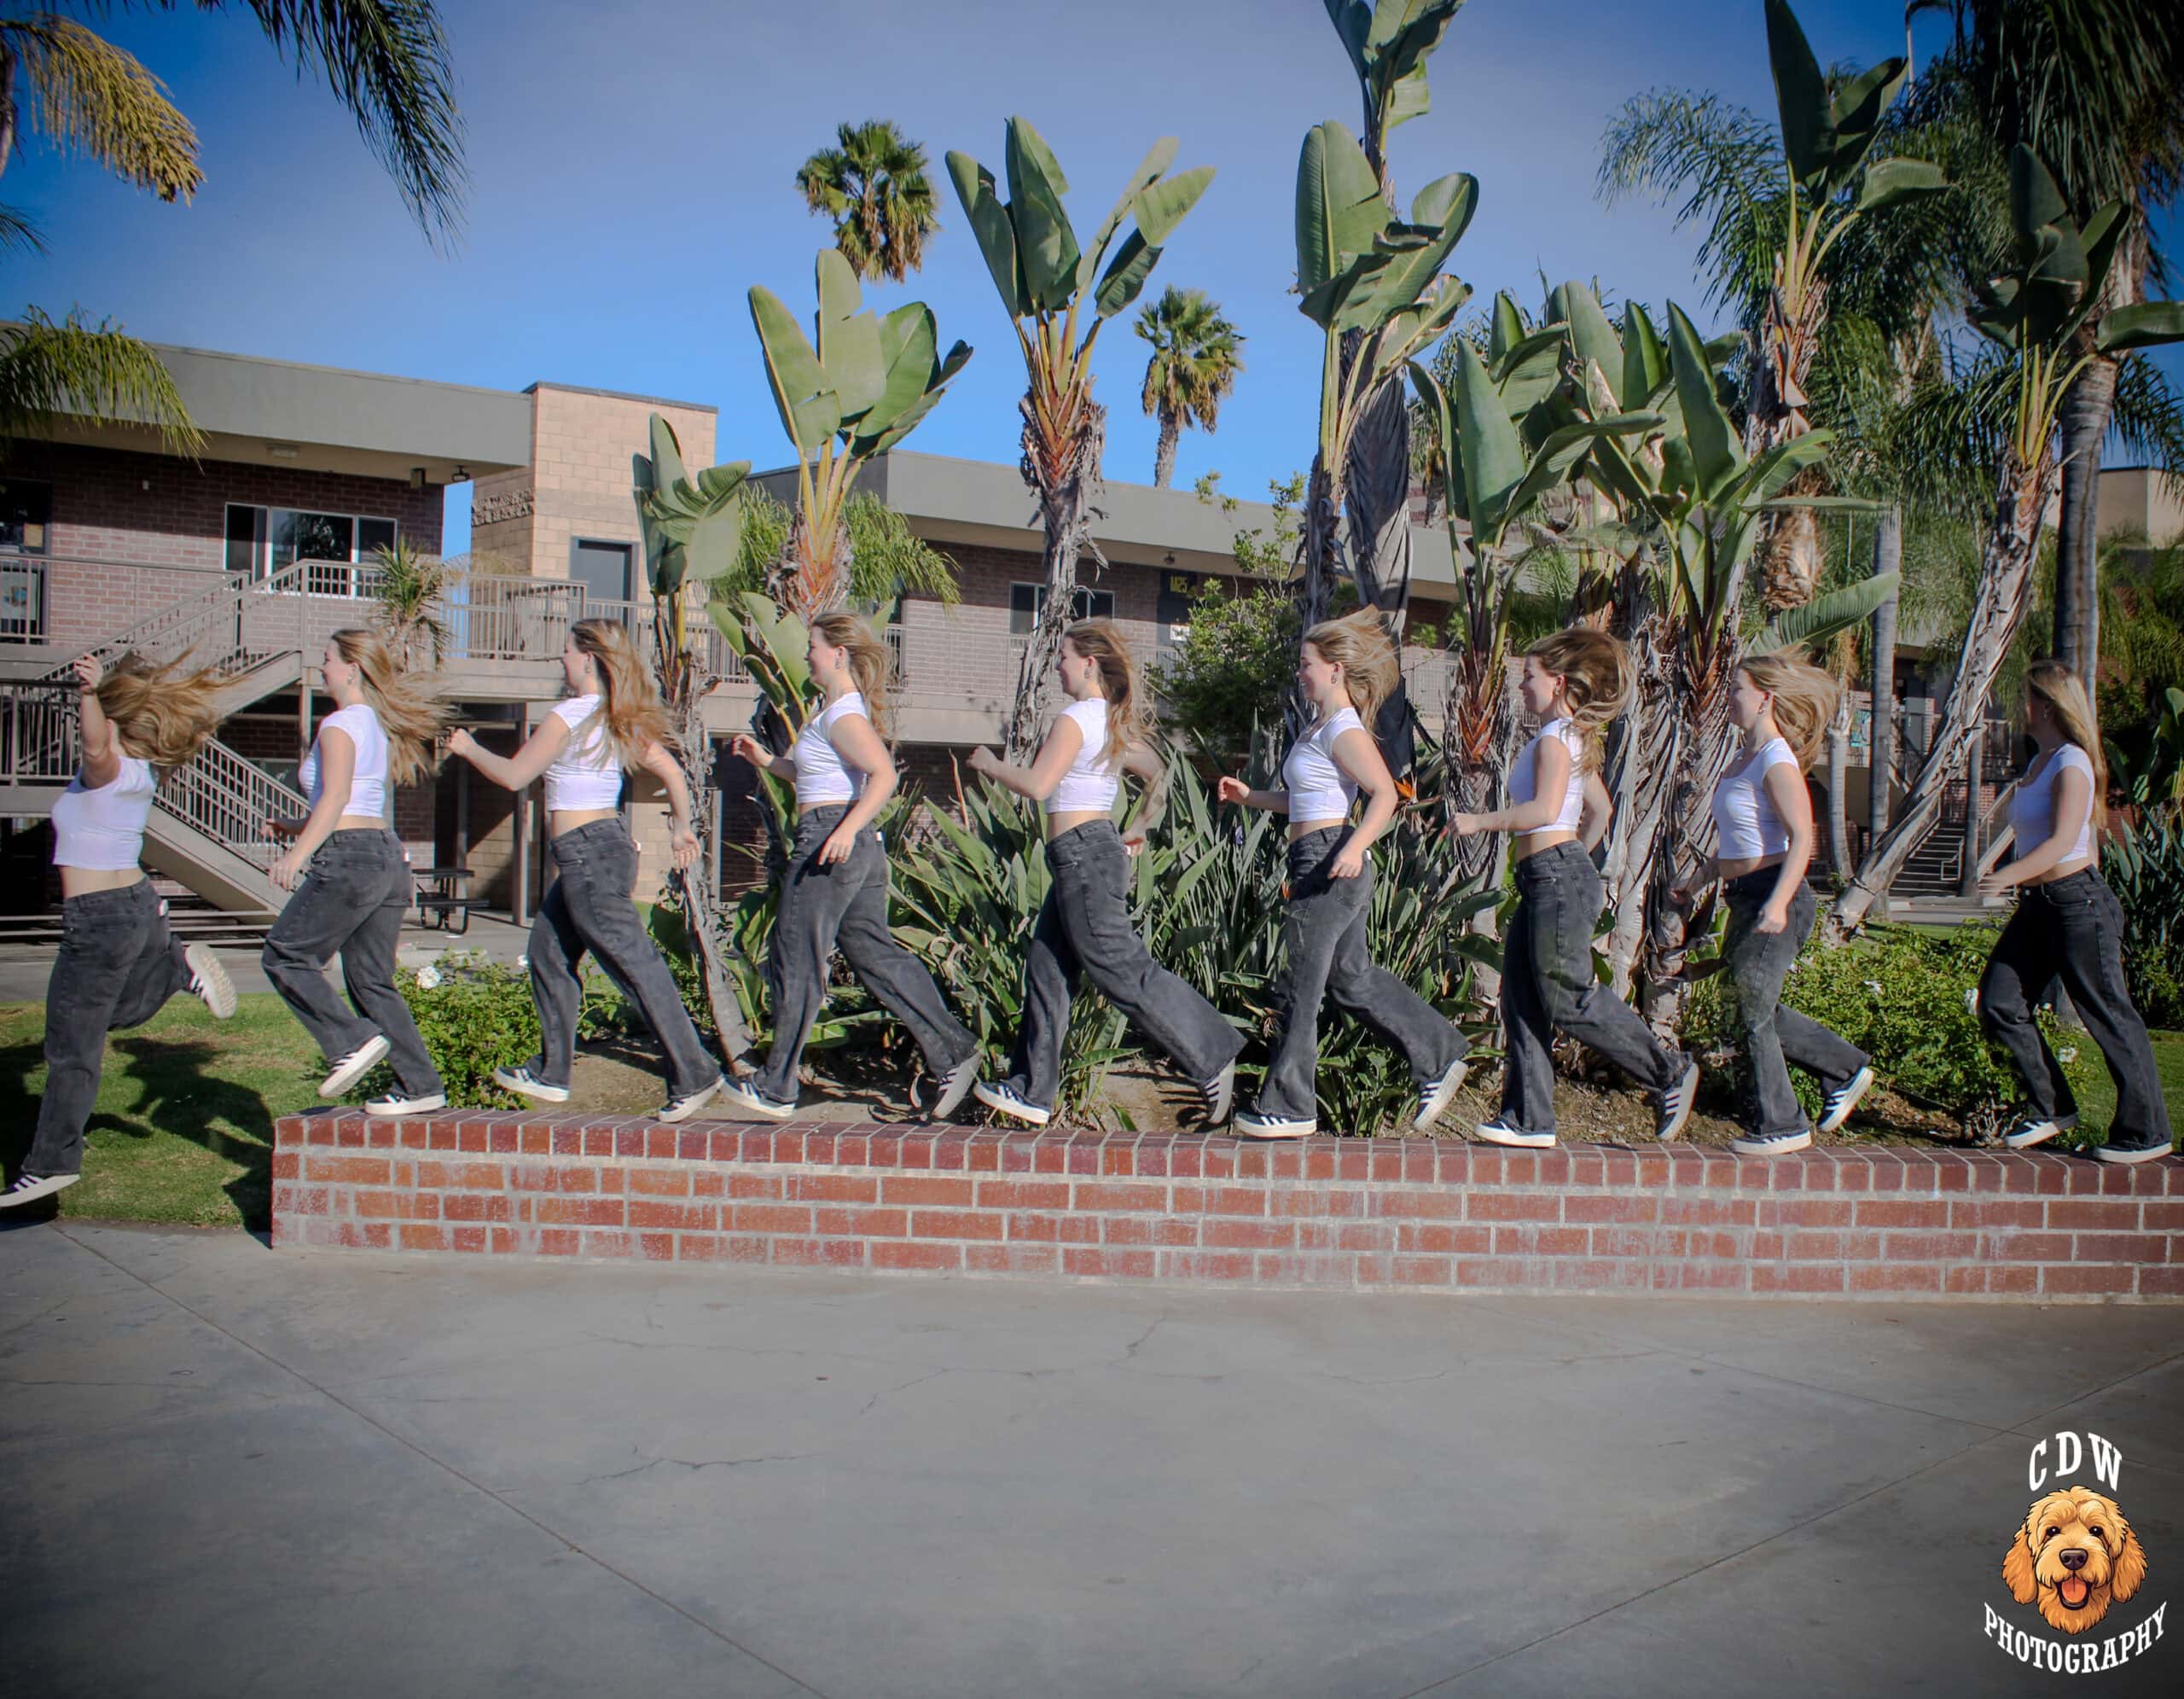
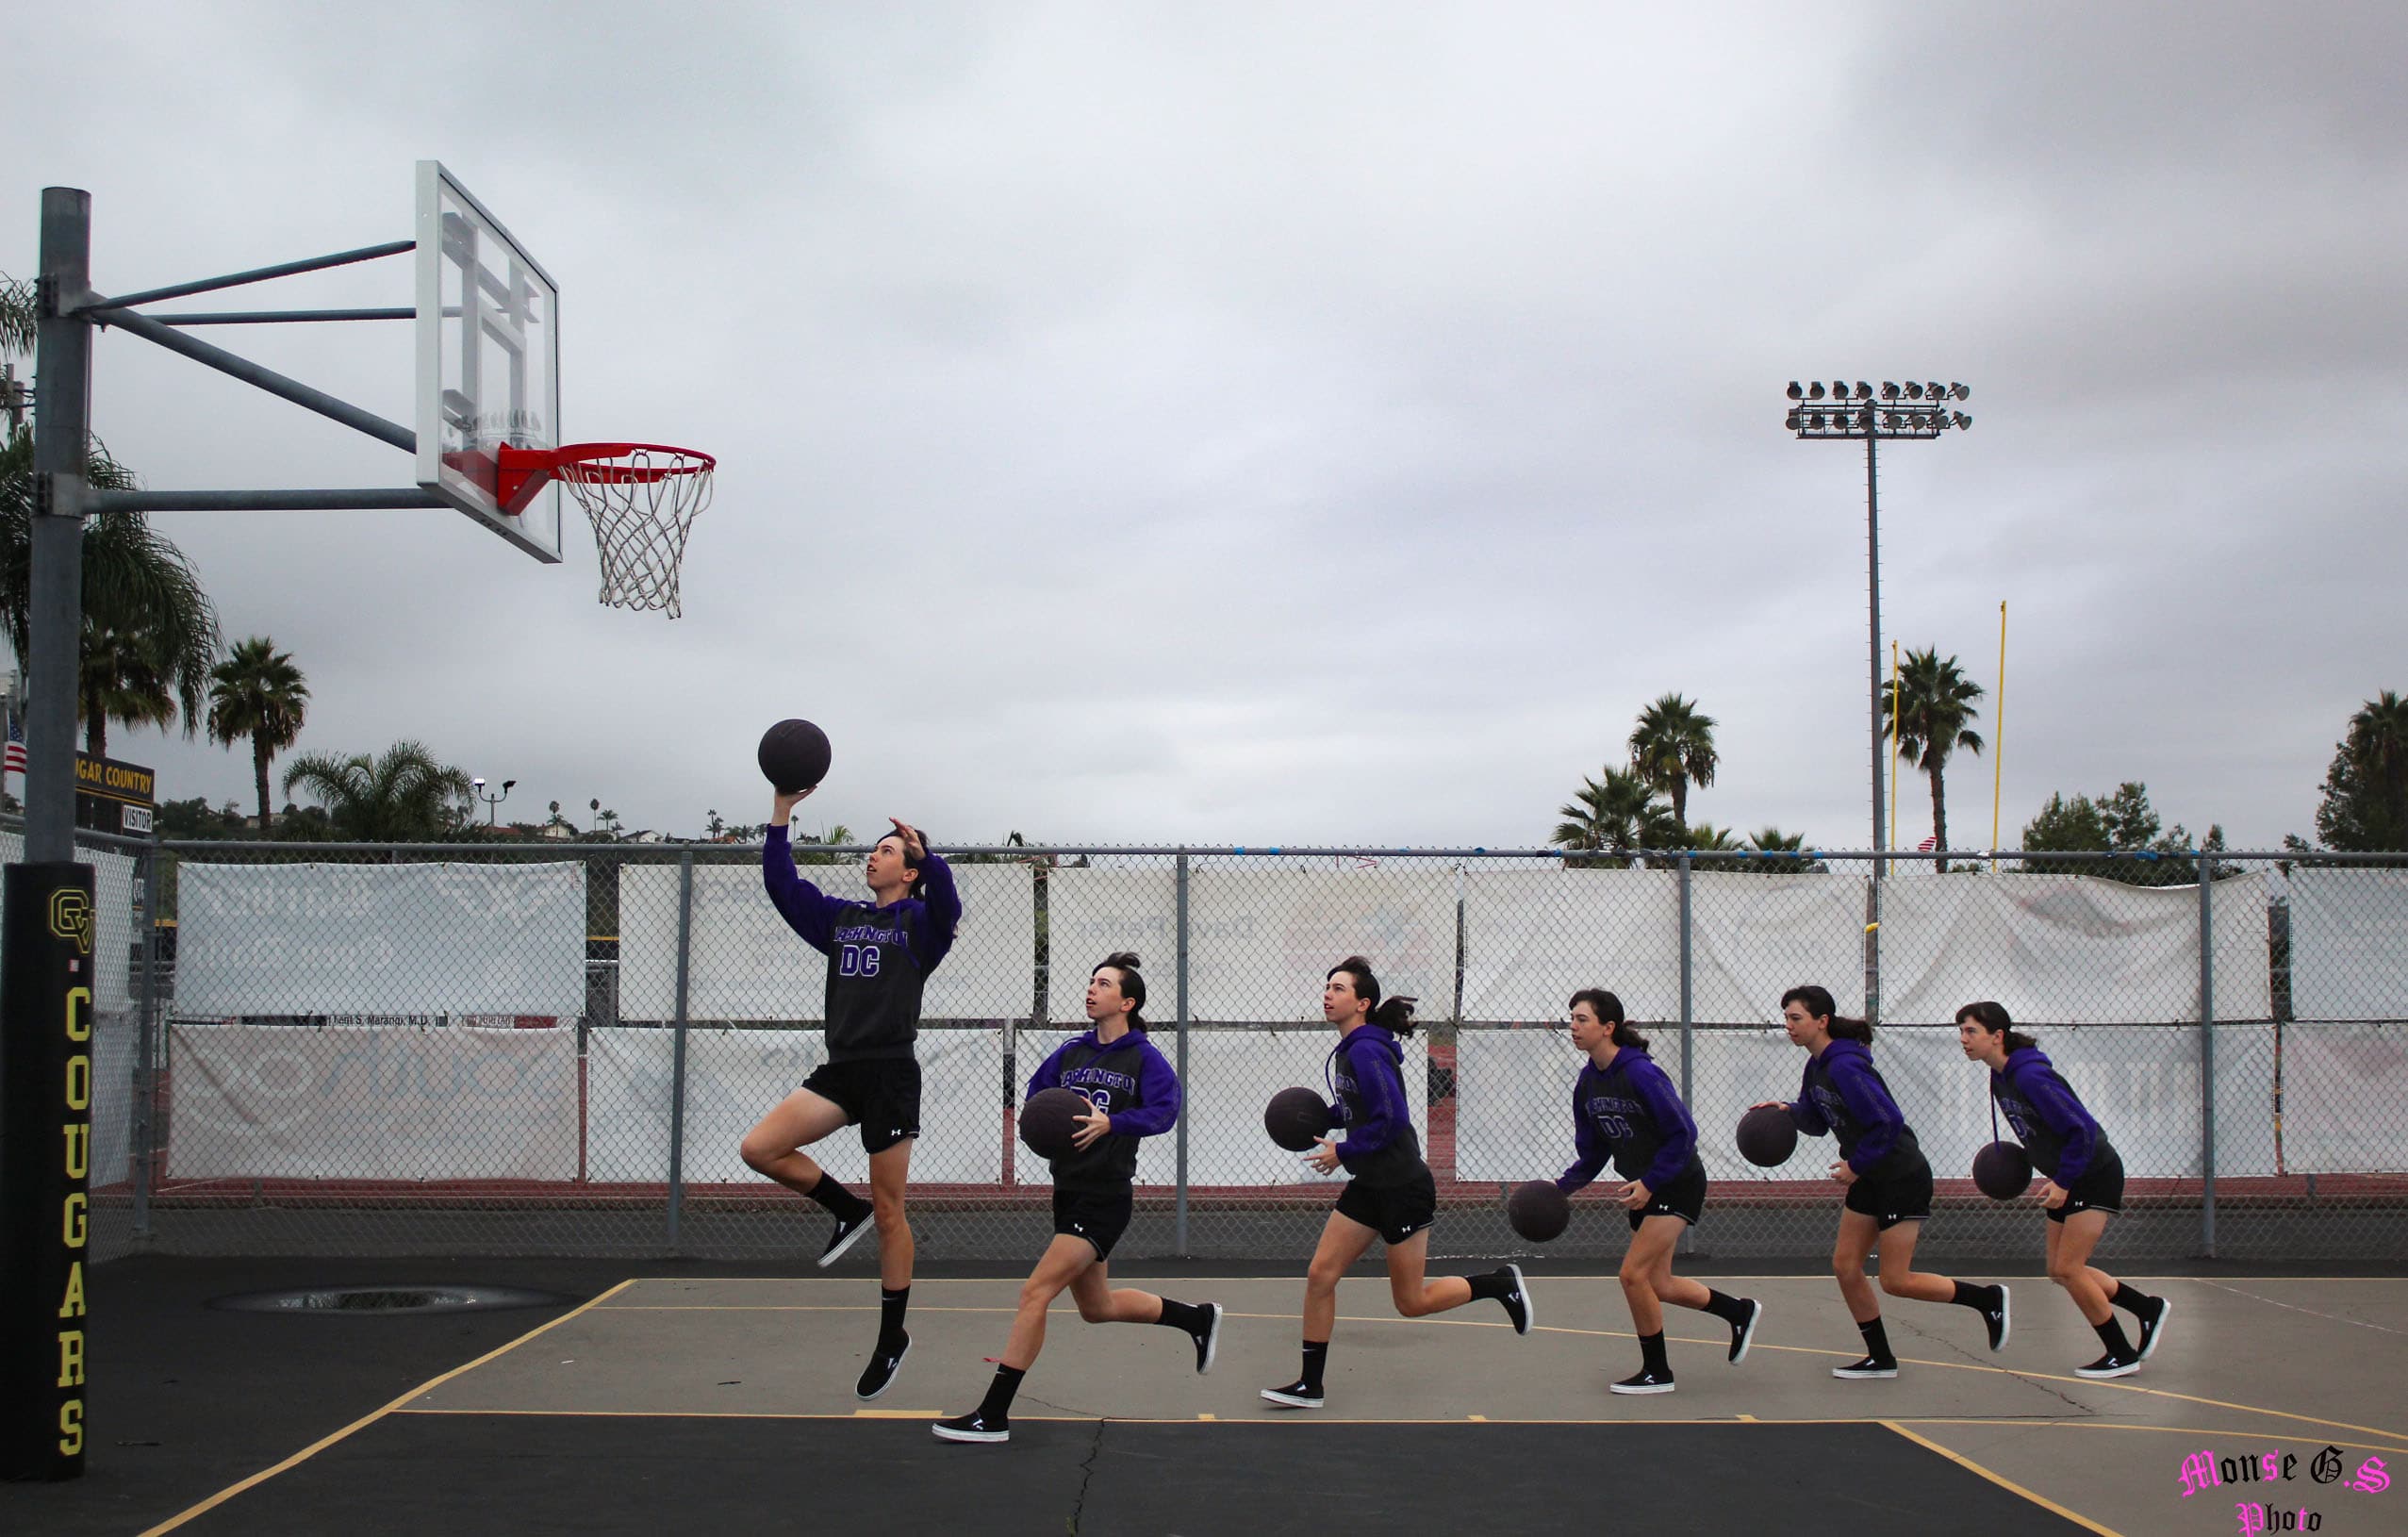
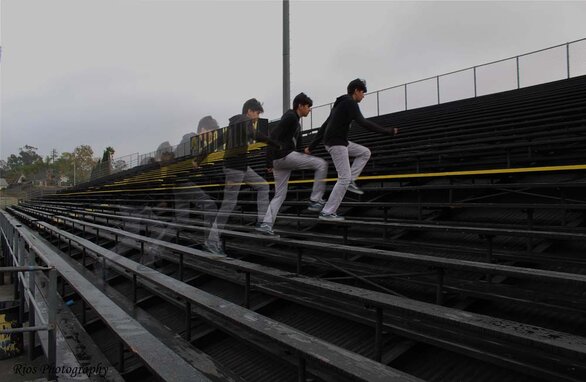
Sequence photography captures a subject’s motion across a series of rapid-fire shots, often merged into a single image or presented as a storyboard to show movement. It uses high-speed, continuous shooting to document dynamic action, such as sports, in a way that blends, or sequences the frames
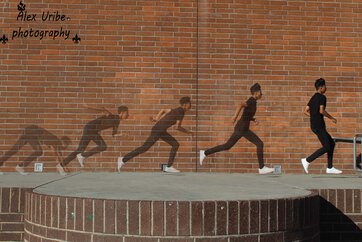
Person runing, jumping, etc. in a straight line Parrell to the camera
Step 1:
 Step 2:
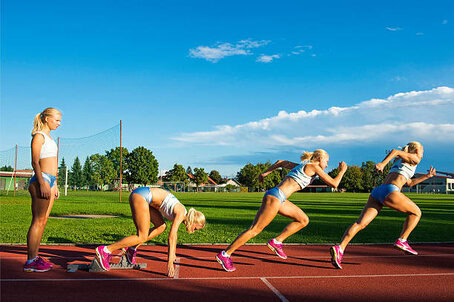

- Place camera on a tripod
- Set camera to TV
- Set to highest shutter speed and take a sample photo
- Change shutter speed slower if it’s to dark
- Set to highest shutter speed and take a sample photo
- Set camera to TV
 Step 2:
- Make sure your person as a lot of area to move in a parrell line to the camera
- Person should be moving from left to right or right to left from you
- NOTE
- Person should NOT be running toward or away from you!!!!!!
 Step 3:
- Take 8-10 seperate photographs of the person as they run/jump/etc
- It is always better to take extra photos
Best of Burst Mode


Photoshop Section
Step 1:
- Go to File
- Scripts
- Load Files into Stack
- Scripts
Step 2:
- Click Browse
- Select 5 photos you will use for the project
- Check box: Attempt to Automatically Align Source Images
- Click OK
- Check box: Attempt to Automatically Align Source Images
- Select 5 photos you will use for the project

Step 3
- Photoshop will stack all of your photos into one image
- It will have 5 Layers
- Each layer is one of the photos you took
- It will have 5 Layers
Step 4:
- Select the Crop tool
- crop out the extra area

Step 5:
- Click on the top layer image

Step 6
- Pick the Quick Selection Tool
- Select the entire person
- Do NOT miss any area
- Do NOT select area around person
- Do NOT miss any area
- Select the entire person

- If your person has a shadow you MUST select this also.
- When you don’t include the shadow will look fake
 Step 7
- Click on the Mask(box at bottom of layers pallet)

Step 8
- The 2nd person will now appear
- Note: If they do not appear click Click CTRL and i

- Click on the next layer image
- Pick the Quick Selection Tool
- Select the entire person
- Do NOT miss any area
- Do NOT select area around person
- Do NOT miss any area
- Select the entire person
- Pick the Quick Selection Tool

Step 10
- Click on the Mask (box at bottom of layers pallet)

Step 11
- The third person will appear
- Note: If they do not appear click Click CTRL and i

Step 12
- Click on the next layer image
- Pick the Quick Selection Tool
- Select the entire person
- Do NOT miss any area
- Do NOT select area around person
- Do NOT miss any area
- Select the entire person
- Pick the Quick Selection Tool

Step 13
- Click on the Mask (box at bottom of layers pallet)
- The fourth person will appear
- Note: If they do not appear click Click CTRL and
- The fourth person will appear

- Repeat the above steps until you have 5 people.
- If you would like to do more than 5 keep following the above steps.
- Flatten Image
- Edit in ACR (camera raw)

Extra for Transparent Option: Not required but an option
Step 15
- We are now going to make some of the people look transparent
- You can make all of them a different opacity levels or just a couple. It is up to you
Step 16
- Click on the layer that you want to make the most transparent
- Lower the opacity until it looks best to you

Step 17
- Click on the next layer that you want to make the less transparent
- Lower the opacity until it is more solid than the previous image
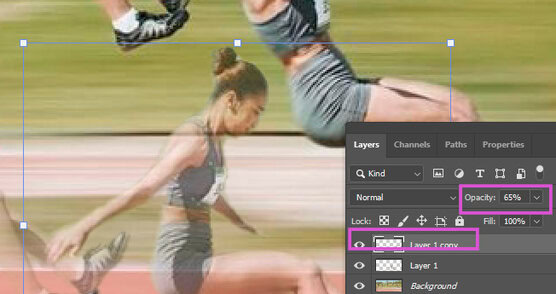
Step 18
- Continue lower the opacity on the 3rd and 4th person
- Leave the 5th person solid.
Step 19
- Flatten image when finished
- Edit in ACR (camera raw)
- Add Logo
What NOT to do
