

![]()
![]()

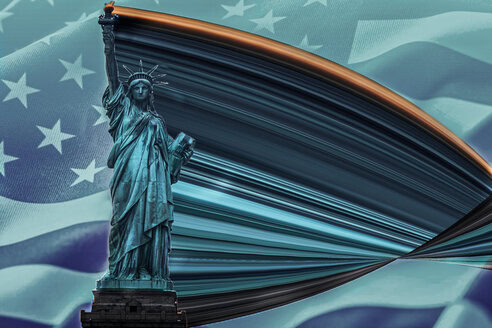
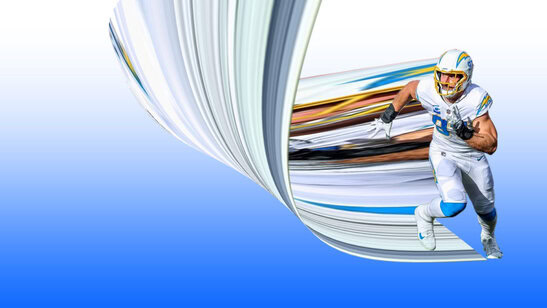
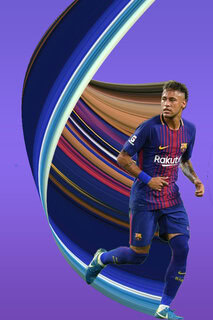


Picking your image
- This assignment works best if you use one of your images from class because it will be large in pixels
- If you pick an image from online you MUST be sure it has a pixel size of at least 1000 pixels.
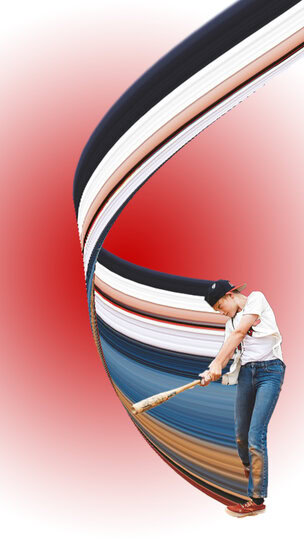
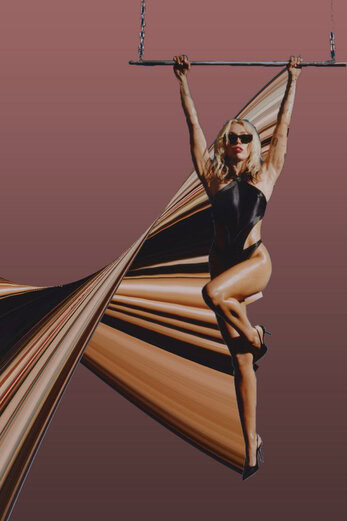
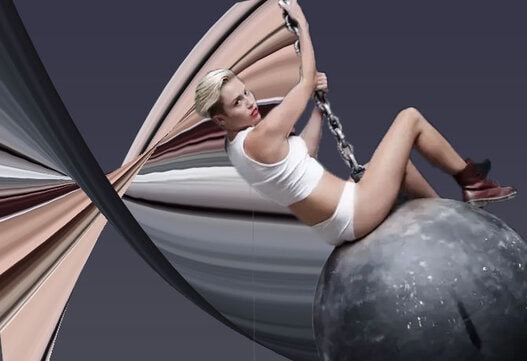
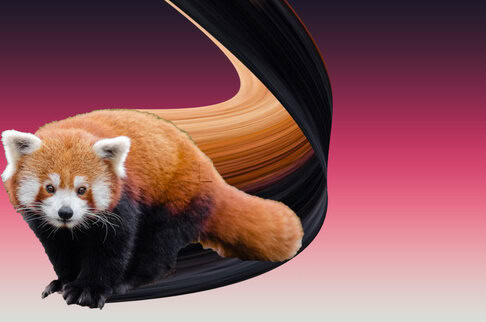
- You may pick a person or animal. No animation!
- Colorful photos work best with this project
- You may pick a person or animal. No animation!
High Pixel Number

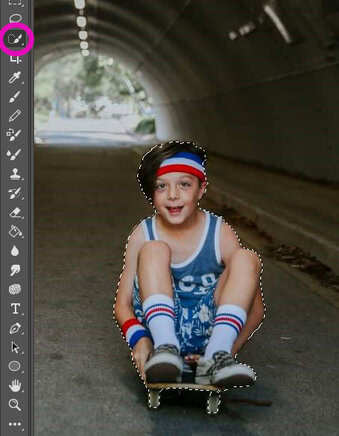
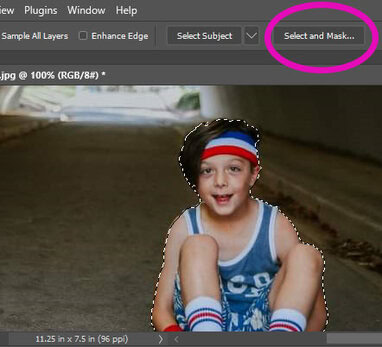
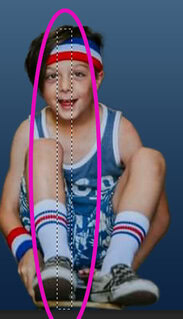
Step 1
- Pick the Quick Select Tool
- Select around the image
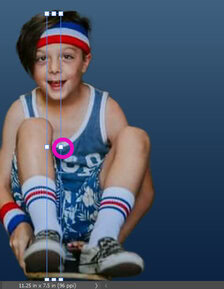
Step 2
- Click the Select and Mask
Step 3
- At the bottom right click Output Settings
- Go to Output To
- Choose New Layer
- Click OK
- Choose New Layer
- Go to Output To

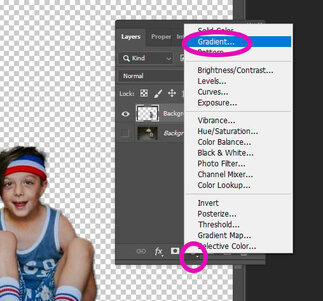
Step 4
- At the bottom of Layers Pallet
- Click on the black and white circle
- Pick Gradient
Step 5:
- Click on the Gradient bar

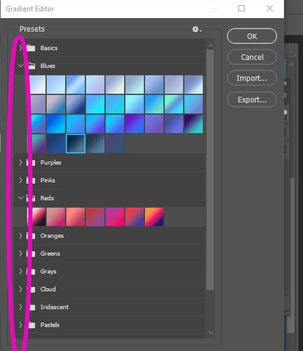
Step 6:
- A choice of colors will pop up
- You must click the arrow to open the color choices
- Pick any color you would like for your background
- You must click the arrow to open the color choices
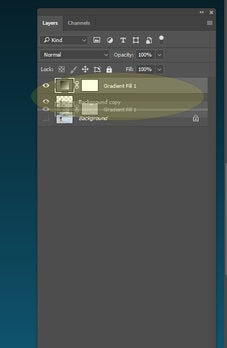
Step 7:
- On Layers
- Click the Gradient Fill Layer
- Drag the Gradient Fill Layer
- BELOW the Background copy layer
- Drag the Gradient Fill Layer
- Click the Gradient Fill Layer
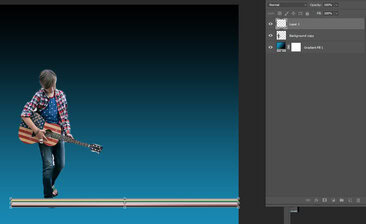
Step 8:
- Click Control-T
- Make your image bigger or smaller so it fills up about half of the canvas
- Move the person to the corner of the page
- It can be the top or bottom corners, it doesn’t matter
- Move the person to the corner of the page

Step 9:
- BACKGROUND Copy
- Select the Rectangular Marquee Tool


Step 10:
- Start at the bottom of the person/animal/etc
- Draw a Thin Rectangle shape over the entire photo
Step 11:
- Click Control-J (this will make copy the layer)
- Click Control- T (you can now streach the box)

Step 12:
- Decide which way you will want the lines coming out from your subject (Left or Right)
- Right Side Lines
- Hold the SHIFT KEY
- Click on the right middle box
- Drag the box to the Right edge of the canvas
- Click on the right middle box
- Hold the SHIFT KEY
- LEFT Side Lines
- Hold the SHIFT KEY
- Click on the Left middle box
- Drag the box to the Left edge of the canvas.
- Click on the Left middle box
- Hold the SHIFT KEY
Step 13:
- Click on the layer with all of the stretched colors
- Drag the layer BELOW the Background copy layer.
- This will put the stretch colors underneath your image.
- Drag the layer BELOW the Background copy layer.

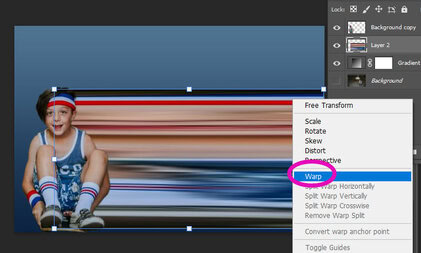
Step 14:
- Click Control T
- Right click and pick Warp
Step 15:
- Click on bottom point
- Drag the lines up and over to a swoop
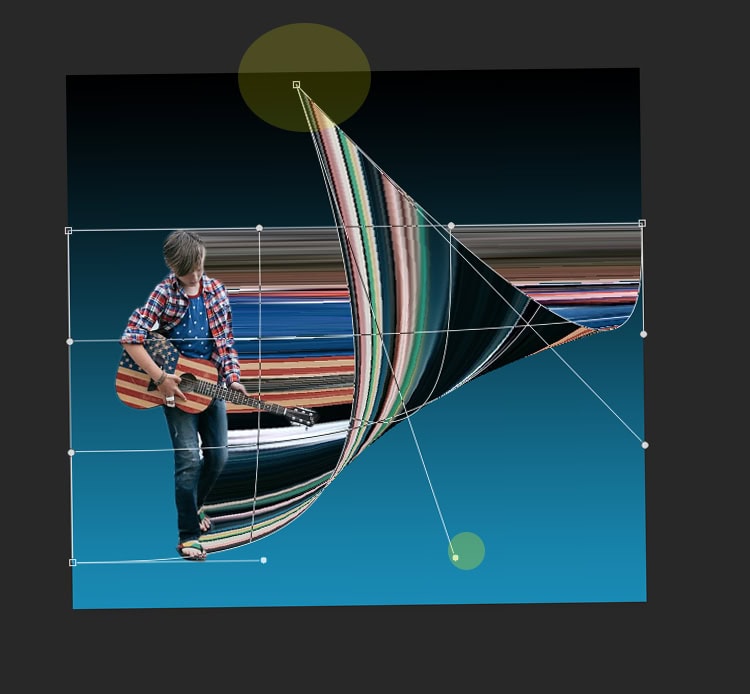
Step 16:
- Click on another point and drag it up.
- Continue dragging the points until you have created the swoop you would like for your image.

Step 17:
- Make sure that the swoop starts at the very top and ends at the very bottom.


