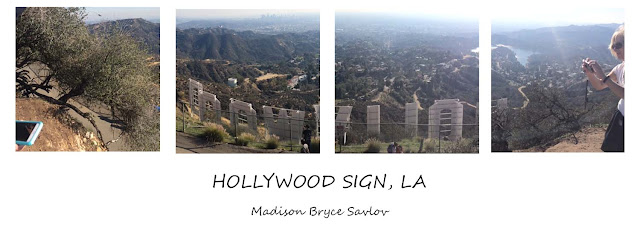
Square Poster Directions
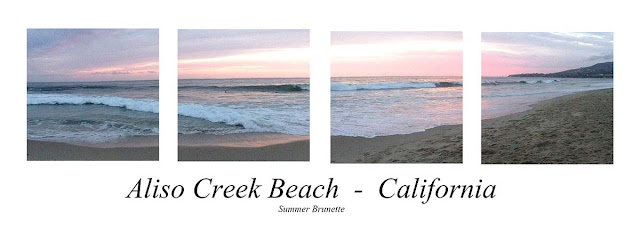
- Go to File-New
- Width: 22
- Height: 8
- Resolution: 150
- Background Contents: White

Step 2:
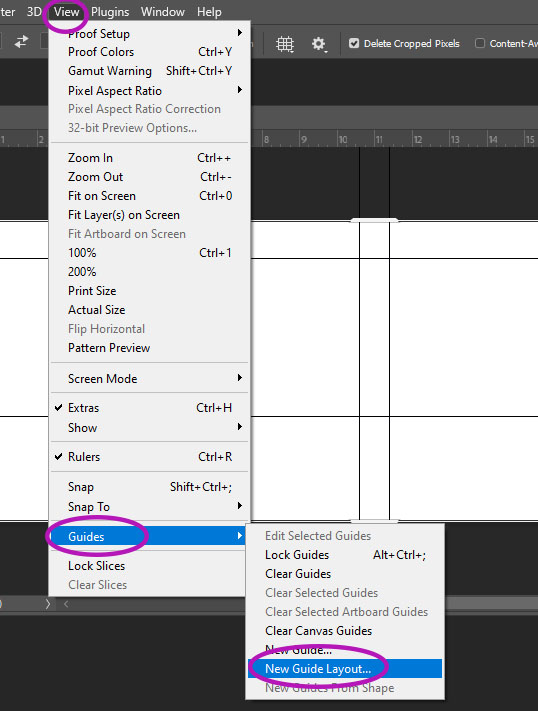
- Go to View
- Guides
- New Guide Layout
- Guides
Step 3:
- Color: Black
- Comumns
- Number 4
- Gutter 0.4
- Margin
- Top: 0.8
- Left: 0.8
- Bottom: 2.8
- Right: 0.8

Step 4:
- Choose the Rectangle Tool
- Fill: Black
- Stroke: white box with red line through it

Step 5:
- Draw a box so that it fits within the graph lines

Step 6:
- Click CONTROL and J at the same time
- This will duplicate your rectangle layer.
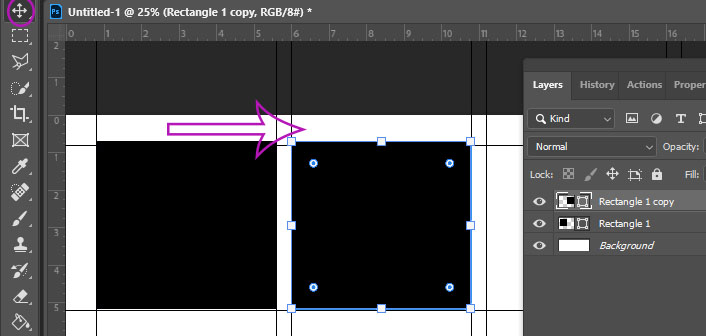
- Click on the move tool
- Move the square to the right into the next graph space
- Click Enter
- Move the square to the right into the next graph space
Step 7:
- Click CONTROL and J again to duplicate the square
- Click on the move tool
- Move the square to the right into the next graph space
- Click Enter
- Move the square to the right into the next graph space
- Click on the move tool
- Repeat the above steps until you have 4 boxes
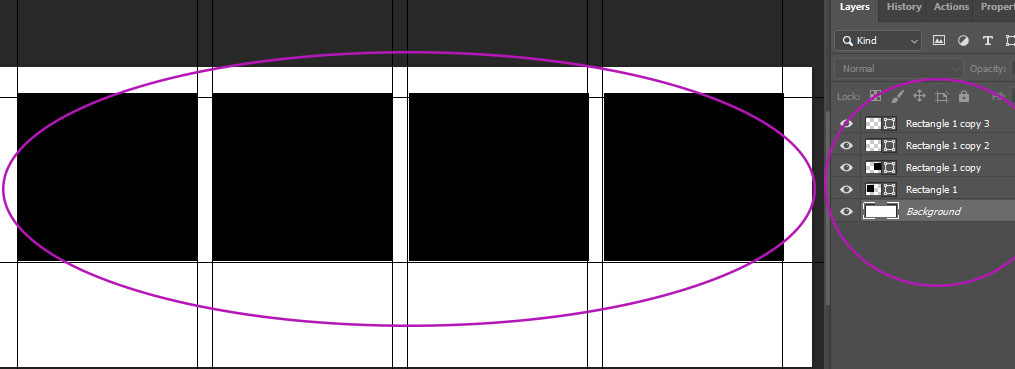
Step 8:
IMPORTANT STEP!!!!!!!!!!!
- Go to Layers Pallet
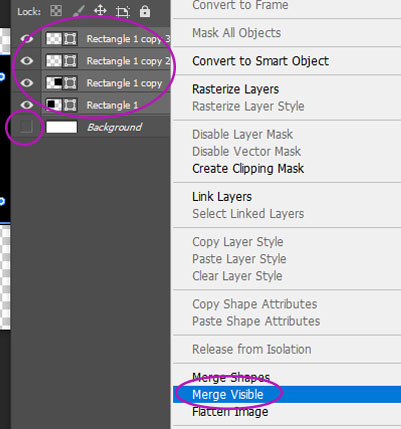
- Un-click the Eye on the Background Layer.
- Click on the Rectangle 1 Layer
- Hold Shift Key
- Click on Rectangle 1 copy 3 Layer
- This should highlight all 4 layers
- Click on Rectangle 1 copy 3 Layer
- Hold Shift Key
- Right click anywhere on the highlighted layers
- Merge Visible
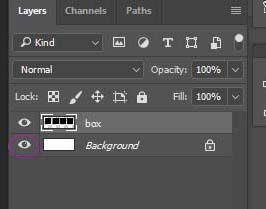
Step 10:
- Click the Eye on the Background Layer ( You will now have two layers)
Step 11:
- Go to File- Place Embedded
- Choose the Panoramic photo
- It will show up in the middle of the canvas
- Move Panoramic photo on-top of the 4 boxes
- Make it bigger until it fits over all 4 boxes completly
- Click Enter
- Make it bigger until it fits over all 4 boxes completly
- Move Panoramic photo on-top of the 4 boxes
- It will show up in the middle of the canvas
- Choose the Panoramic photo

Step 12:
- Make sure you are on the panoramic photo layer (top layer)
- Right Click
- Pick Create Clipping Mask
- Right Click
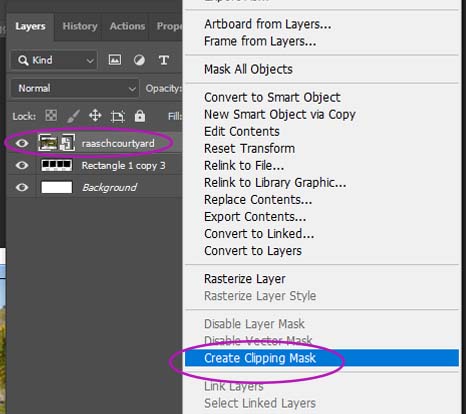
Step 13:
- The photo will now be behind all 4 boxes
- If you would like to re-position your panoramic photo
- Click on the move tool and move it around
- If you would like to re-position your panoramic photo

Step 14:
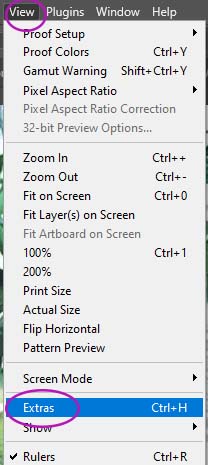
- We will now take off the graph lines
- View
- Click Extras so there is no check mark by it
- View
Step 15:
- Select the Text Tool
- Draw a box below the panoramic squares
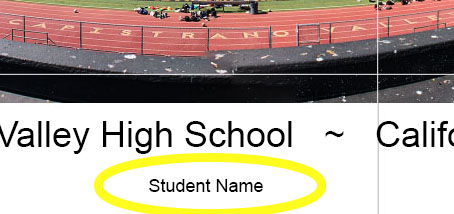
- It should be similar in size to the box in the image below
- Draw a box below the panoramic squares

Step 16:
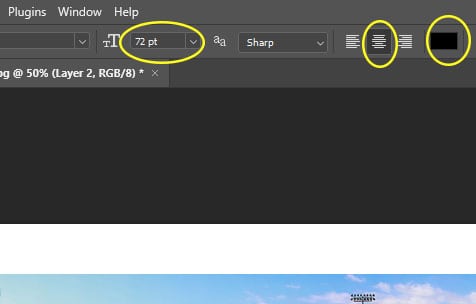
- Before typing your text
- 72 pt
- Middle lines are selected
- Black Selected
Step 17:
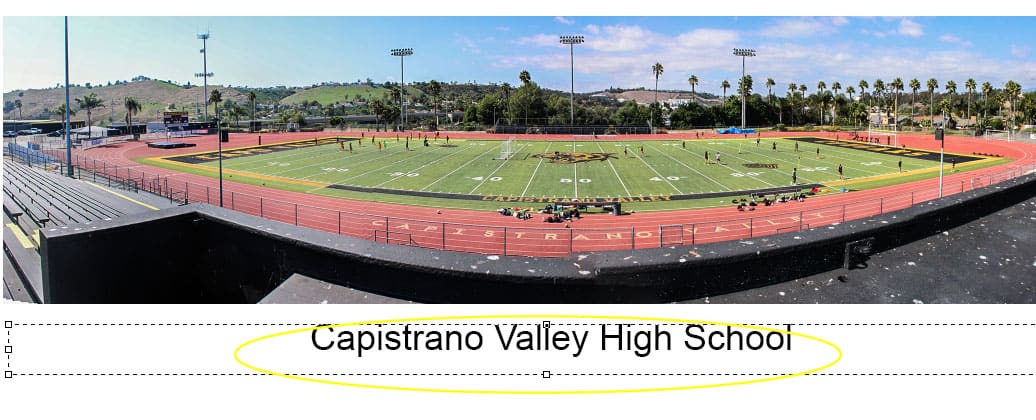
- Type in the Location of the panoramic photo
- You may change the font style
Step 18:
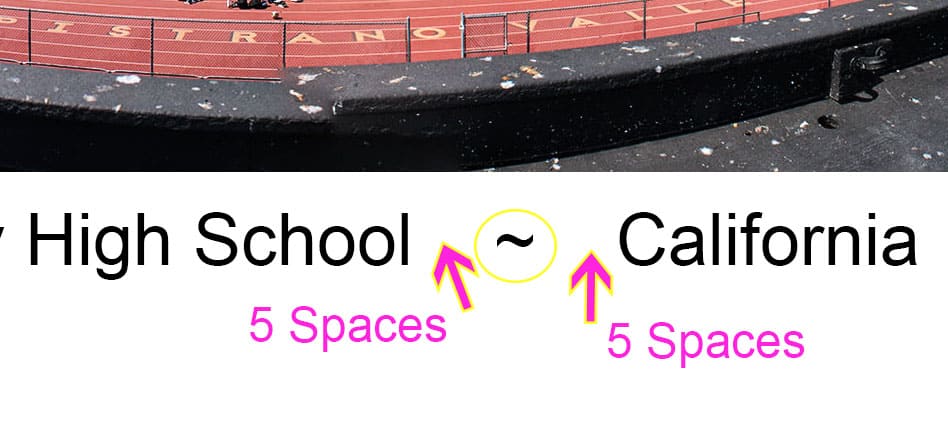
- After you type the location
- Put 5 spaces
- Put the ~ symbol (located above the Tab key)
- Put 5 more spaces
- Type California, or the County or the City (ex Orange County or Mission Viejo CA
- Put 5 spaces
Step 19:
- Create a new Text Box under the middle of your photo
- Make the font a LOT smaller
- Type in your name
Step 20:
- Flatten your layers
- Save as jpeg
