Panoramic Plain Poster


Plain Poster Directions
Step 1
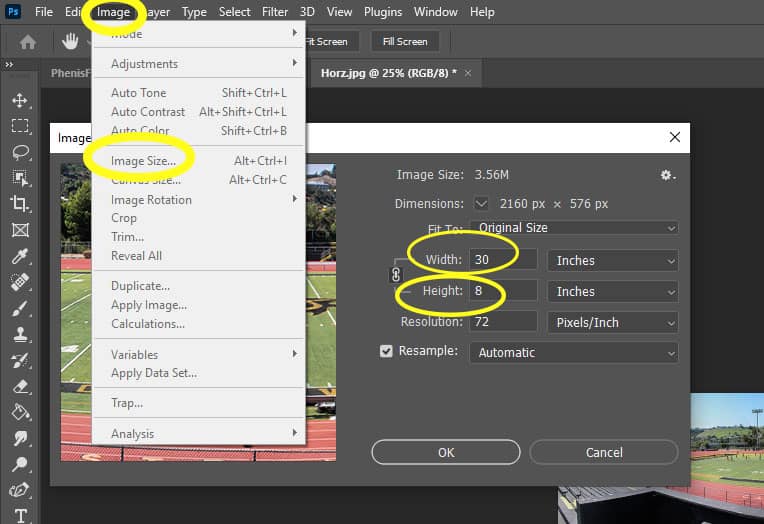
- Open your Edited Panoramic photo in Photoshop
- Go to
- Image- Image Size
- Make sure the Width is 30 and Height 8 Inches (not pixels)
- Change it if it is not
- Image- Image Size
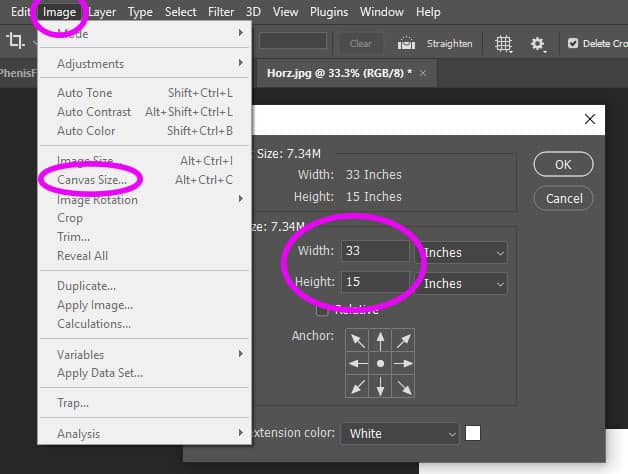
Step 2
- Go to
- Image – Canvas Size
- Make the Width is 33 and Height 15 Inches (not pixels)
- Click ok
- This will put white around your image
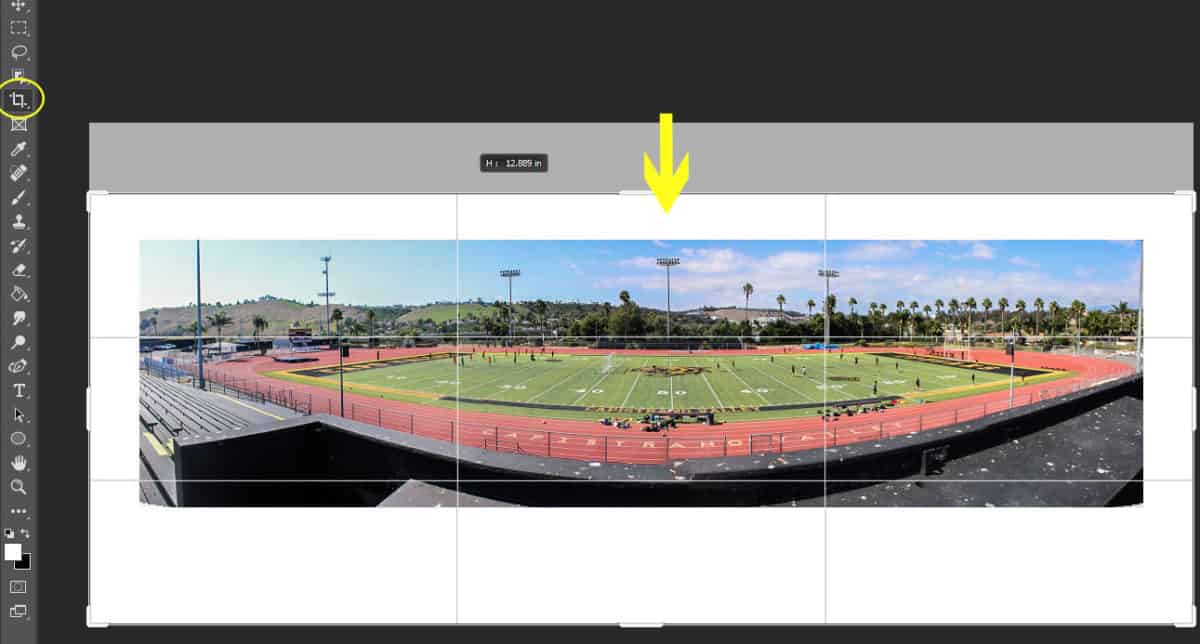
Step 3
- Select the Crop Tool
- Crop off the TOP white area so that it is about the same size as the sides.
- We will be leaving the bottom white area alone
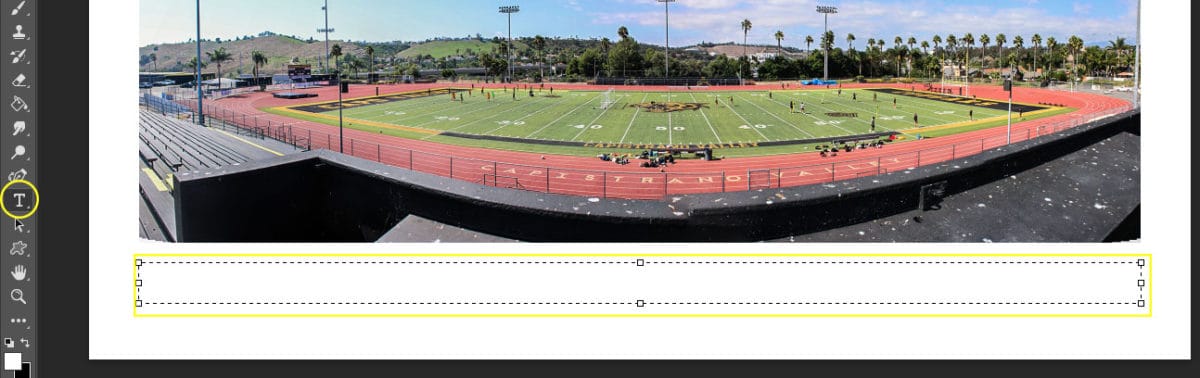
Step 4
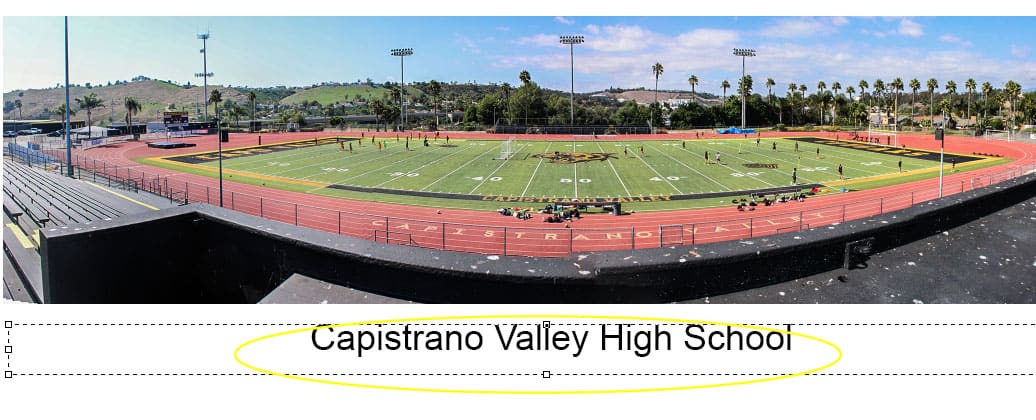
- Select the Text Tool
- Draw a box similar in size to the box in the image below
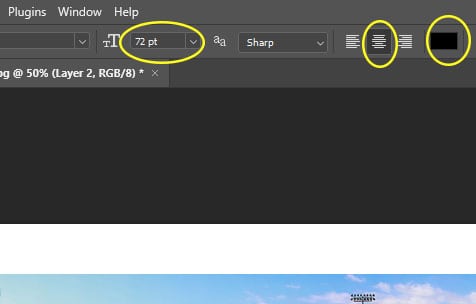
Step 5
- Before typing your text
- 72 pt
- Middle lines are selected
- Black Selected
Step 6
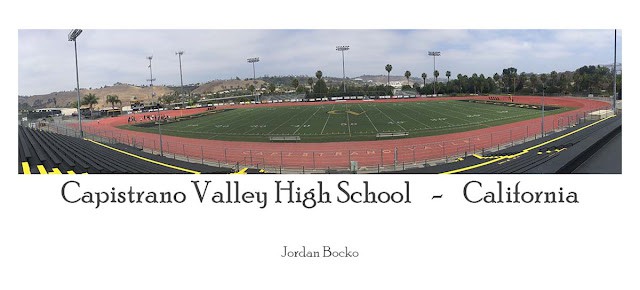
- Type in the Location
- You may change the font style
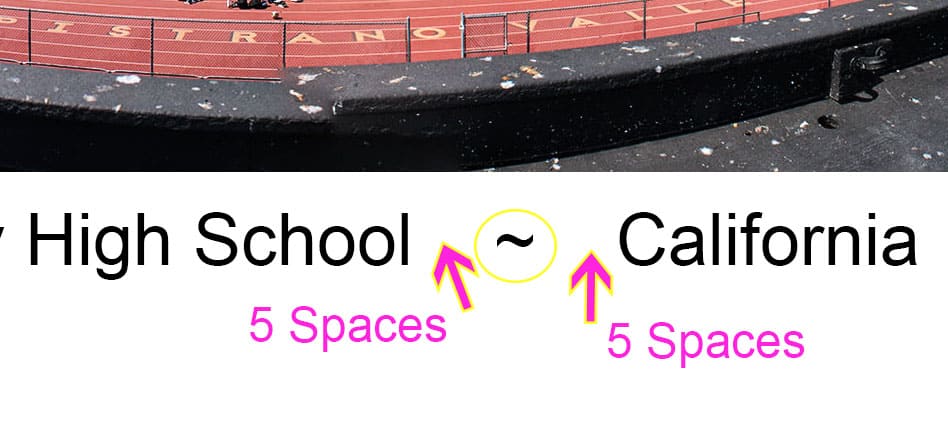
Step 7
- After you type the location
- Put 5 spaces
- Put the ~ symbol (located above the Tab key)
- Put 5 more spaces
- Type California, or the County or the City (ex Orange County or Mission Viejo CA
- Put 5 spaces
Step 8
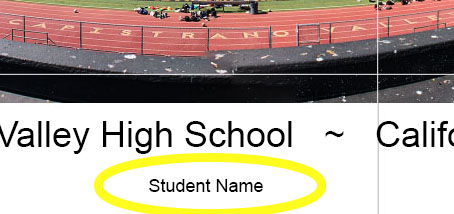
- Create a new Text Box under the middle of your photo
- Make the font a LOT smaller
- Type in your name