

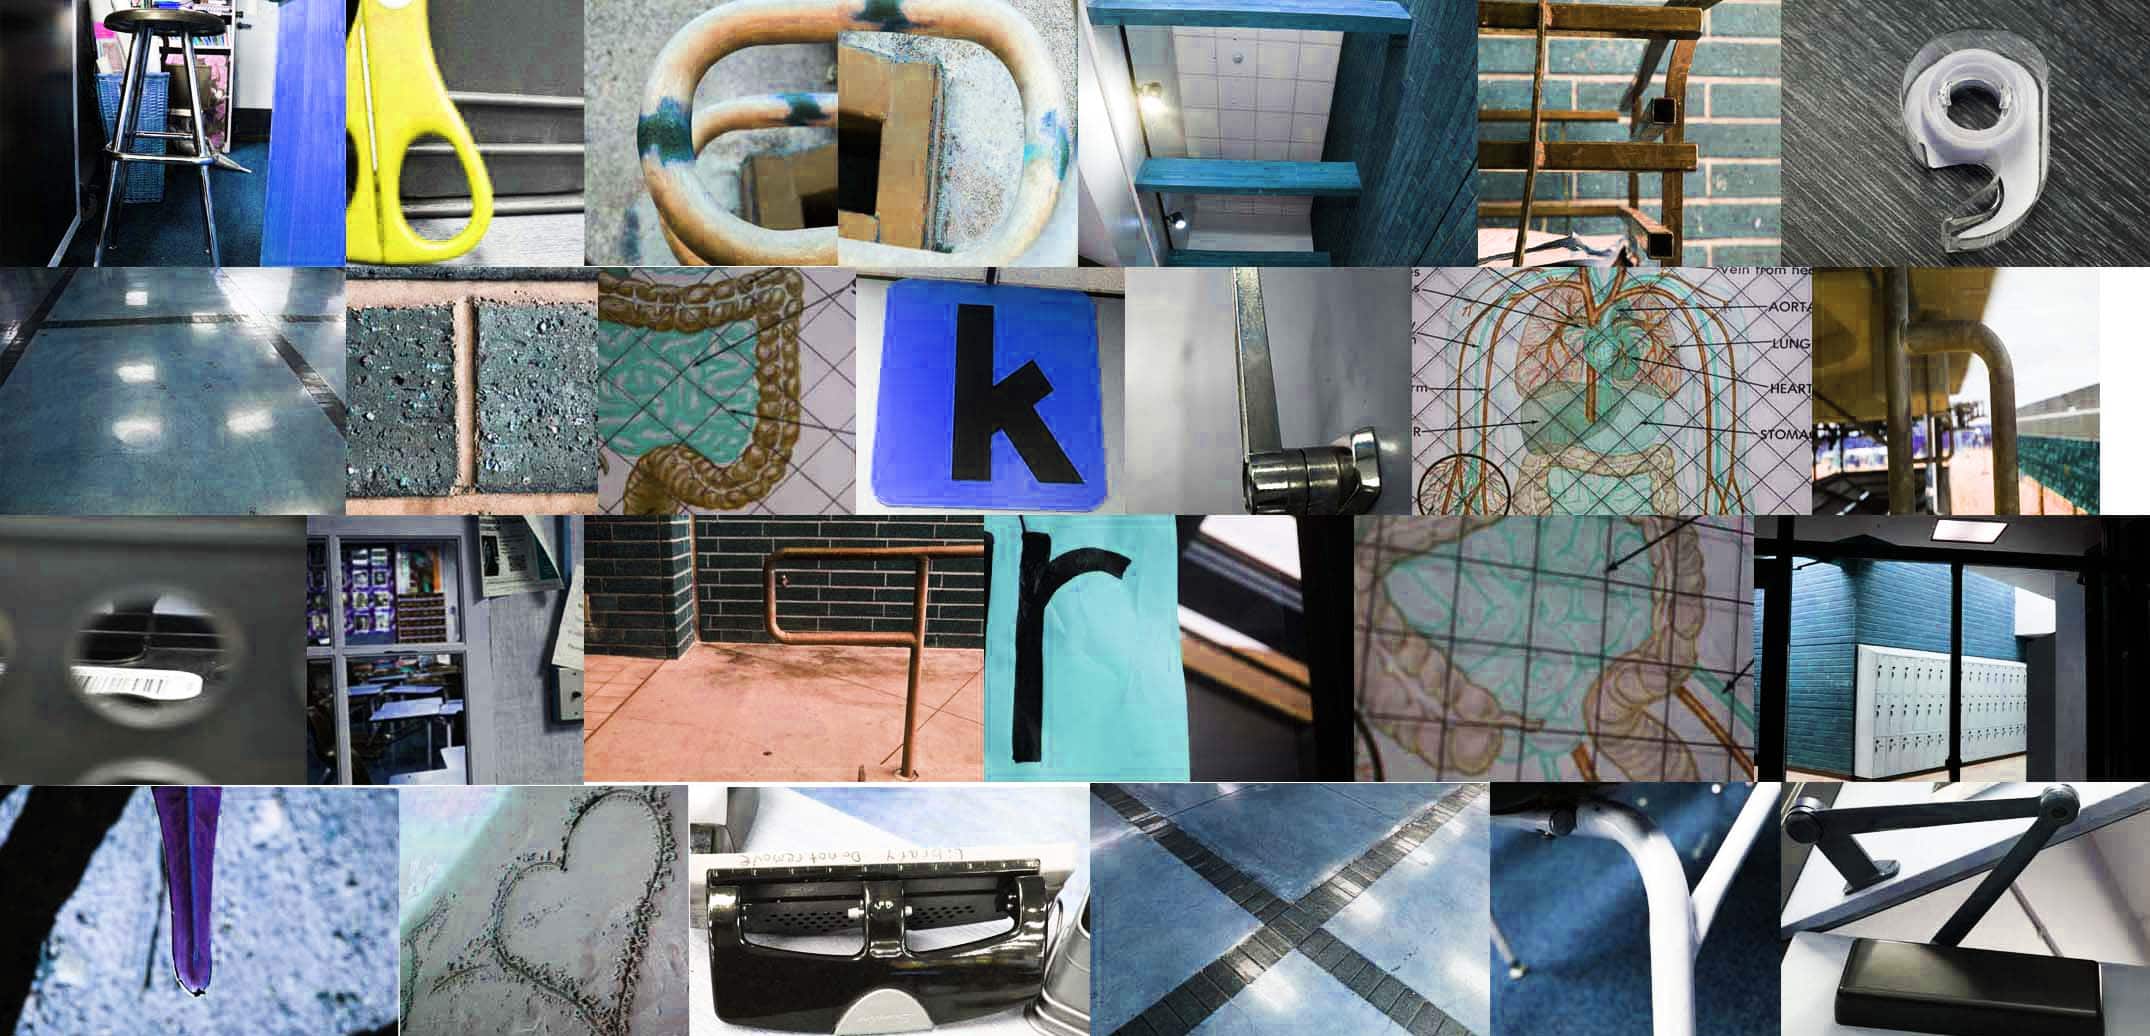
Finding Letters in Plain Sight
Photography Section
Step 1:
- Pick a word or phrase
- Must be appropriate!
Step 2:
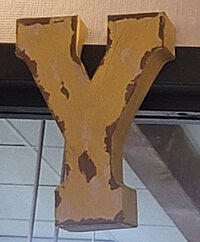
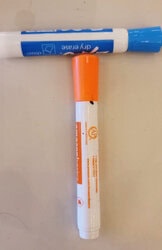
- Take a photograph of objects that look like letters
 B
B  V
V
 S
S 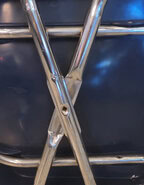 X
X
- If your word has the same letter twice in it you must pick two different objects for that letter
- Ex the word Soccer
- Must take two different C photos
- Ex the word Soccer
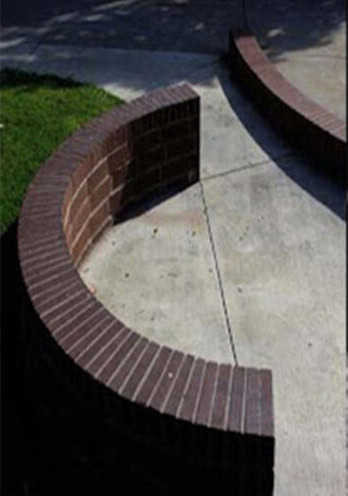

- You may NOT use real letters, create letter out of objects or anything that is draw/painted on a poster or wall
No

- Words for Sale
- If you pick a theme (baseball, music, beach) it makes it more interesting
- Examples of this project that are for sale:
- If you pick a theme (baseball, music, beach) it makes it more interesting
Points for word length and theme
- 3 Points
- 4 Letters
- 4 Points
- 6 Letters
- 5 Points
- 8 Letters
- 6 points
- 10 + Letters
Photoshop Section
Step 1: Height
- File -New
- Height: 2 inches
- Resolution 150
- Background color: White
- Resolution 150
- Height: 2 inches
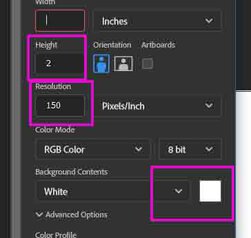
****If you are creating two words, make the Height 4 inches****
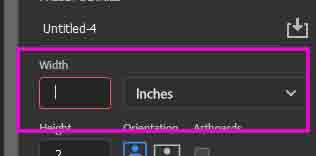
Step 2: Width
- Each canvas Width will be different depending on the length of the word
- To get the width
- Multiple 2 by how many letters in the word
- 4 letter word 2 x 4=8 inches
- 6 letter word 2 x 6 = 12 inches
- 8 letter word 2 x 8 = 16 inches
- Multiple 2 by how many letters in the word
- To get the width
____________________________________________________________________
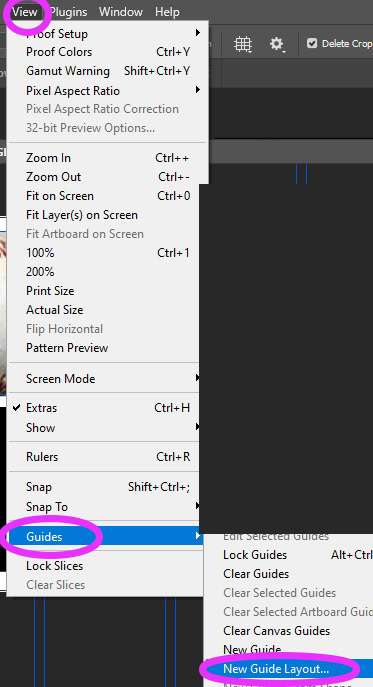
Step 3: Guides
- Go to View
- Guides
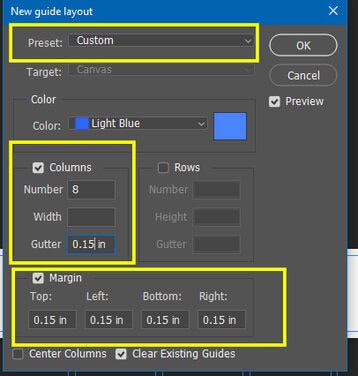
- New Guide Layout
- Guides
Step 4:
- Columns
- Number: This number will depending on how many letters you are using.
- Ex: If you have 4 letters fill in the number 4
- If you have 8 letters in number 8
- Ex: If you have 4 letters fill in the number 4
- Number: This number will depending on how many letters you are using.
- Gutter: 0.15
- Rows
- 1
- (If you have two words make it 2 rows)
- 1
- Margin
- Top 0.15
- Left 0.15
- Bottom 0.15
- Right 0.15
- Bottom 0.15
- Left 0.15
- Top 0.15
- Color
- Custom: Pick any Blue color
Step 5
- Click on the Rectangle Tool
- Fill: Black
- Stroke: White box with red line through it
- Fill: Black

Step 6
- Draw a rectangle in the far left blue graph box
- Make sure you have a white border around the black box
- The blue lines are to give you a guide so you do not make the box the correct size
- Make sure you have a white border around the black box

Step 7
- Go to the Layers Pallet
- Double click where it says Rectangle 1
- Rename the layer to
- 1 Letter
- Rename the layer to
- Double click where it says Rectangle 1

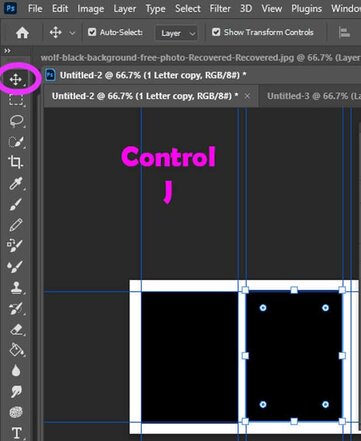
Step 8
- Stay on 1 Letter Layer
- Click Control J (this will make a copy of the black box)
- Select the Move tool
- Move the black box to the right into the next graph section
- Select the Move tool
- Click Control J (this will make a copy of the black box)
Step 9
- On the Layers Pallet
- Double click where it says Rectangle 1 copy
- Rename it 2 Letter
- Double click where it says Rectangle 1 copy

Step 10
- Click Control J
- Select the Move tool
- Move the black box to the right into the next graph section
- Select the Move tool

Step 11
- On the Layers Pallet
- Double click on the third layer
- Rename it 3 Letter
- Double click on the third layer

Step 12
- Continue until you have filled all of the boxes
- Everyone will have a different number of boxes that is dependant on the length of the word

Step 13
- Click on 1 Letter on Layers Pallet
- Go to
- File- Place Embedded
- Go to

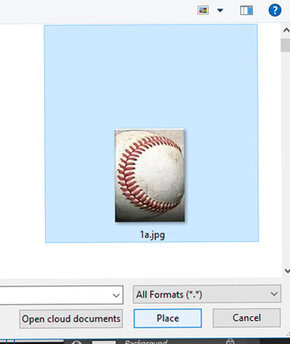
Step 14
- Pick the first letter of your word/phrase
- Click Place
Step 15
- Your photo will appear in the middle of your canvas BEHIND the black boxes
- Select the move tool

Step 16
- Move the photo to the left until it’s in front of the first black box
- Make the photo a little bigger than the black box

Step 17
- Go to Layer Pallet
- Click on the layer of the image
- Be SURE that it is directly above 1 Letter Layer
- Right click on that layer
- Choose Create Clipping Mask
- Right click on that layer
- Be SURE that it is directly above 1 Letter Layer
- Click on the layer of the image

Step 18
- The photo will now be “Clipped” inside of the black box
- Make the image larger or smaller until it looks perfect to you

Step 19
- Click on 2 Letter on Layers Pallet
- Go to
- File- Place Embedded
- Go to

Step 20
- Choose the second letter of the word
- Place image
- It will show up in the middle of the canvas behind black boxes
- Move the letter to the Left and over the second black box
- Right click on the Layer
- Create Clipping Mask
- The image will be “clipped into the box”
- Make it bigger or smaller to fit
- The image will be “clipped into the box”
- Create Clipping Mask
- Right click on the Layer
- Move the letter to the Left and over the second black box
- It will show up in the middle of the canvas behind black boxes
- Place image

Step 21
- Click on 3 Letter Layer
- Repeat the steps from above until you have placed all the letters in your word/phrase
Step 22
- When word /phrase is complete
- Flatten Image
Step 23
- Edit in Camera Raw
- You want a clean edit
- Properly exposed
- Colors match
Step 24
- Save as jpeg
- No LOGO
