
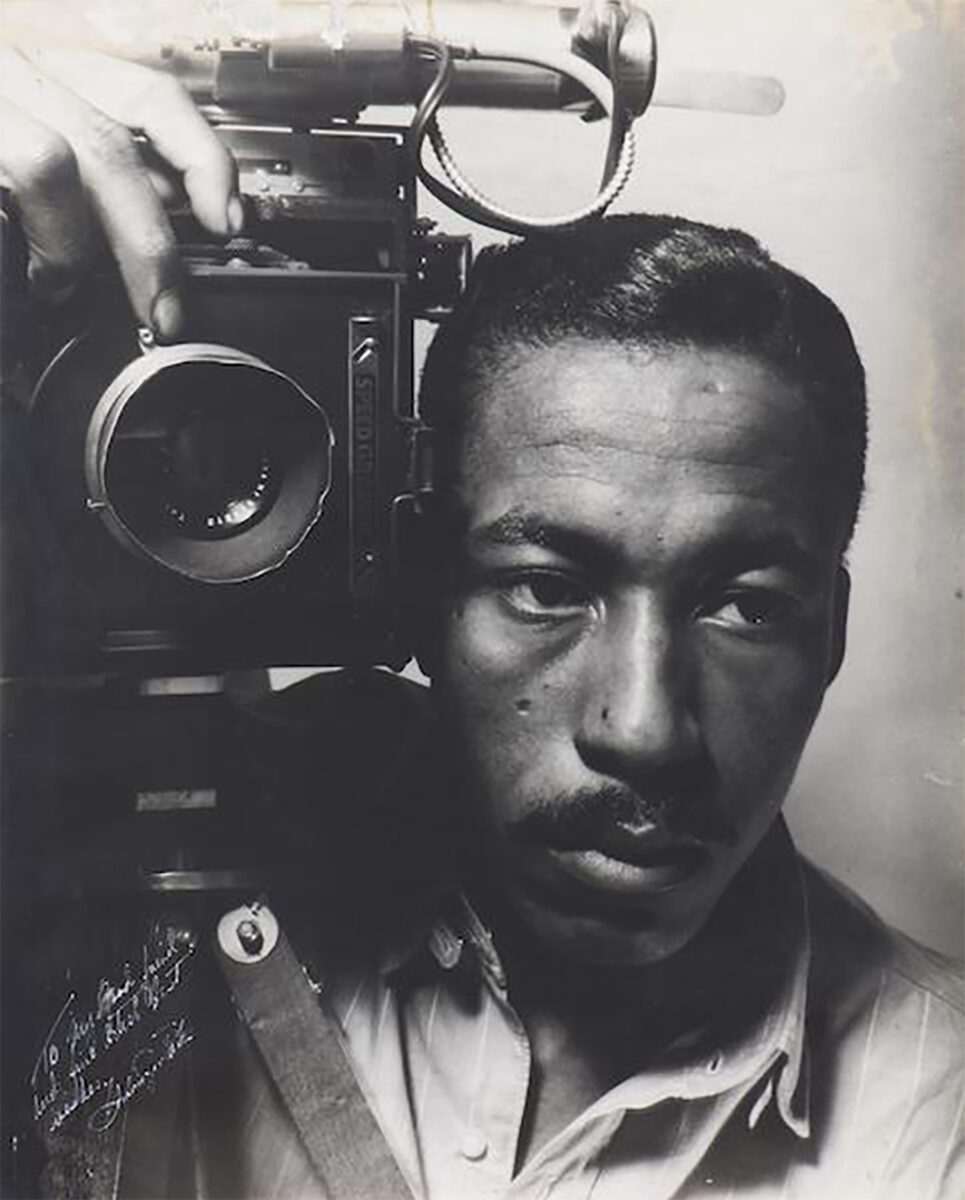
Part 1: Picking Gordon Parks photos
Step 1:
- Save the 2 photos below to your computer
Step 2:
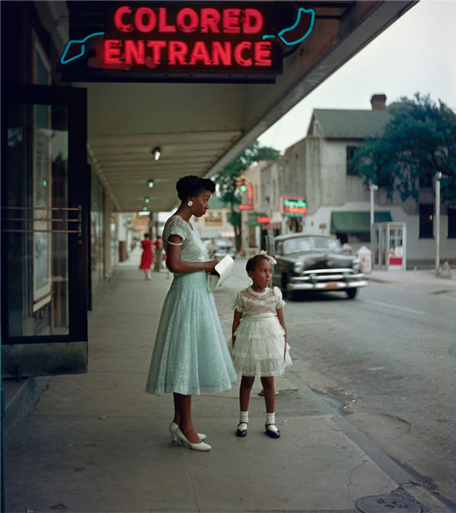
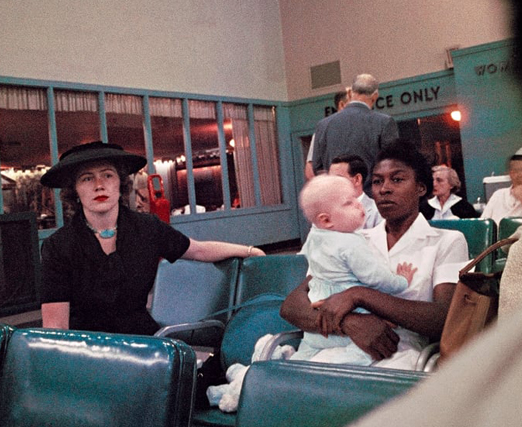
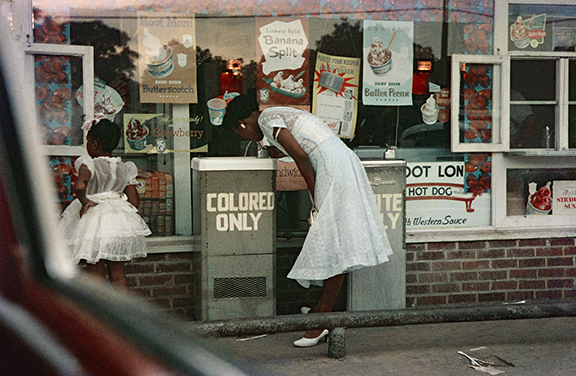
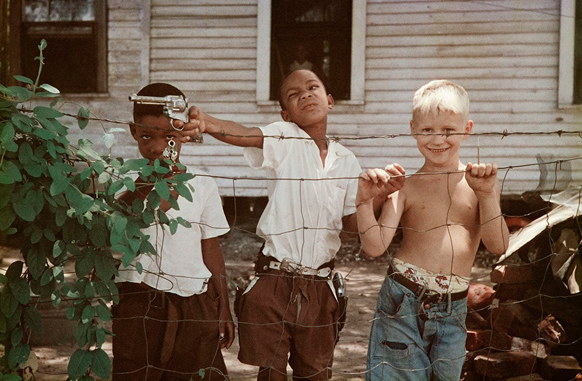
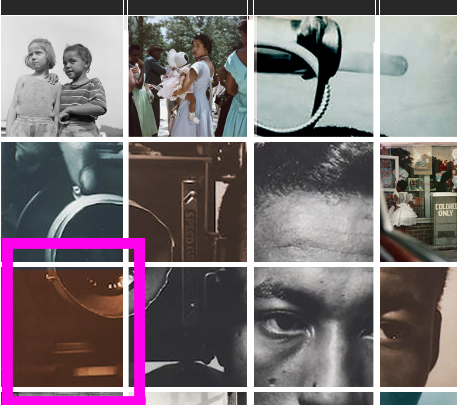
- Pick 3 Colored Photos of Gordon Parks work
- Save the 3 photos to your computer


Step 3:
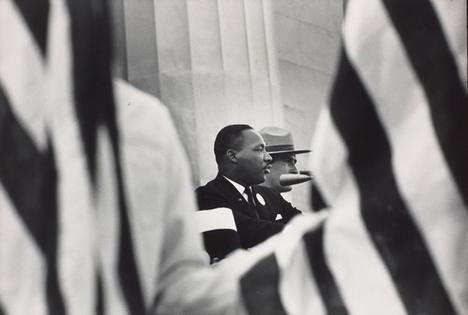
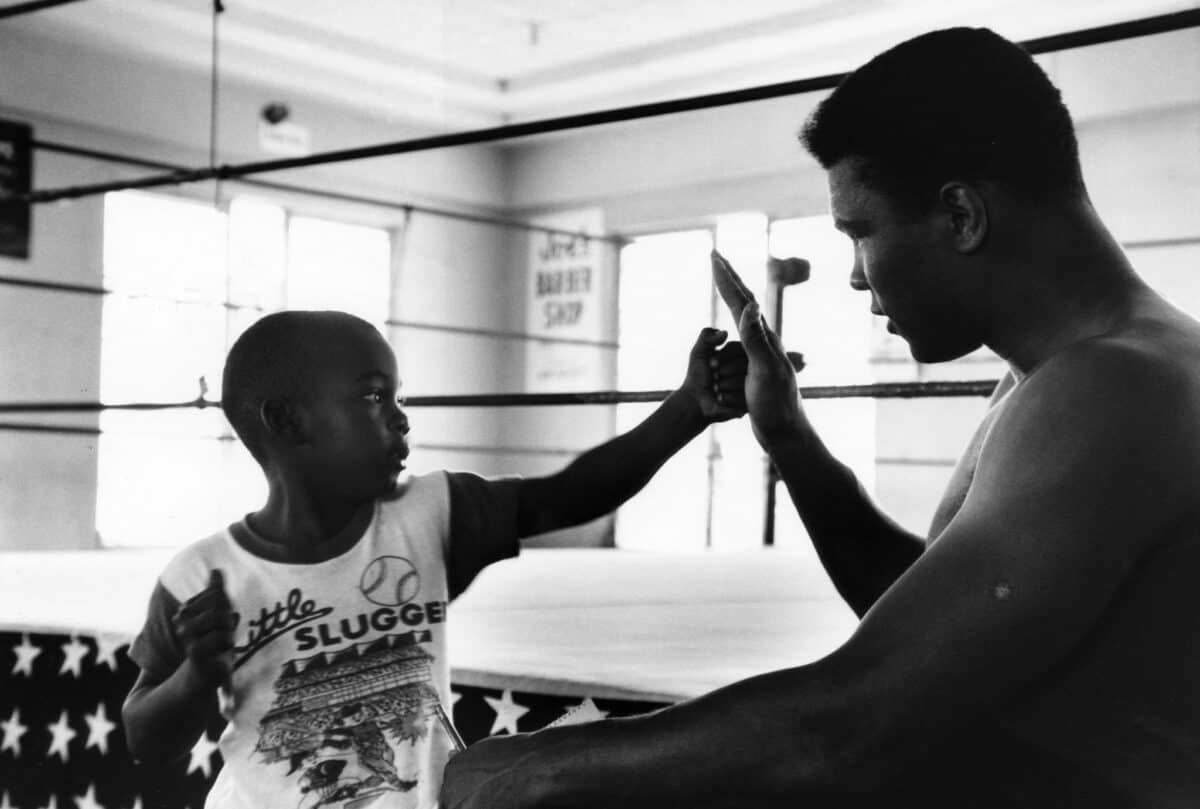
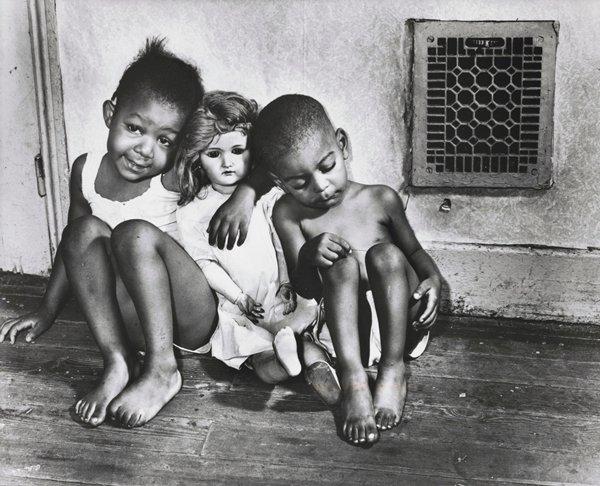
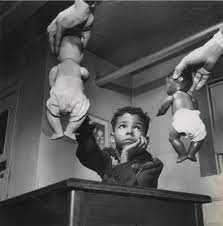
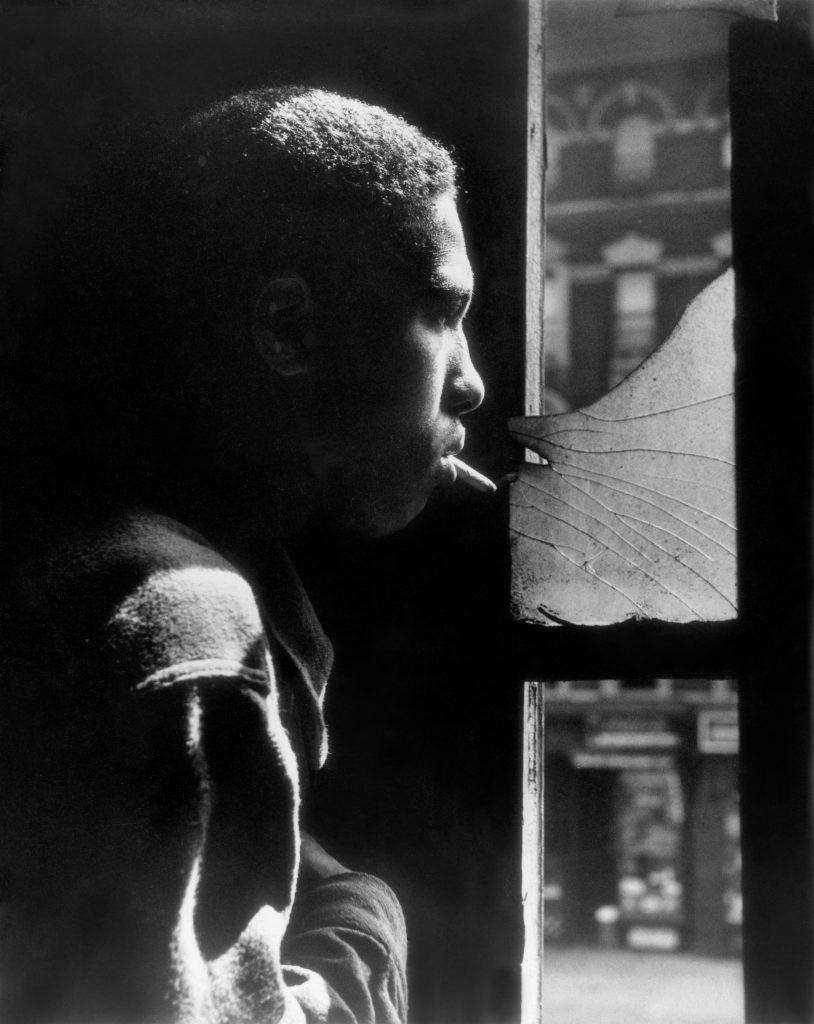
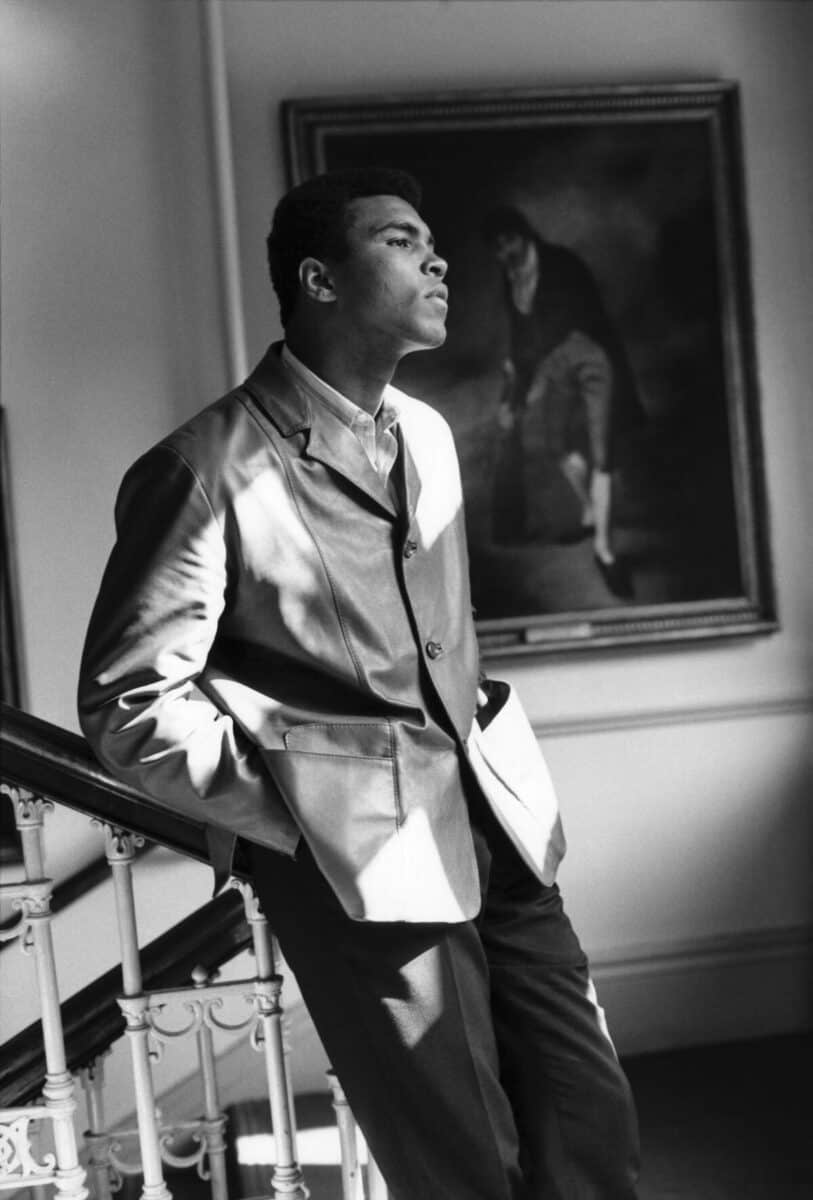
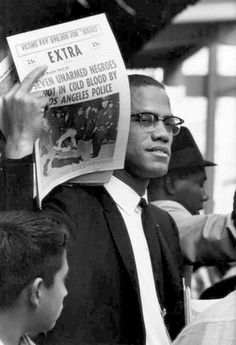
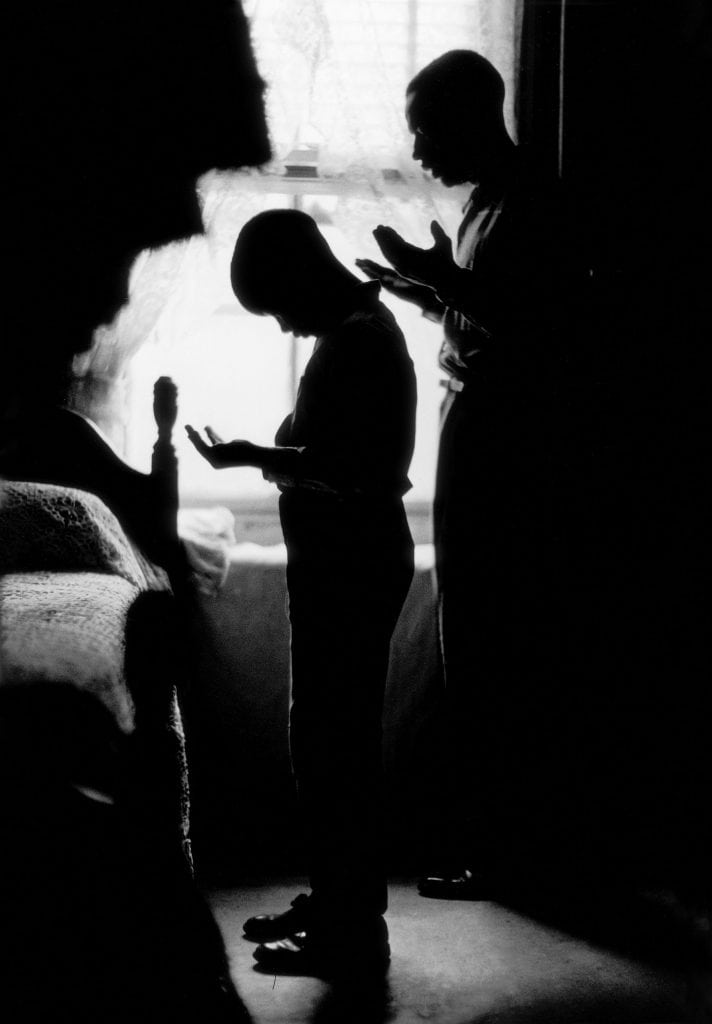
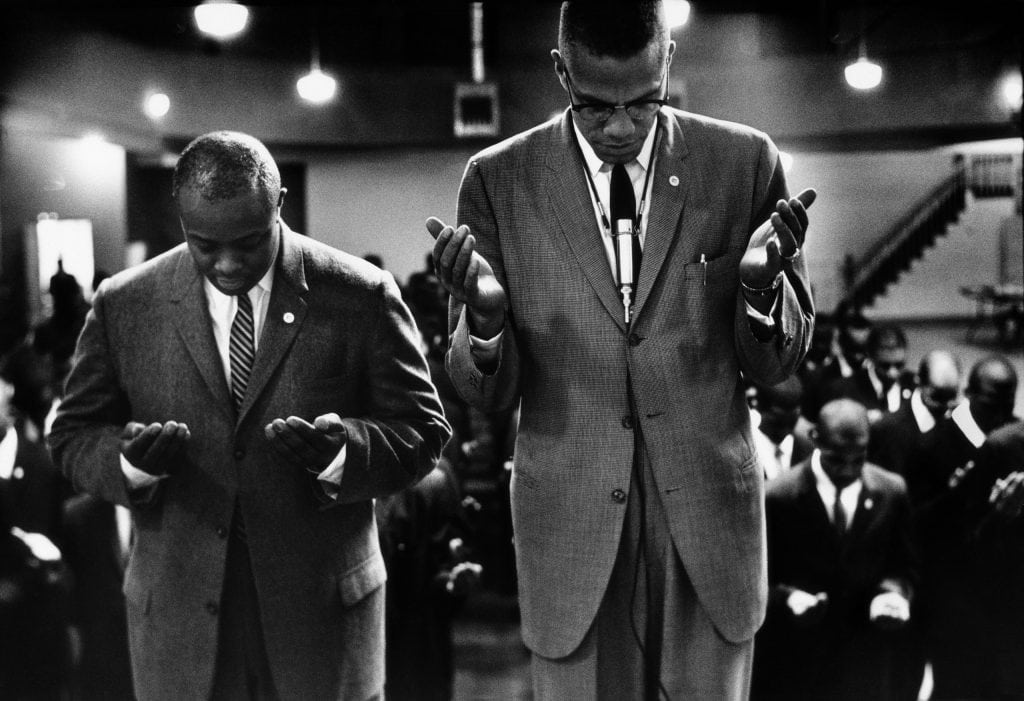
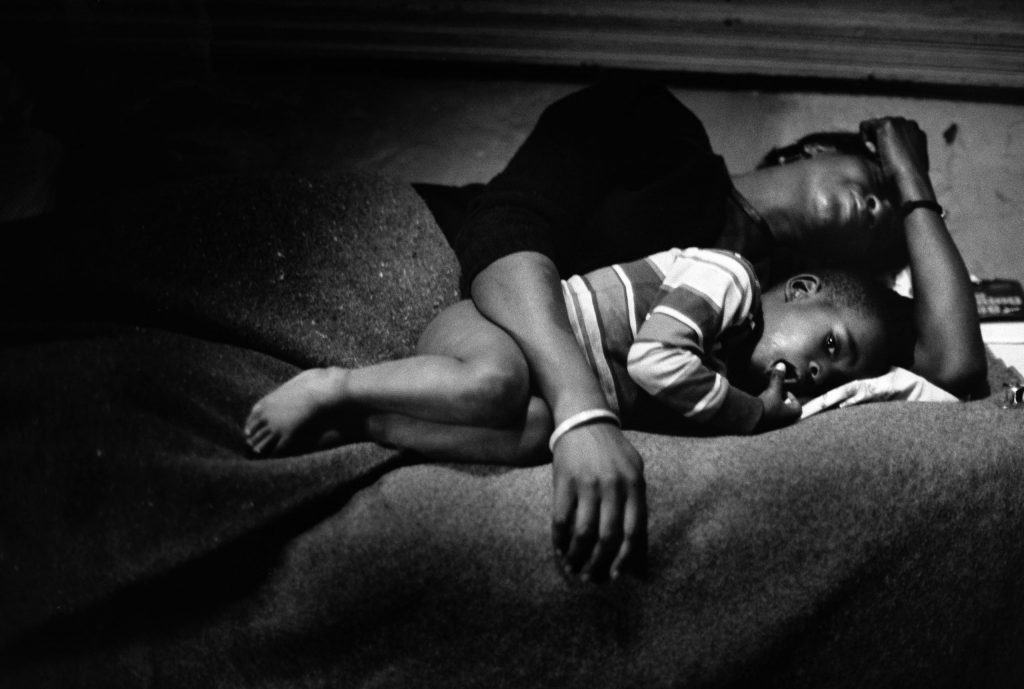
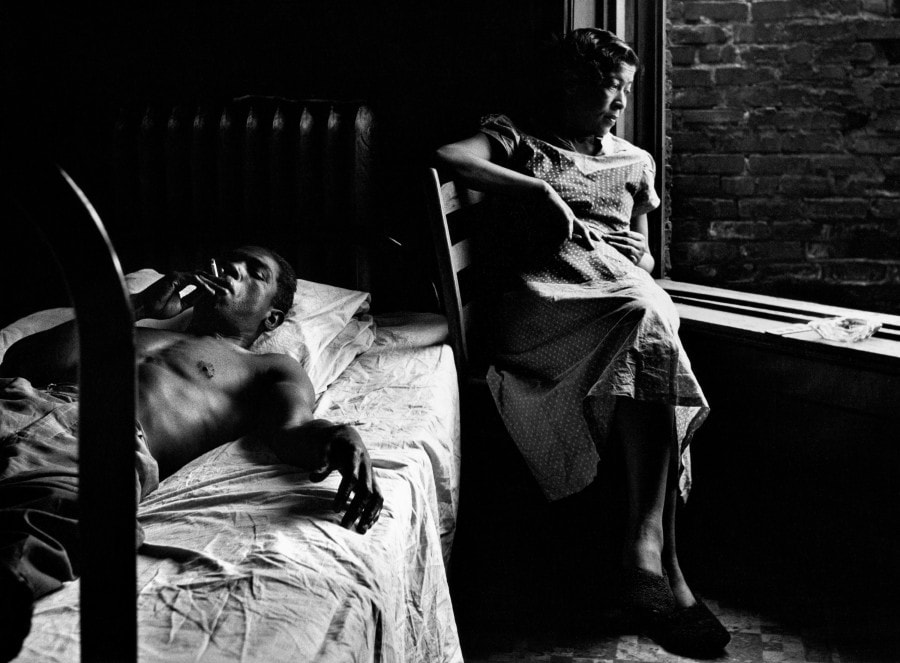
- Pick 3 Black and White Photos of Gordon Parks work
- Save the 3 photos to your computer

___________________________________________________________________________
Part 2: Creating the Graph
Step 1:
- Open the photo of Gordon Parks

Step 2:
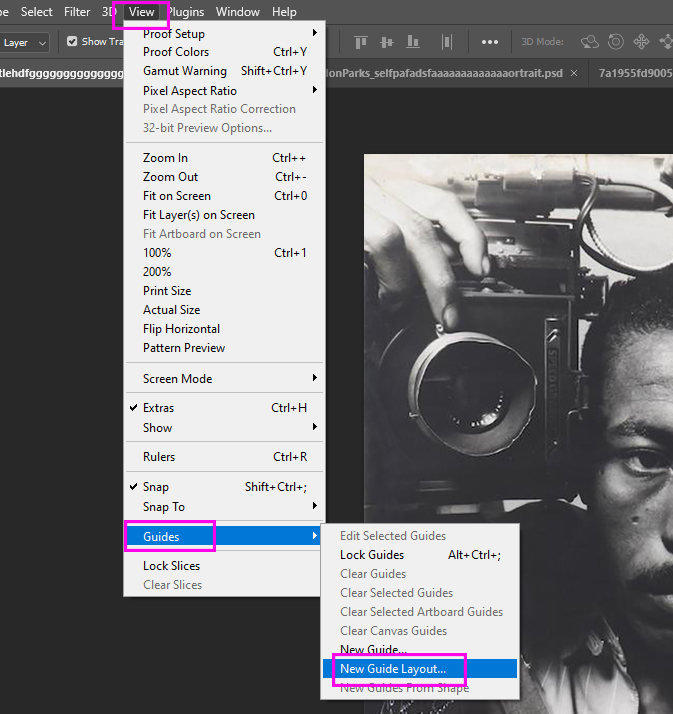
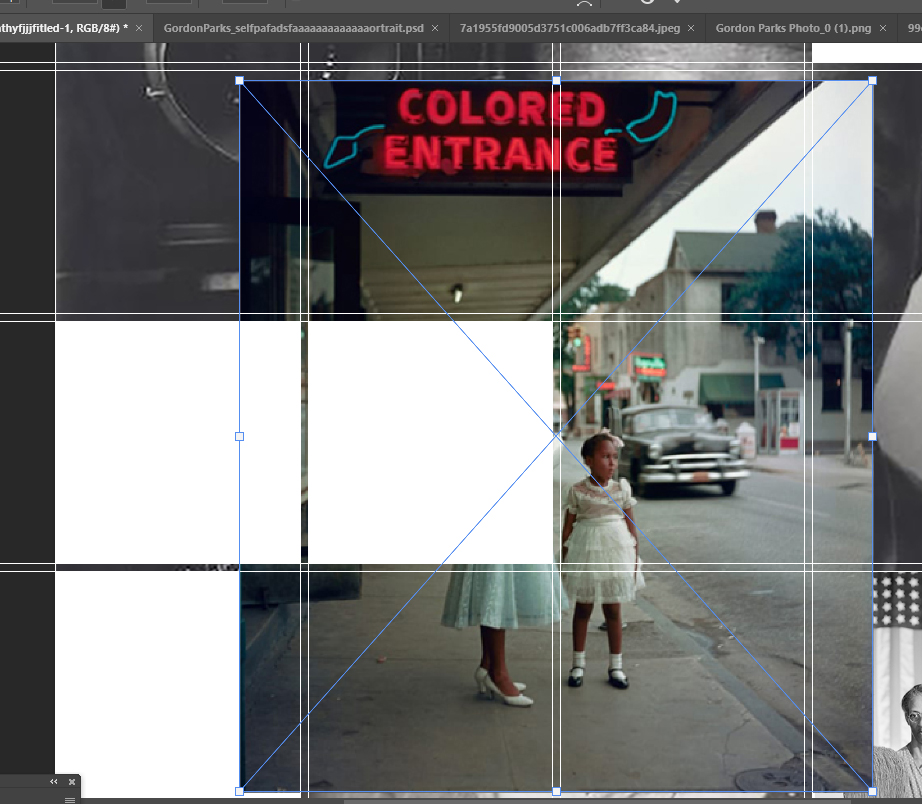
- Go to
- View
- Guides
- New Guide Layout
- Guides
- View
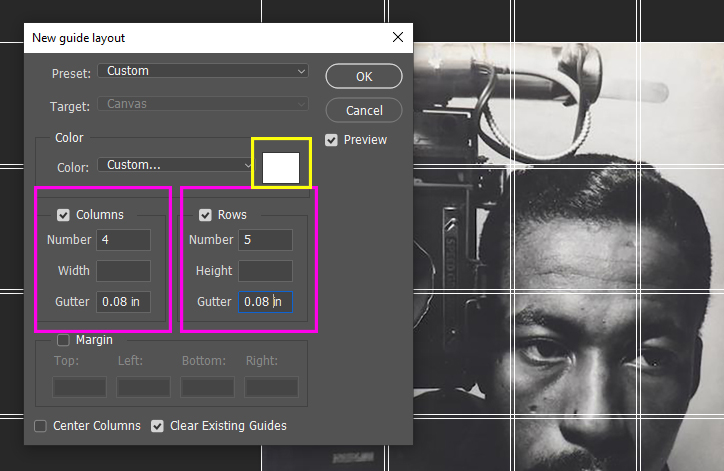
Step 3:
- Color
- Custom……White
- Columns
- Number 4
- Gutter 0.08 in
- Rows
- Number 5
- Gutter 0.08 in
- Click OK
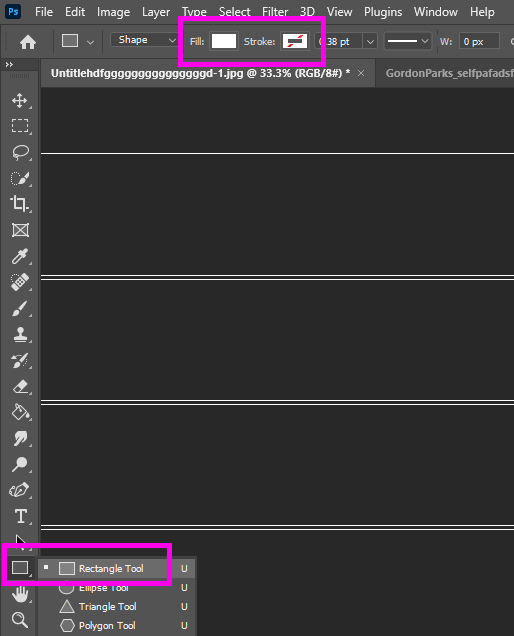
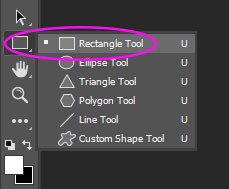
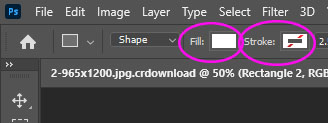
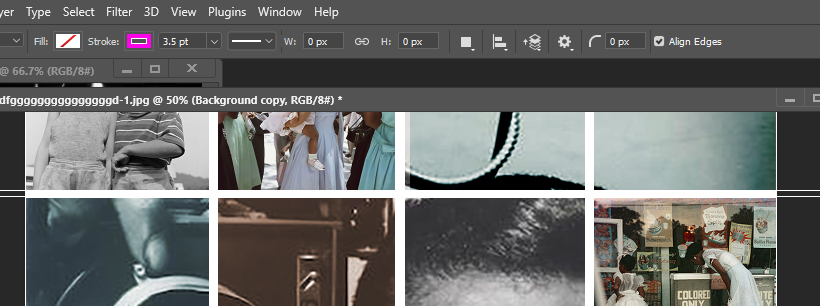
Step 4:
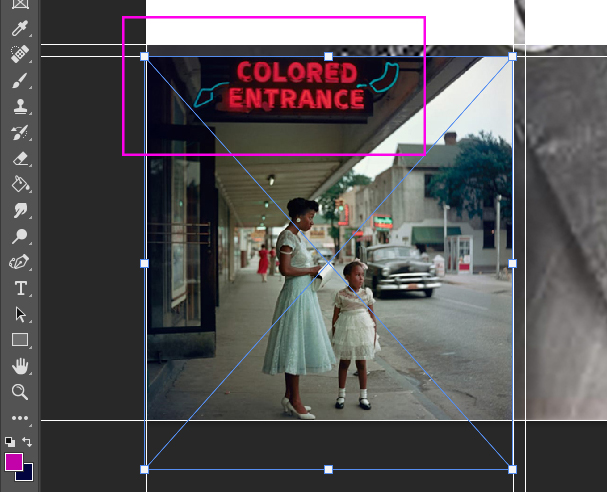
- Select the Rectangle Tool
- Fill: White
- Stroke: White box with Red line through it
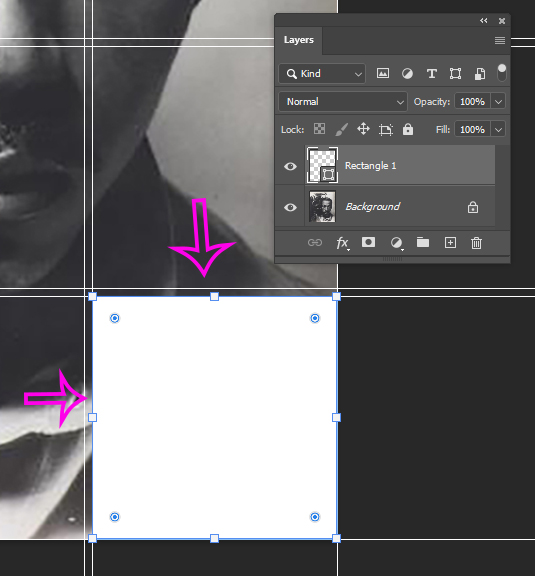
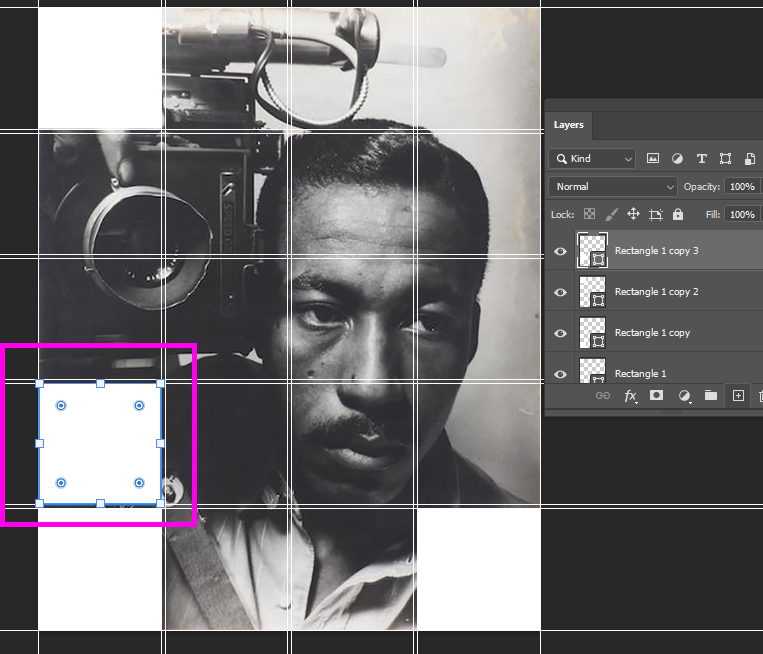
Step 5:
- In the Bottom Right Corner Box
- Draw a White Box
- Make sure you draw the box so that it is touching the inside white graph line
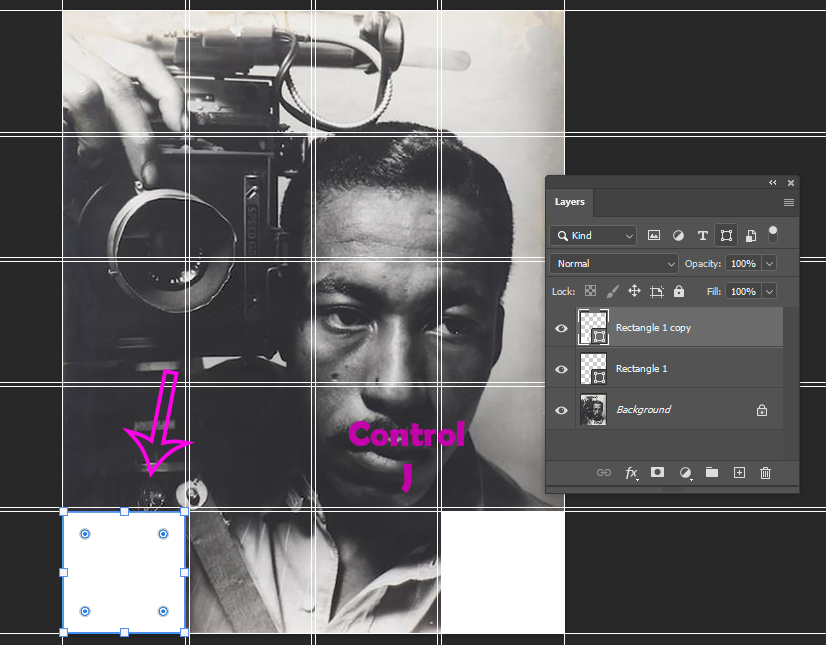
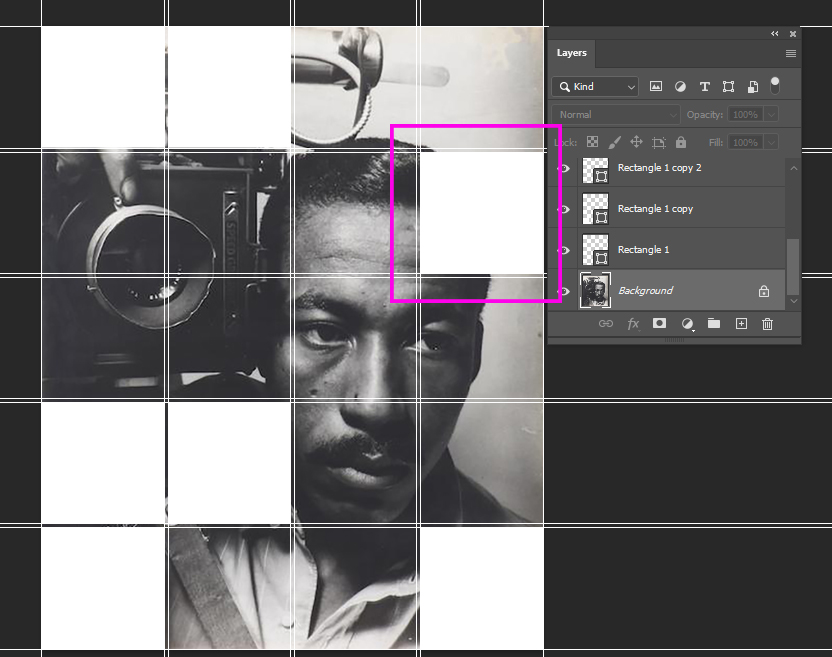
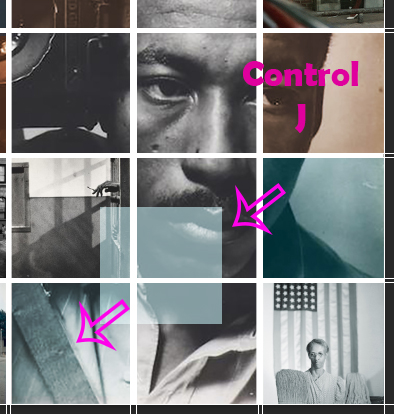
Step 6:
- You will be duplicating the White Box
- Click
- Control J
- Move the duplicated white box to the FAR left bottom square
Step 7:
- Click
- Control J
- This made another copy of the white box
- Move the duplicated white box to the Top Left square

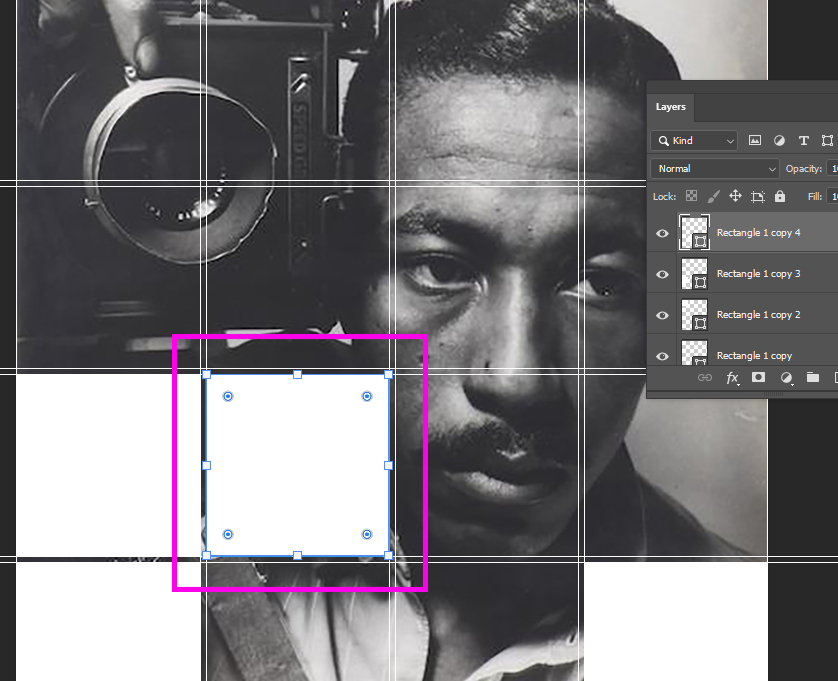
Step 8:
- Click Control J
- Move the duplicated white box to
- 4th row
- 1st Column
- 4th row
Step 9:
- Click Control J
- Move the duplicated white box to
- 4th row
- 2nd Column
- 4th row
Step 10:
- Click Control J
- Move the duplicated white box to
- 2nd row
- 1st Column
- 2nd row
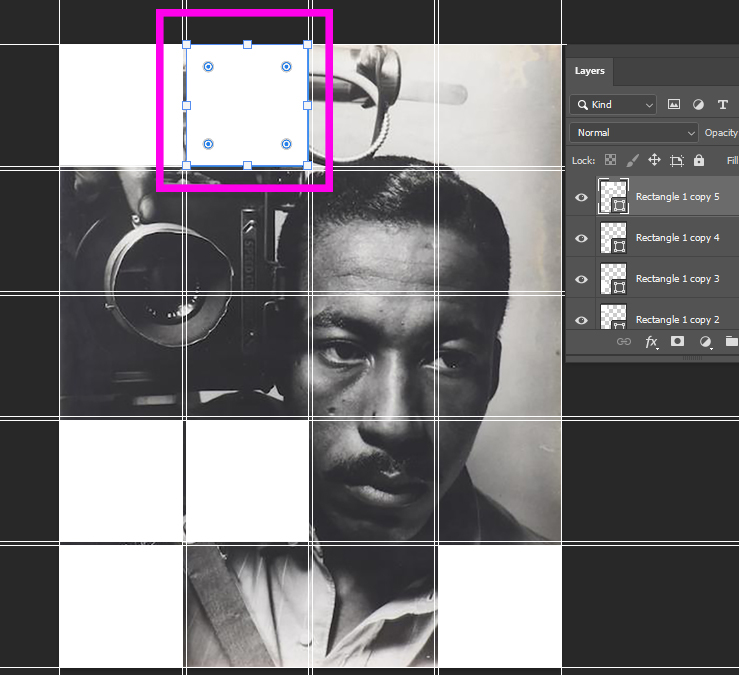
Step 11:
- Click Control J
- Move the duplicated white box to
- 4th row
- 2nd Column
- 4th row
- You should now have 7 white boxes
__________________________________________________________________________________________
Part 3: Adding Gordon Parks Photography
Step 1:
- On the Layers pallet
- Click on Rectangle 1 Layer
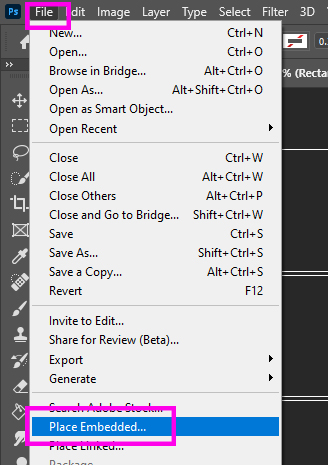
- Go to
- File
- Place Embedded
- File

Step 2:
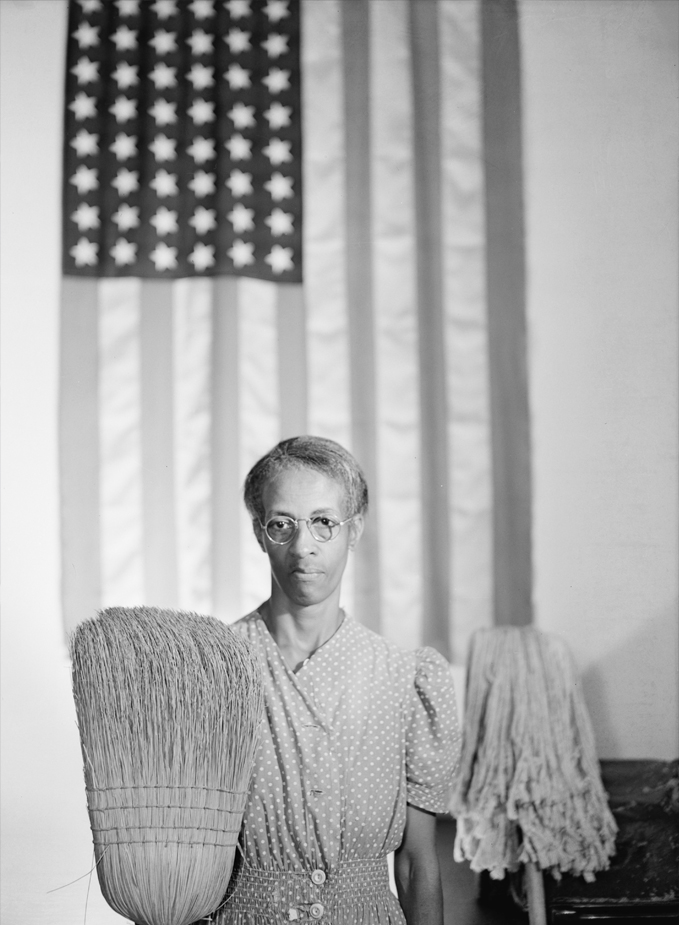
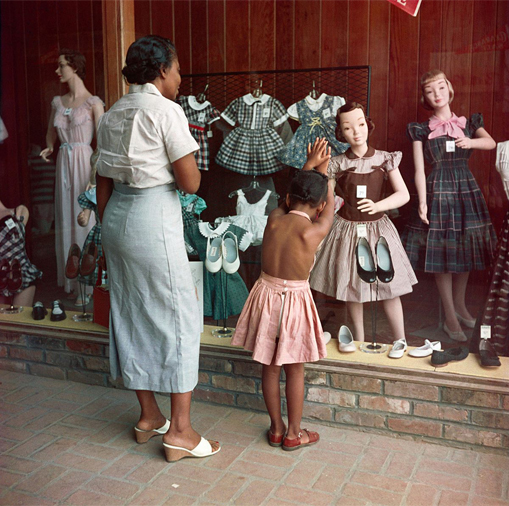
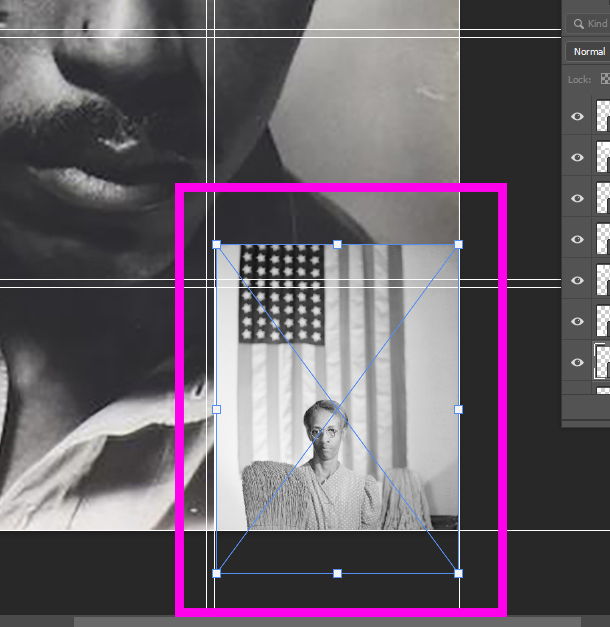
- Choose the photography you saved of American Gothic (Lady in front of American Flag with broom)
- You MUST use American Gothic and no other photograph for this square!
- The photo will show up in the middle of the graph

Step 3:
- Move the image ontop of the Bottom Right white Box
- Don’t worry if the whole photograph does not fit
- Move it around so that the most important parts of the photograph will fit into the box
- Click Enter when done
- Move it around so that the most important parts of the photograph will fit into the box
- Don’t worry if the whole photograph does not fit
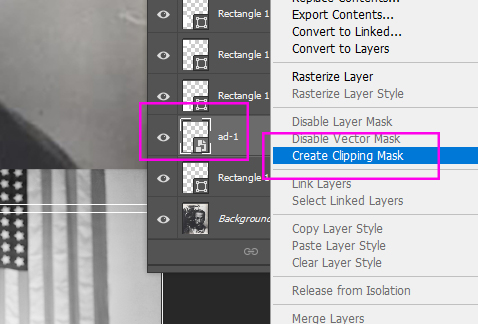
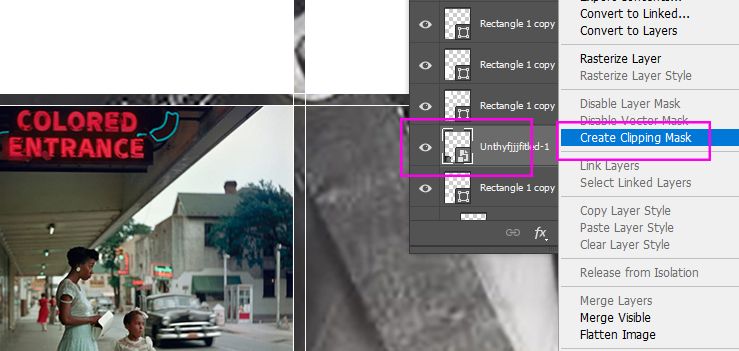
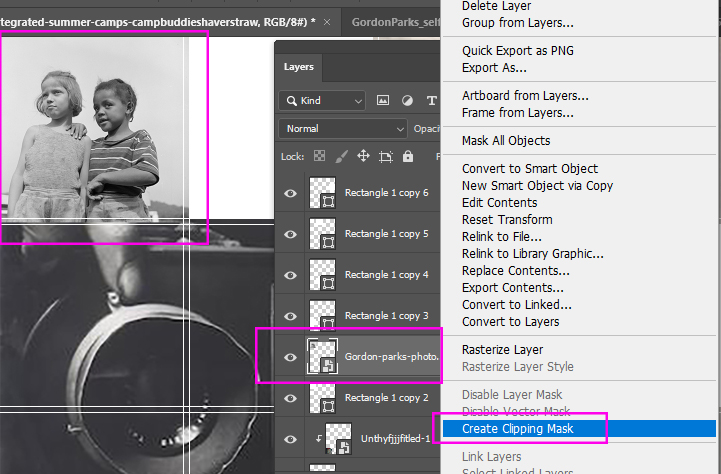
Step 4:
- Right Click on American Gothic Photo Layer
- (yours may have a different name but it is the Layer above Rectangle 1)
- Pick Create Clipping Mask
- The photo will now be locked into the square shape
- You can still move it around if you need to change it’s position
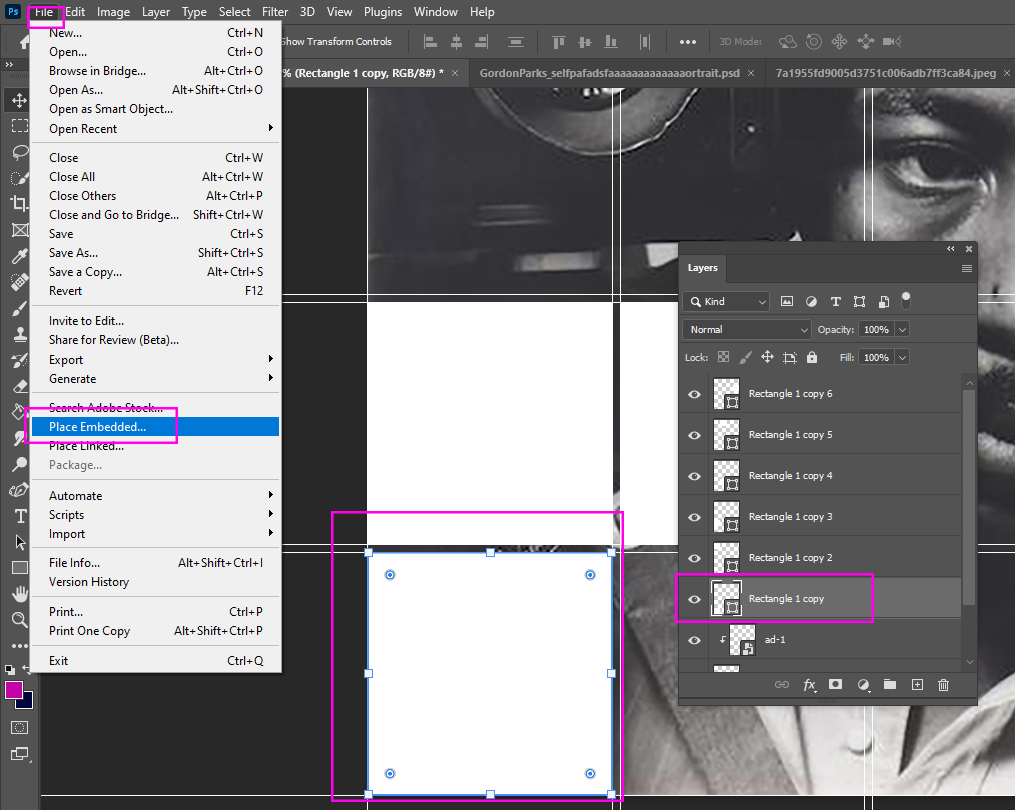
Step 5:
- Click on Layer
- Rectangle 1 Copy (This will select the white box on the bottom left side)
- Go to
- File
- Place Embedded
- File
Step 6:
- Choose any colored or black/white photo you saved from Part 1
- It will show up in the middle of the graph
Step 7:
- Move the image ontop of the Bottom Left white Box
- Don’t worry if the whole photograph does not fit
- Move it around so that the most important parts of the photograph will fit into the box
- Click Enter when done
- Move it around so that the most important parts of the photograph will fit into the box
- Don’t worry if the whole photograph does not fit
Step 8:
- On the Layers Pallet
- Right Click on the photograph you just inserted
- It is the Layer above Rectangle 1 Copy
- (Everyones photo will have a different name than what is shown below)
- It is the Layer above Rectangle 1 Copy
- Right Click on the photograph you just inserted
- Pick Create Clipping Mask
- The photo will now be locked into the square shape
- You can still move it around if you need to change it’s position
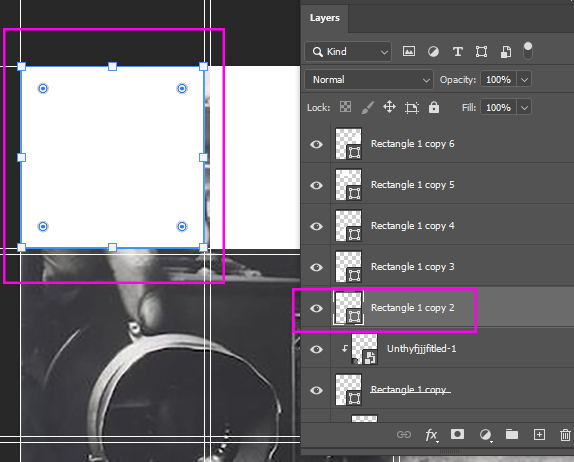
Step 9:
- On the Layers Pallet
- Click on Rectangle 1 Copy 2
- Go to
- File
- Place Embedded
- File
- Pick any Colored or Black/white photo you saved
Step 10:
- Move the image ontop of the white box
- Don’t worry if the whole photograph does not fit
- Move it around so that the most important parts of the photograph will fit into the box
- Click Enter when done
- Move it around so that the most important parts of the photograph will fit into the box
- Don’t worry if the whole photograph does not fit

Step 11:
- On the Layers Pallet
- Right Click on the photograph you just inserted
- It is the Layer above Rectangle 1 Copy
- (Everyones photo will have a different name than what is shown below)
- It is the Layer above Rectangle 1 Copy
- Right Click on the photograph you just inserted
- Pick Create Clipping Mask
- The photo will now be locked into the square shape
- You can still move it around if you need to change it’s position
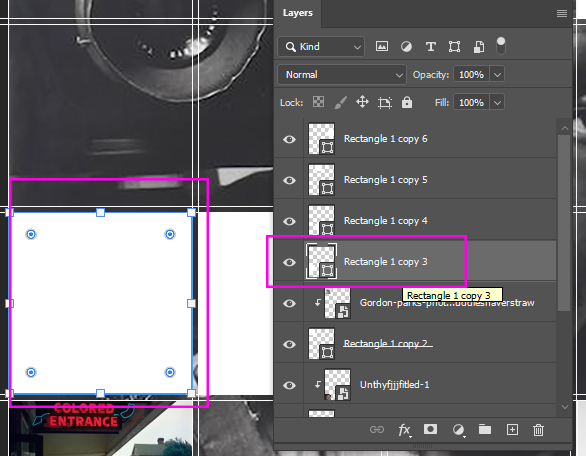
Step 12:
- On Layers Pallet pick
- Rectangle 1 copy 3
- Add another photograph by following the steps from above
- Continue steps 5-8 until all the white boxes are filled with Gordon Parks photographs that you picked
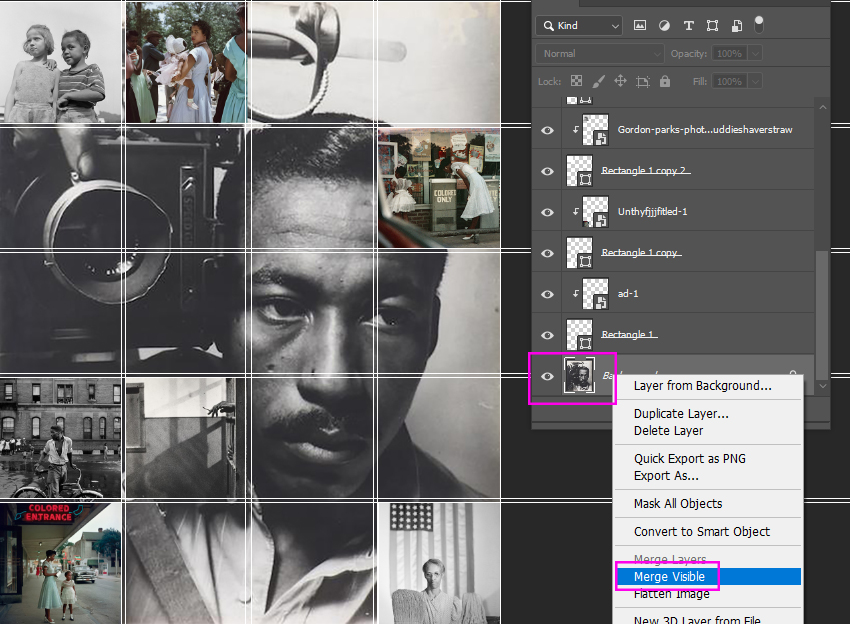
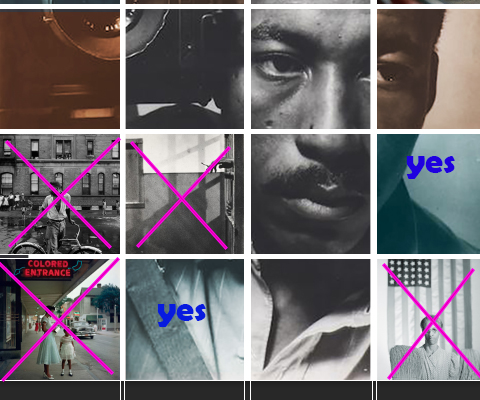
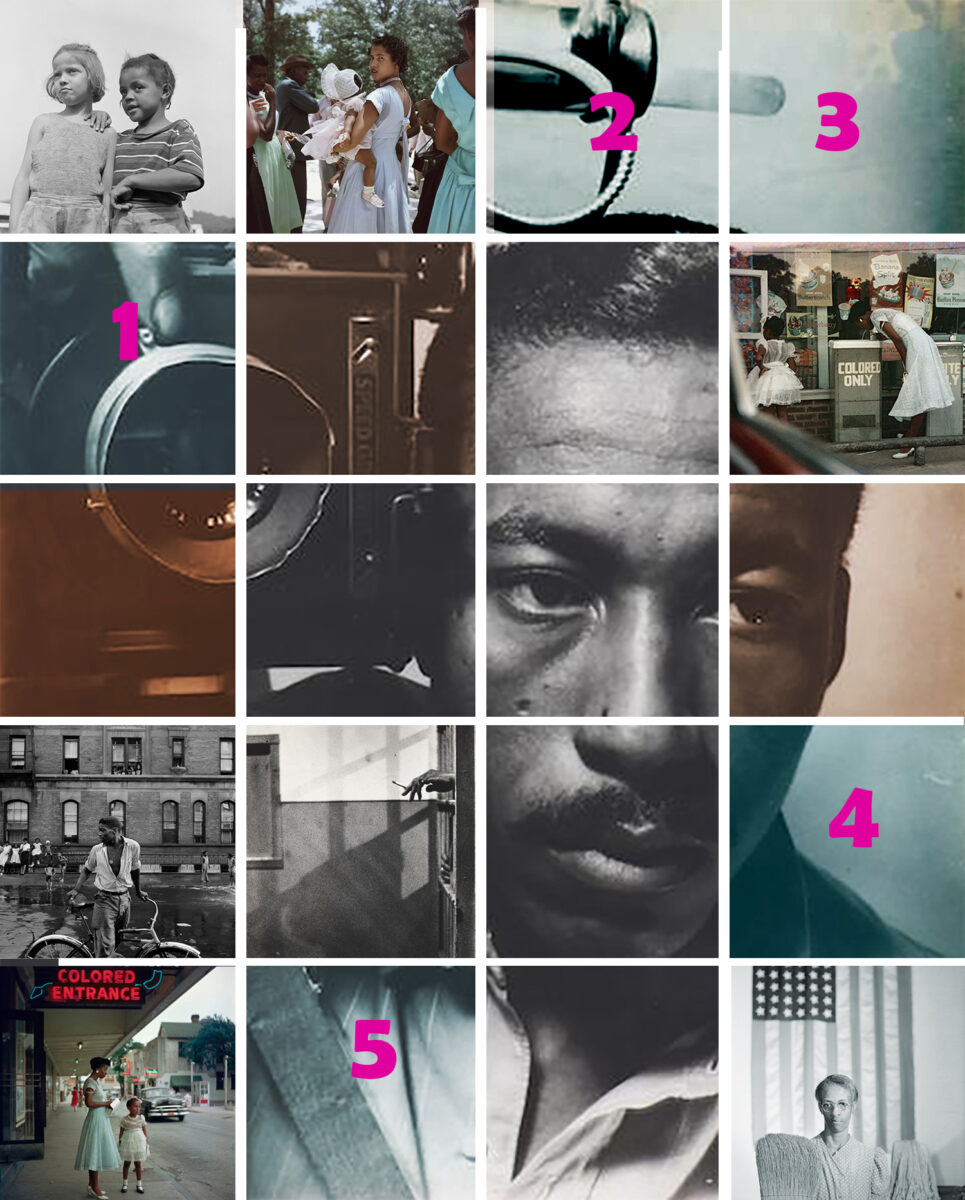
Step 13:
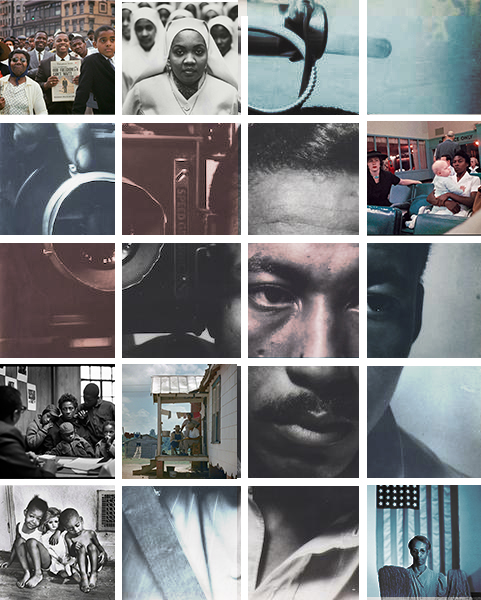
- You should have on your graph
- American Gothic
- 3 Colored photos
- 3 Black/white photos
- On Layers pallet
- Right click on Background Layer
- Merge Visible
- Right click on Background Layer
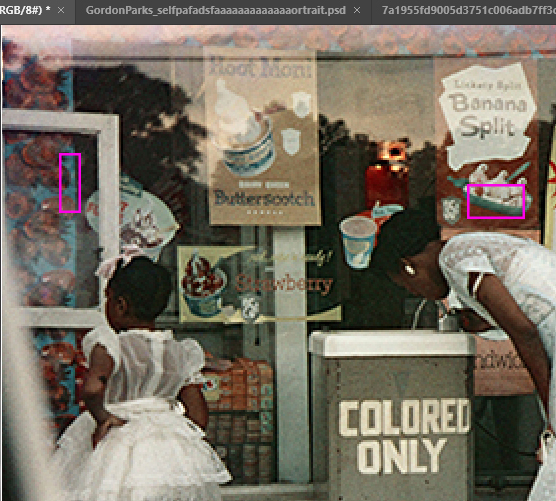
Part 4: Adding Color Overlays
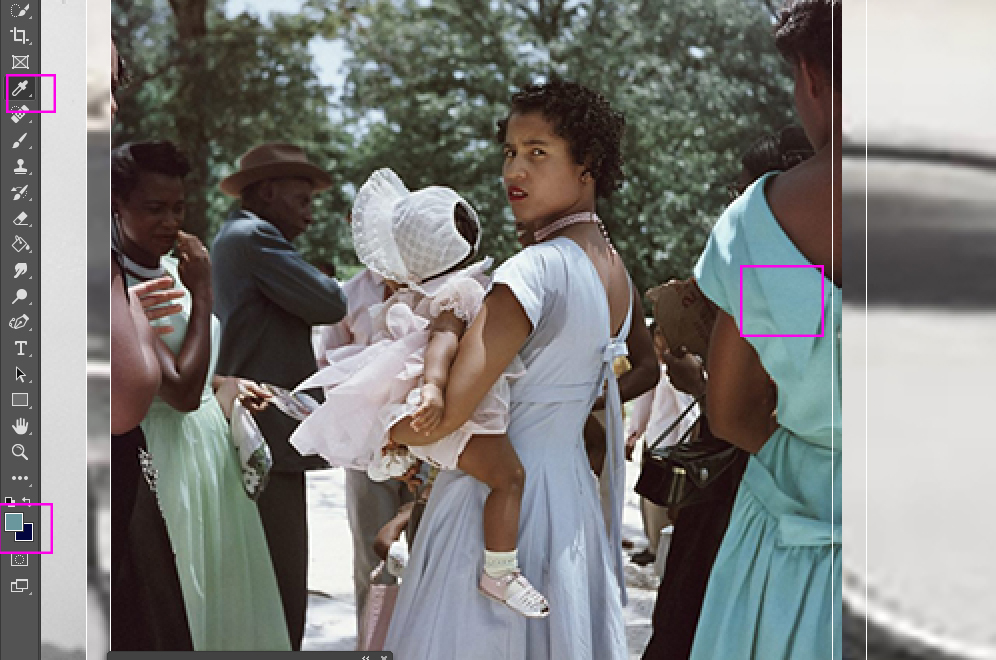
Step 1:
- Choose the Eye Dropper Tool
- Pick a Blueish color area on any of the colored photos on the graph
- Click the Eye Dropper tool over the blueish area
- This will select that blue color and it will show up at the botton of the tool bar
- Click the Eye Dropper tool over the blueish area
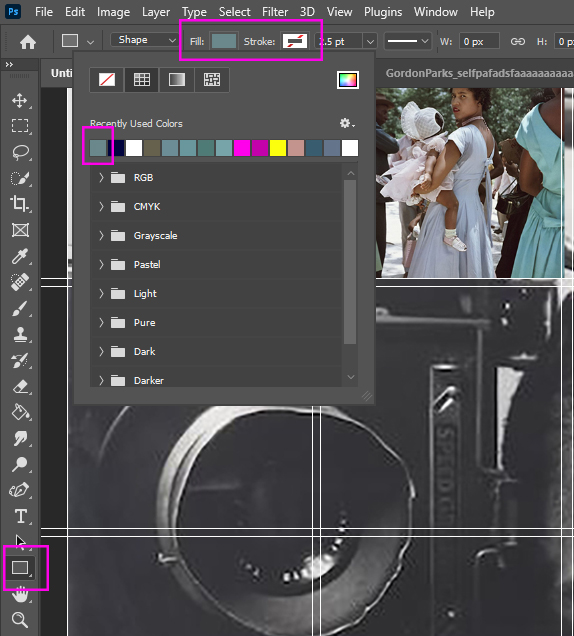
Step 2:
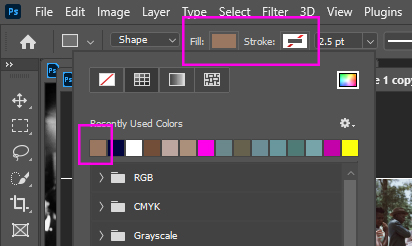
- Choose the Rectangle Tool
- At the top of Photoshop click
- Fill
- Recently Used Colors
- Choose the first color (this will be the blue you selected)
- Stroke: White box with red /
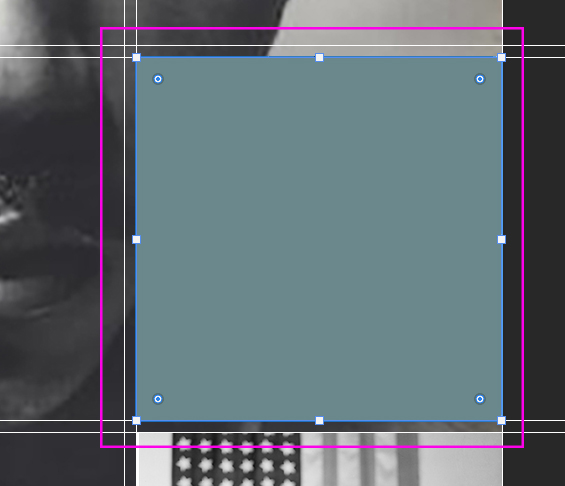
Step 3:
- Draw a Blue box on any square that is Gordone Parks Face/Camera/hand
- DO NOT Draw a box over one of the colored or Black/white photos you insterted
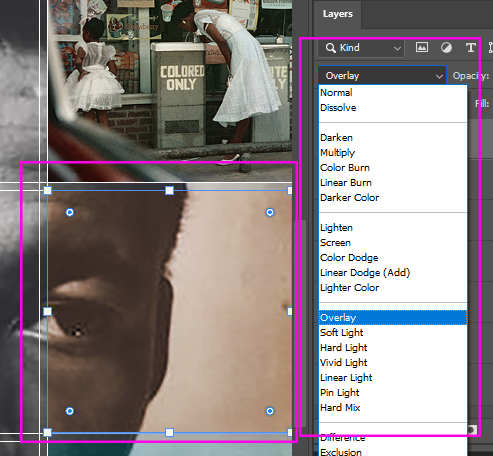
Step 4:
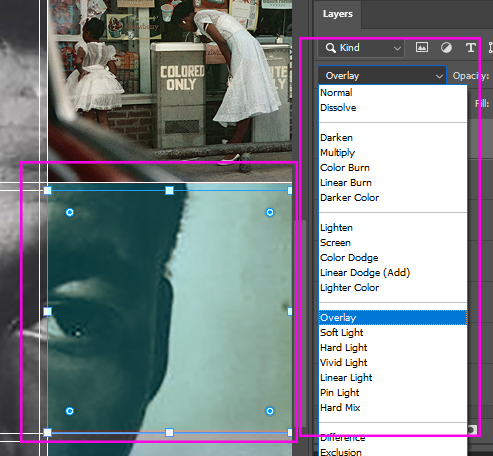
- Go to the top of Layers pallet
- Change Normal to any overlay between Darken – Hard Mix
Step 5:
- Make a copy of the blue square by clicking
- Control J
- With the Move Tool
- Move the blue square copy to any square that is his Face/Camera/hand/neck
- DO NOT cover a photograph you inserted
- Move the blue square copy to any square that is his Face/Camera/hand/neck
Step 6:
- On the Layers pallet
-
- Change Normal to any overlay between Darken – Hard Mix
- You may keep the same overlay from step 4 if you like.
- Change Normal to any overlay between Darken – Hard Mix
- Make a copy of the blue square by clicking
-
- Control J
-
Step 7:
- Continue Steps 5-6 until you have filled 5 squares with Blue Overlays
- Your blue squares do not have to be in the same locations that I put mine
Step 8:
- Choose the Eye Dropper Tool
- Choose any colored photo and pick any area of skin
- Click the Eye Dropper tool over the skin area

Step 9:
- Choose the Rectangle Tool
- At the top of Photoshop click
- Fill
- Recently Used Colors
- Choose the first color (this will be the brown color you selected)
- Stroke: White box with red /
Step 10:
- Draw a Brown box on any square that is Gordone Parks Face/Camera/hand
- DO NOT Draw a box over one of the colored or Black/white photos you insterted
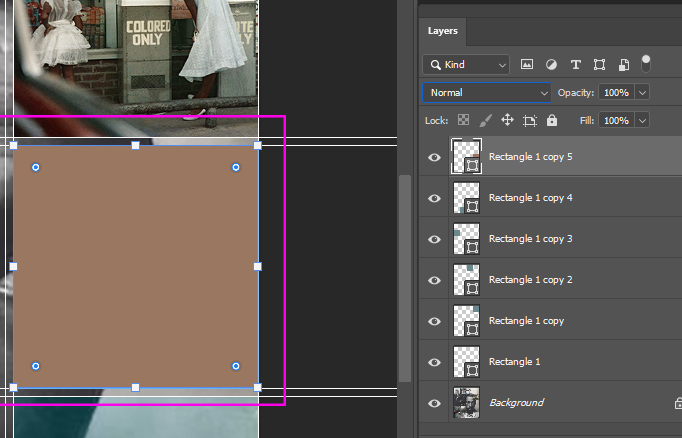
Step 11:
- On the Layers pallet
- Change Normal to any overlay between Darken – Hard Mix
Step 12:
- Make a copy of the Brown square by clicking
- Control J
- With the Move Tool
- Move the Brown square copy to any square that is his Face/Camera/hand/neck
- DO NOT cover a photograph you inserted
- Move the Brown square copy to any square that is his Face/Camera/hand/neck
Step 13:
- Repeate Step 12 until you have 3 Brown Squares
- Right click on Background
- Merge Visible

Part 5: Adding Lines
Step 1:
- Pick the Rectangle Tool
Step 2:
- Fill: White
- Stroke: White box with Red line through it
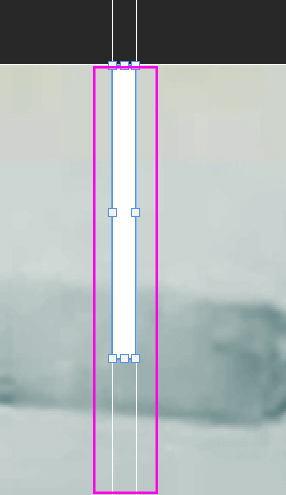
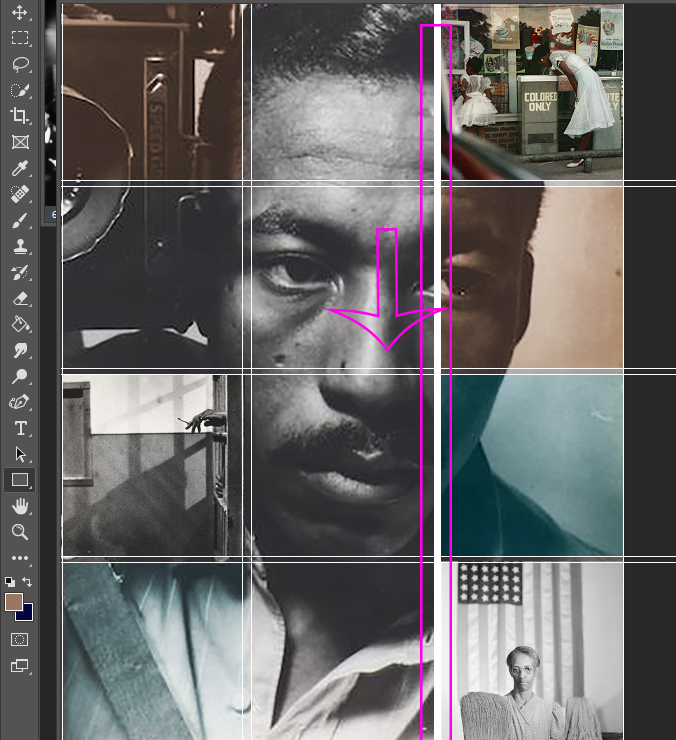
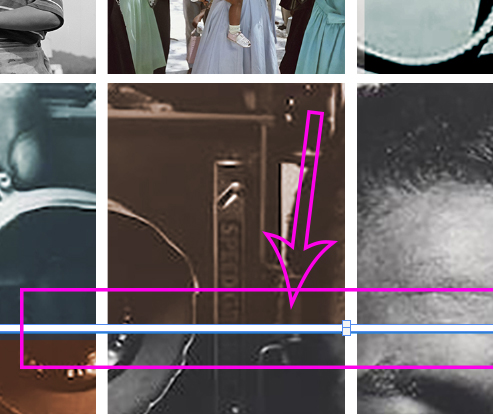
Step 3:
- You will be drawing a line between the squares along the gutter lines
- Start at the top right
- Draw a straight line from the top of the photo to the bottom of the photo
- Start at the top right
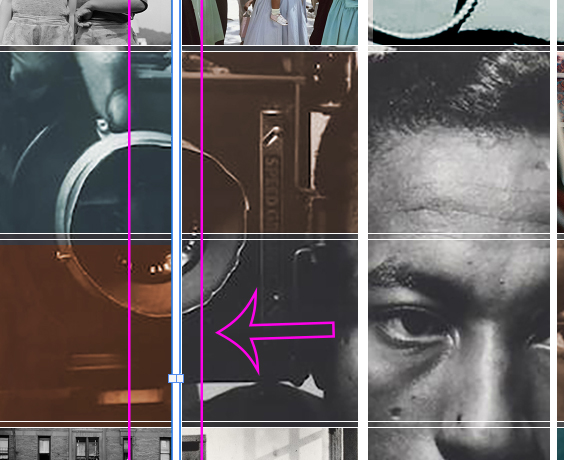
Step 4:
- Make a Copy of the white line
- Control J
- Select the Move tool
- Drag the white line copy to the left
- Stop between the next set of boxes
- Drag the white line copy to the left

Step 5:
- Make another Copy of the white line
- Control J
- Select the Move tool and drag the white line copy to the left
- Stop between the next set of boxes
Step 6:
- You will continue drawing a line between the squares goint horizontal
- Draw a straight line from one end of the image to the other end
Step 7:
- Make another Copy of the white line
- Control J
- Select the Move tool and drag the white line copy down
- Stop between the next set of boxes
Step 8:
- Repeat Step 7 until you have white lines between all the boxes
- Flatten Layers
- Save as jpeg
- NO logo
