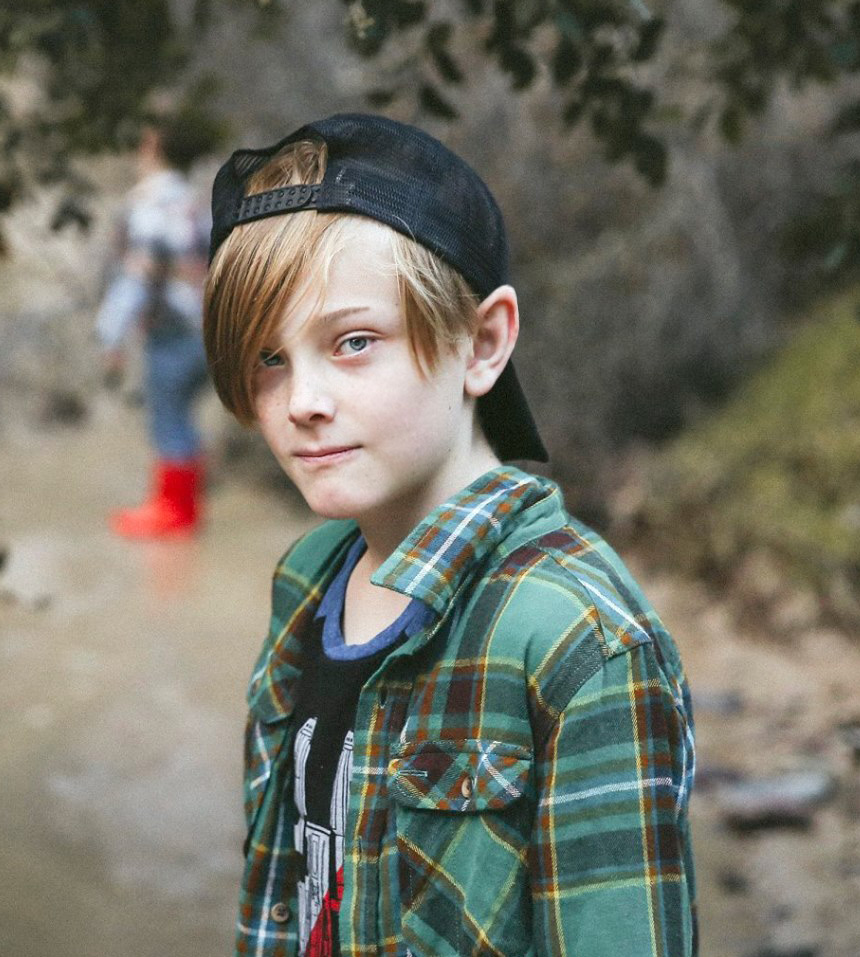
Photography Section
- Make sure the person has their hair pushed behind their ears so that they are completely showing.
- If they can wear a hat it works even better
- Take a photograph of a person close up
- Make sure that it is not underexposed or overexposed (to dark or to light)
Photoshop Section
- Before you begin to Elf your photo make a couple quick adjustments to make sure that your photo is not to dark or light.
- Merge your layers before starting on the next step
Ear Section
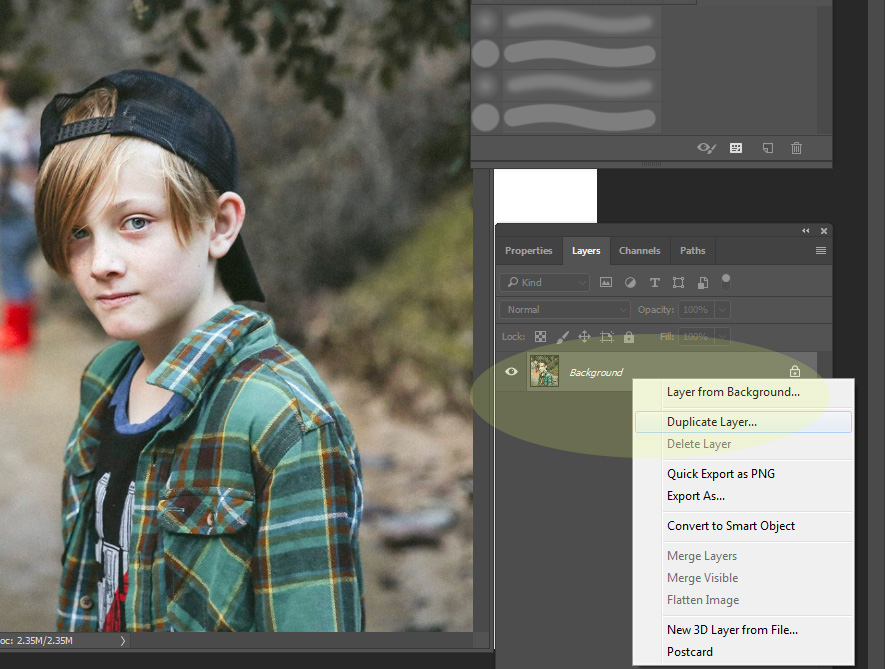
- Right Click on your Background layer and Duplicate the Layer
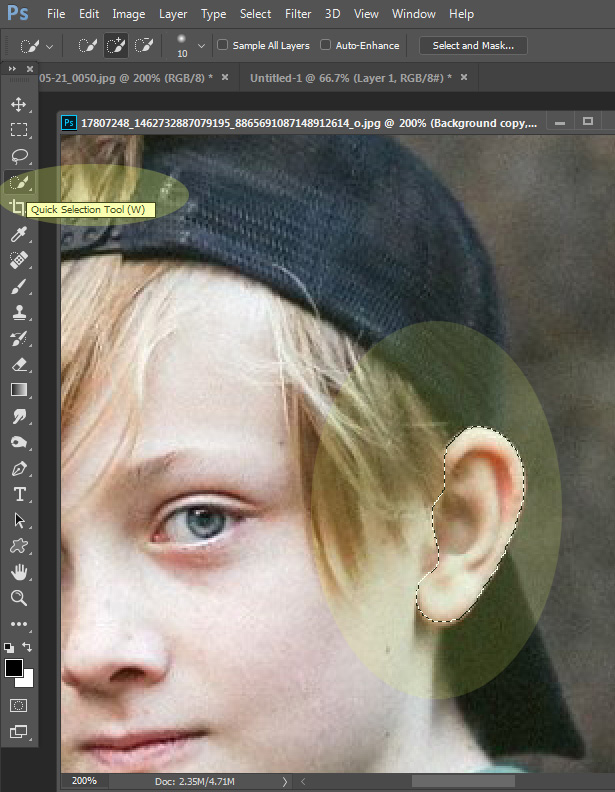
2. Using the Quick Selection Tool, completely select around the ear
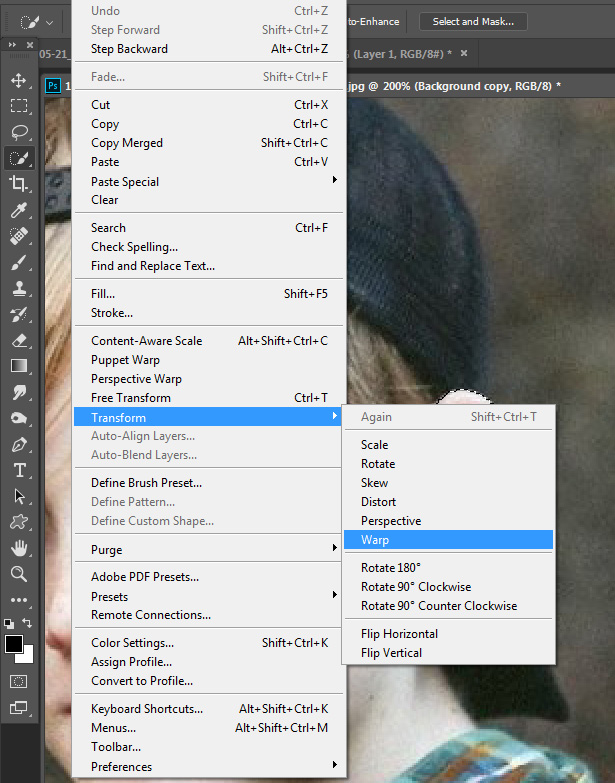
3. Go to Edit- Transform- Warp
4. Pull the top of the ear up to make it look pointed like an Elf ear
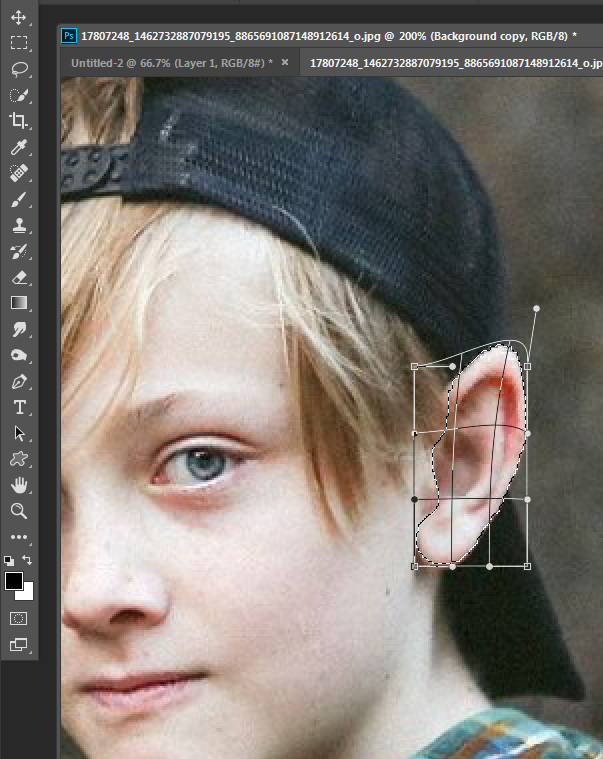
Before you go to the next section you MUST Deselect around the ear. To do this: Go to – Select- deselect
Eye and Nose Section
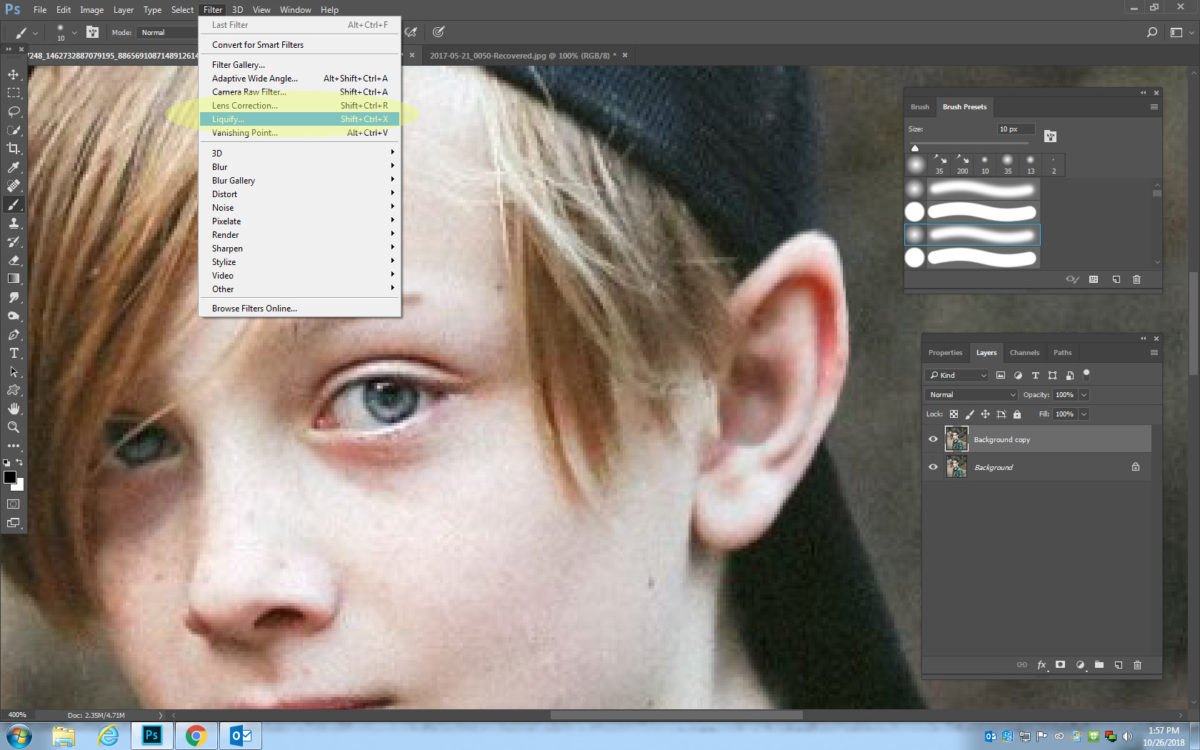
- Go to Filter- Liquefy
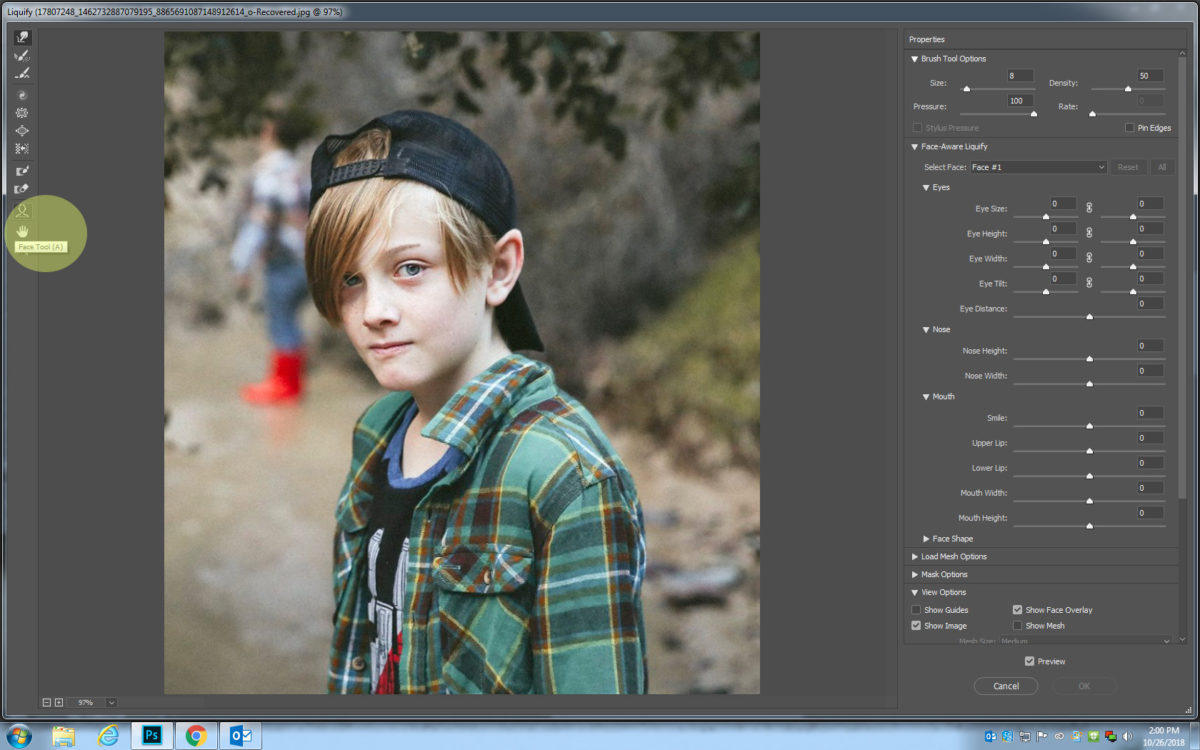
2. Click on the bottom left icon of a person and select Face Tool
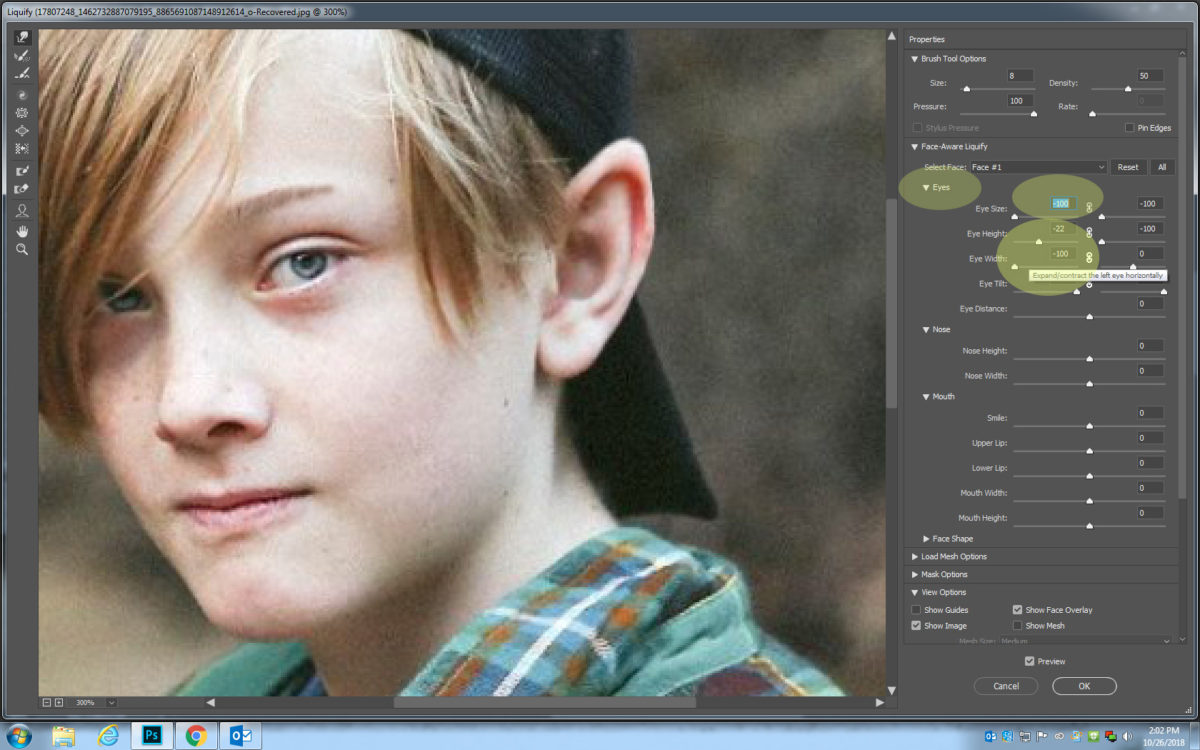
3. Select the Eyes section
All the numbers below may be altered to fit your photograph. These are just guidelines.
Do the following for both the right and left eye
- Eye Size (-100 to -80
- Eye Height (-22 to -60
- Eye Width (-100 to -70)
- Eye Tilt (80 to 100)
4. Select the Nose section
All the numbers below may be altered to fit your photograph. These are just guidelines.
- Nose Height (100)
- Nose Width (-100)
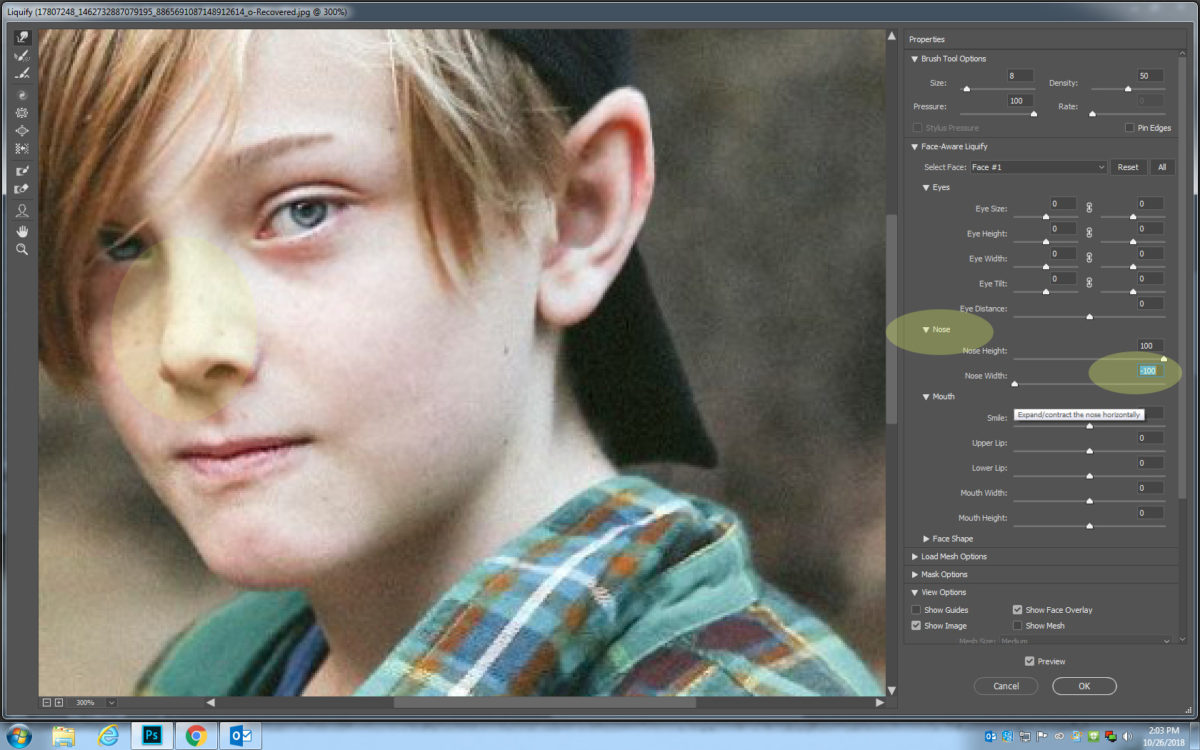
Finish your image with editing with the adjustments. If you would like to add snow to your image you can find the tutorial here

