Photograph Section
In order for this edit to work the photograph MUST have blue in it! The more blue the better!
Photoshop
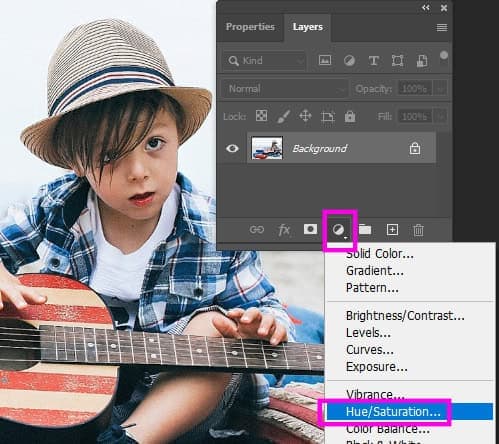
Step 1:
- Open Photo into Photoshop
- Click the Circle at the bottom of Layers Pallet
- Choose Hue/Saturation
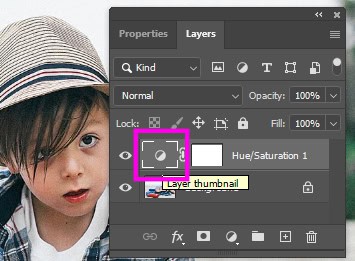
Step 2:
- Double Click the Layer Thumbnail
- Properties should open
- You MUST have properties open for the rest of this project
- Properties should open
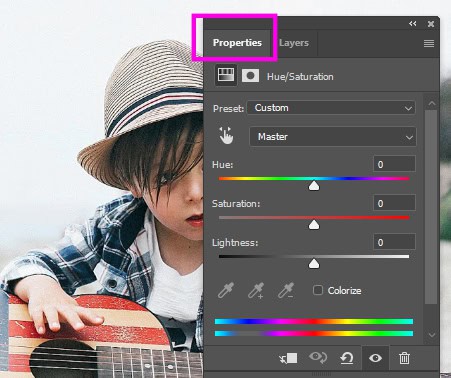
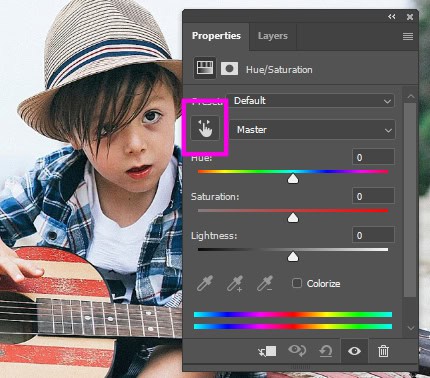
Step 3:
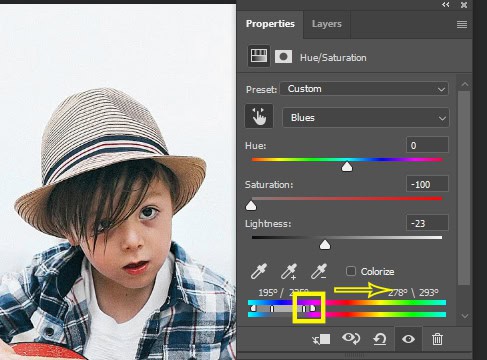
- Click on the hand at the left of Properties
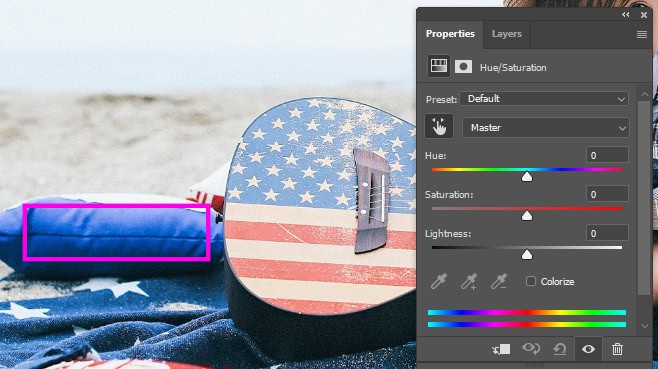
Step 4:
- Click on the Bluest area of the photograph
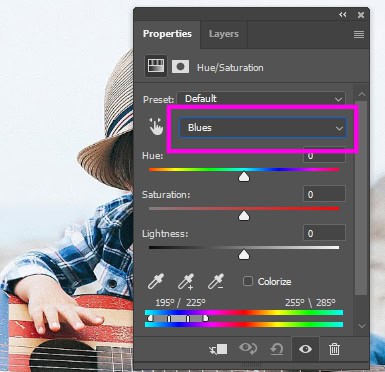
Step 5:
- It should now say Blues
- If it says Cyans
- Select a different blue section of the photograph
- It MUST say Blues
- Select a different blue section of the photograph
- If it says Cyans
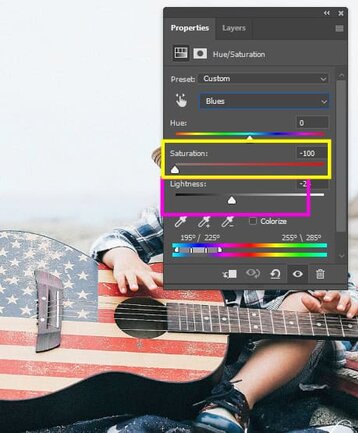
Step 6:
- Lower the Saturation to -100
- You may SLIGHTLY lower the Lightness depending on your photo
- Each photo will be different
- You may SLIGHTLY lower the Lightness depending on your photo
Step 7:
- At the bottom of Properties you will see 4 little lines between the colors
- We will be moving the 2 lines on the right
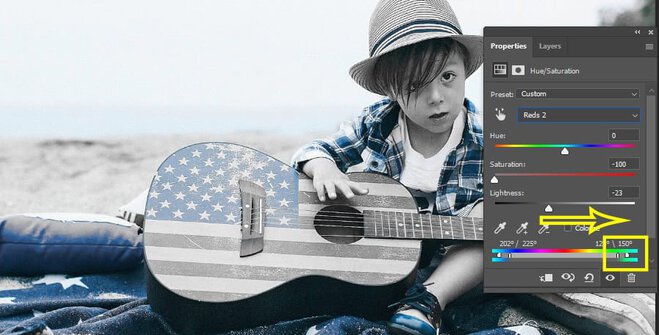
Step 8:
- Move the two lines to the right
- You willl notice that all the color is gone except the blue
- Each photo will be different with how far they need to move the lines
- You willl notice that all the color is gone except the blue
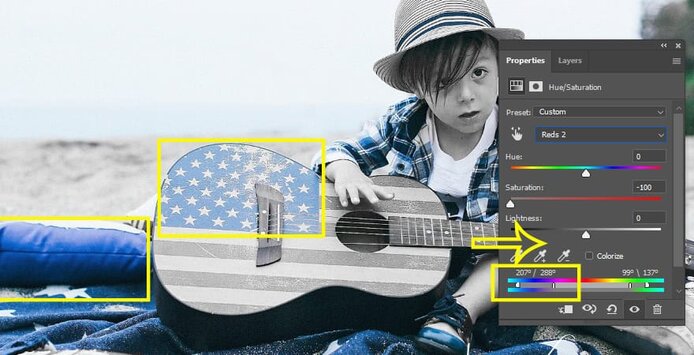
Step 9:
- Slowly move the other two lines toward the right
- You want the blue to pop out
- Each photo will be different with how far they need to move the lines
- You want the blue to pop out
Step 10:
- If you would like to make the Blues in your photo less blue saturated
- Lower the saturation
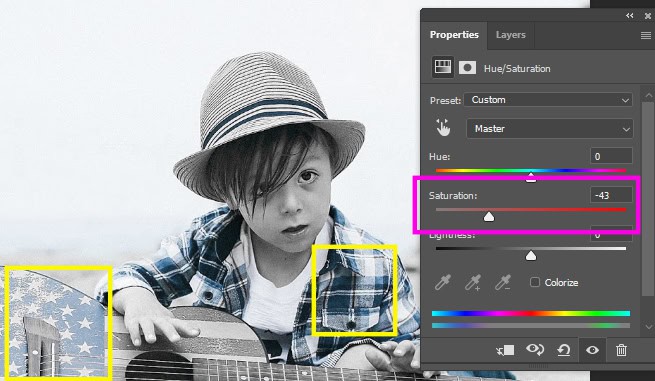
Step 11:
- If you would like to make the Blues in your photo more blue saturated
- Increase the saturation
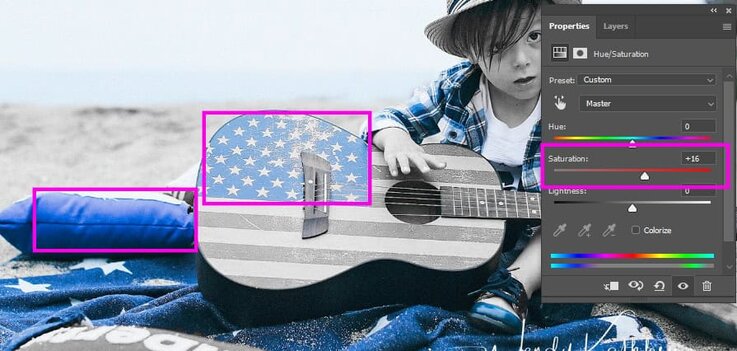
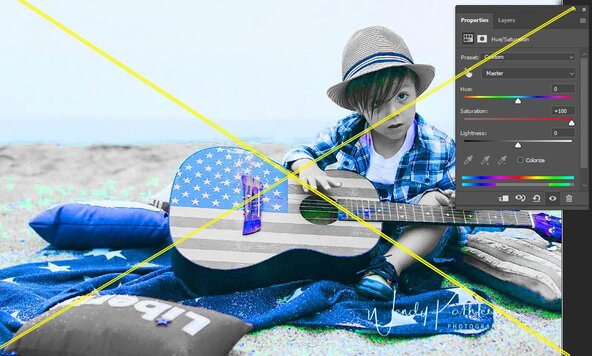
Step 12:
- Do NOT over saturate the photo!
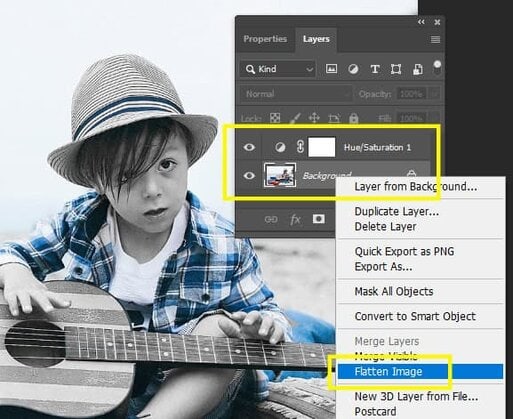
Step 13:
- When finish
- Right click on Layers
- Flatten Image
- Right click on Layers