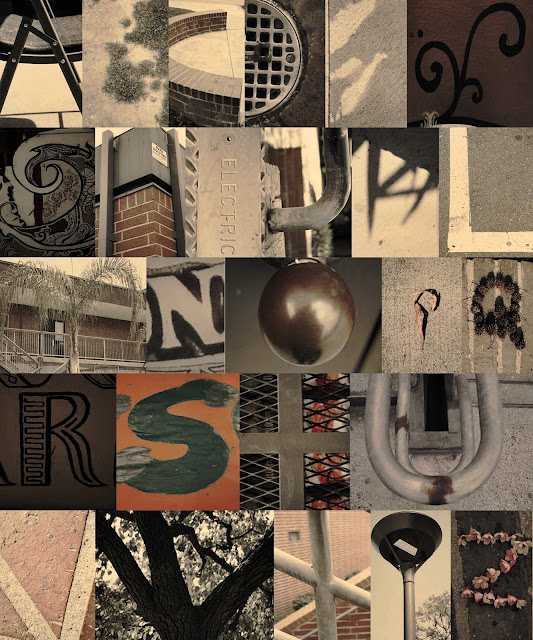
Step 1:
- Click on the yellow folder at the bottom of the computer screen

Step 2:
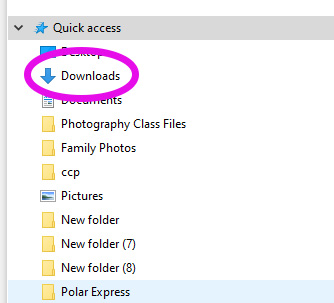
- Click on Downloads Arrow
Step 3:
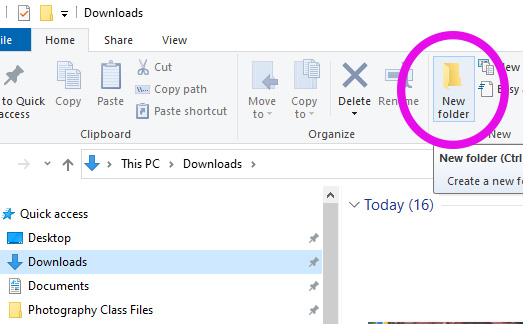
- Click the yellow folder at the top
- This will create a New Fold
- Name the folder ABC
- This will create a New Fold
Step 4:
- Open the sd card with the photos you took for the ABC project
- You will only want to select the photos you took for this project
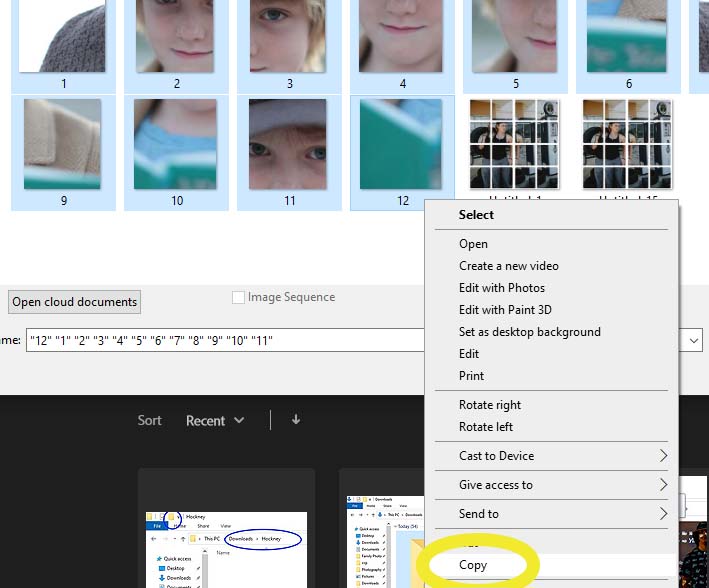
- Highlight all the photos you took for the ABC project
- When they are all highlighted
- Right click with your mouse
- Select Copy
- Right click with your mouse
Step 5:
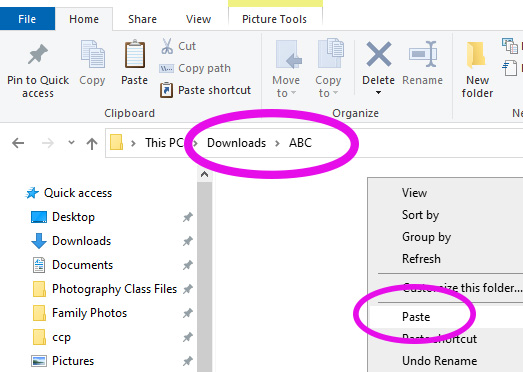
- Return to the ABC folder you made
- It’s in Downloads
- Right click on the ABC folder
- Paste the photos into the folder
__________________________________________________________________________________________
Part 2: Shrinking the Photos
Step 1:
- Open Photoshop
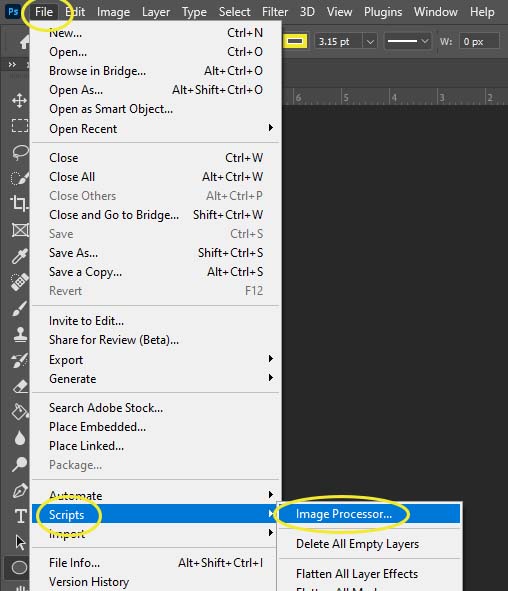
- Go to:
- Files
- Scrips
- Image Processer
- Scrips
- Files
- Section 1
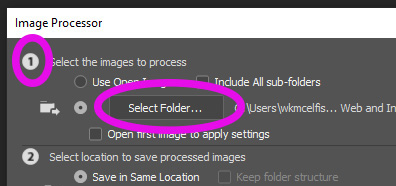
- Click Select Folder
- Search for the ABC Folder
- It should be in Downloads
- Search for the ABC Folder
- Select the ABC folder
- Click Select Folder
- Section 2
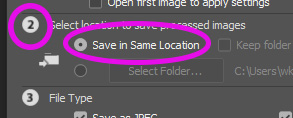
- Pick Save in Same Location
- Section 3
- Click
- Save as JPEG
- Resize to Fit
- W 400
- H 400
- Quality 5
- Click
- Ignore all the other sections below
- Click Run


Step 5:
- Stop and don’t freak out as Photoshop takes over shrinking all of your images
- The photos will pop up on your screen for a second and close again
- When it is done running there will be nothing left on your screen
- You will not need to do anything else with this section
Step 6:
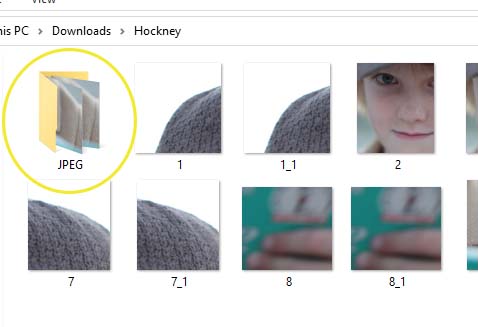
- When it’s time to put all the letters you will need to use the small images
- You will find the small images in the ABC folder and in another folder named JPEG
_____________________________________________________________________
Part 3: Making the Graph
Step 1
- Go to
- File- New
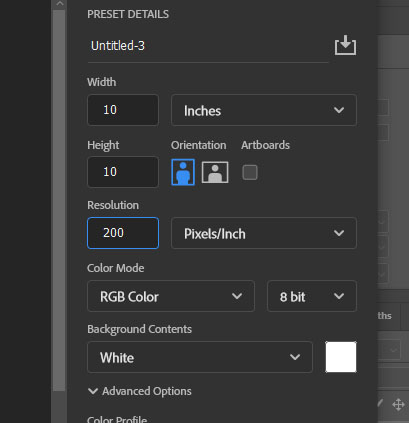
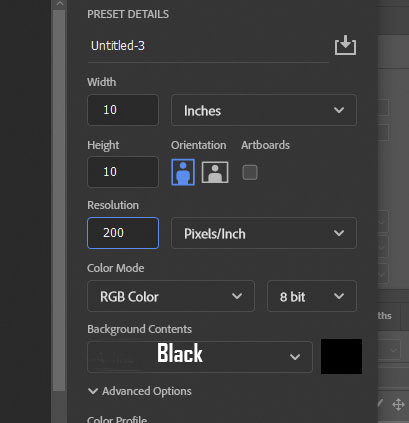
- Make your canvas size 10 Inches in width 10 Inches in height
- 200 resolution
- Background Contents: Black or white
Step 2:
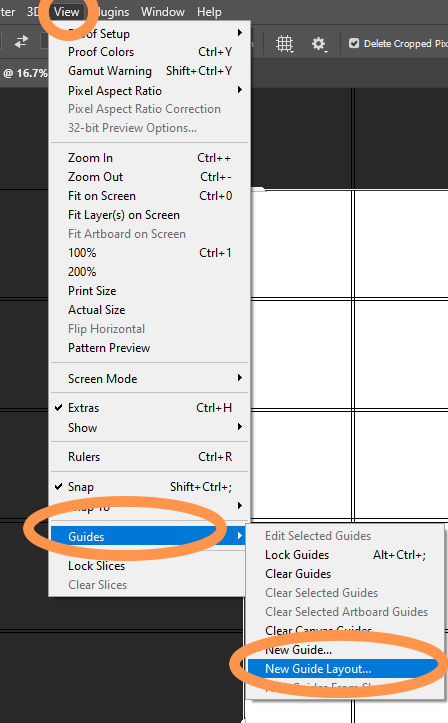
- Go to
- View
- Guides
- New Guide Layout
- Guides
- View
Step 3:
- Color pick Light Blue
- In Columns
- Number 5 px
- Gutter 5 px
- In Rows
- Number 6
- Gutter 5

Step 4:
- Click on the box shape at the bottom left of tool bar
- Fill can be any color of blue you would like
- Stroke must have a white box with red line through it

Step 5a:
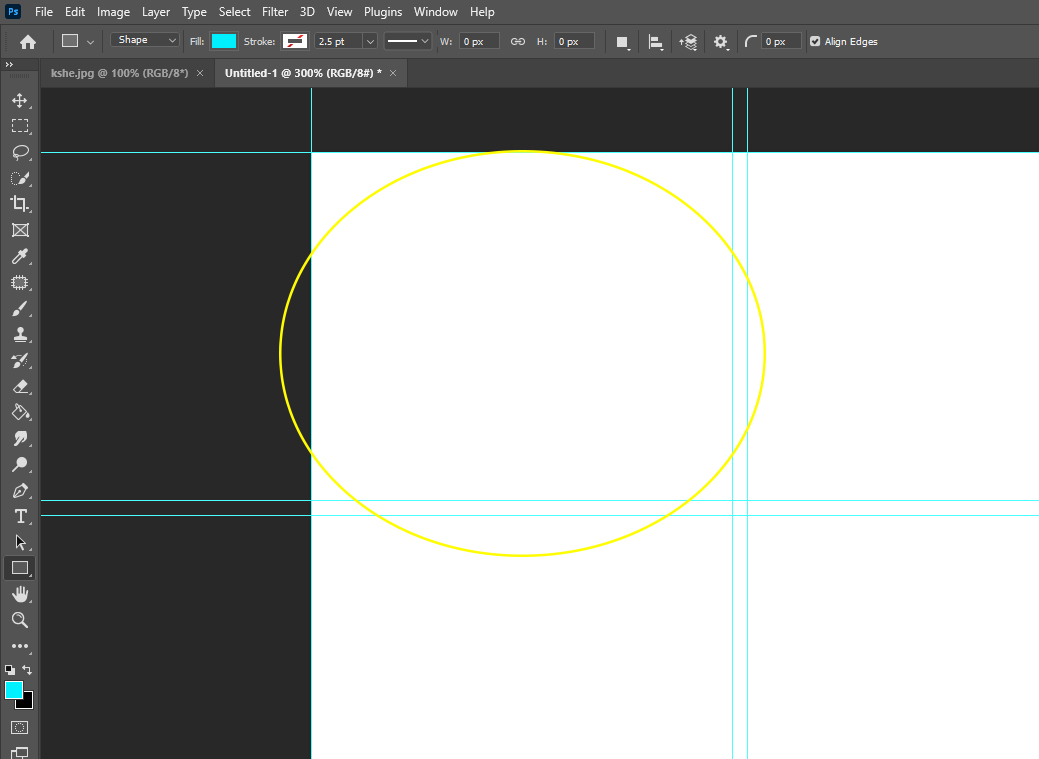
- Zoom in closely on the First box in the upper left hand
Step 5b:
- Draw a blue box so that it fits in the first square area perfectly
- LEAVE the area of white around the box.
- You will want to have white space between all the letters as you build the graph
- LEAVE the area of white around the box.

Step 6:
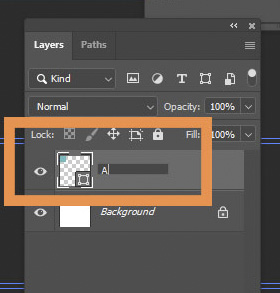
- Go to the Layers pallet
- Double click where it says Rectangle 1
- Rename it A
Step 7a:
- Stay on Layer A
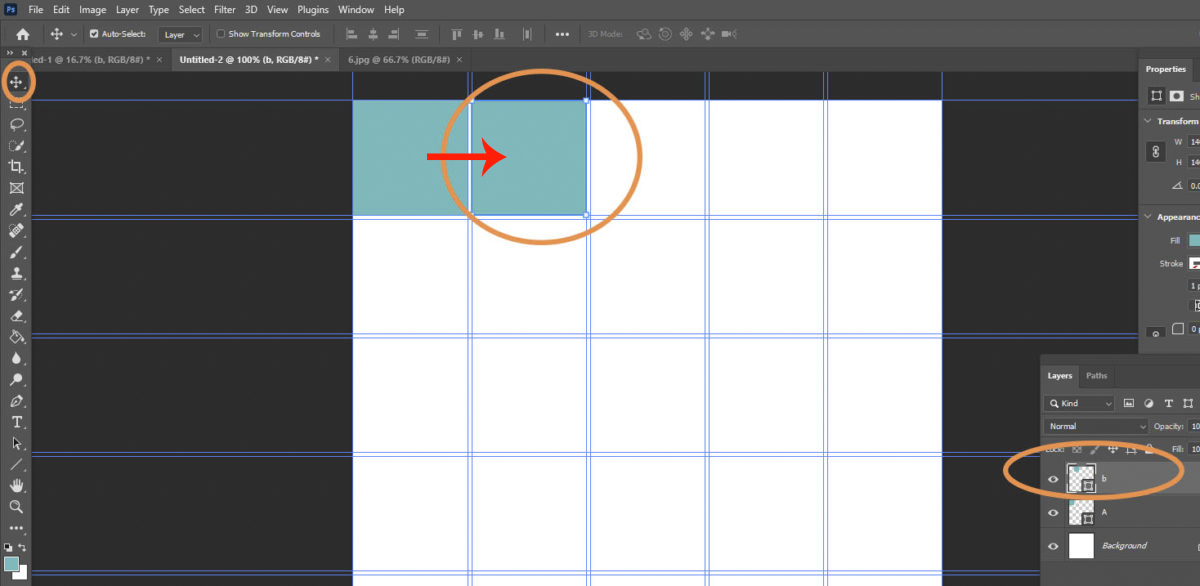
- Click Control-J (You have now made a copy of Layer A Box)
- Select the Move Tool
- Click on the first blue square you made
- Move the duplicated square to the box on the Right
Step 7b:
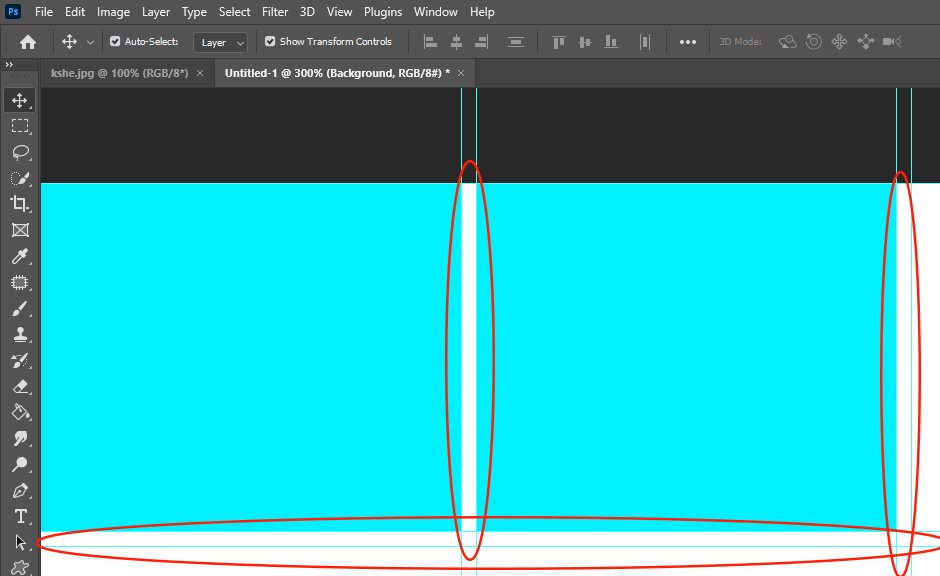
- Be sure you are leaving white space between the boxes. This is why we made a graph with extra lines.
Step 8:
- Go back to the Layers Pallet
- Double Click on the Layer that says A copy
- Rename it B
- Double Click on the Layer that says A copy

Step 9:
- Stay on Layer B
- Click Control-J
- You will now have another blue square made
- Select the Move Tool
- Move the blue square to the next box on the graph to the right
- Double Click on the Layer that says B copy
- Rename it C

Step 10:
You will continue duplicating/adding squares in the remaining graph spots until you have letters A-Y listed.
Letter Z is explained below
Step 11:
- When you get to the Letter Z
- Create your last square in the middle of the last row (as shown below)
- You will have 2 blank boxes before and after
- Create your last square in the middle of the last row (as shown below)

Step 12:
- STOP! You will need to save your graph as a PSD file
- Name the file ABC Graph
- Save the graph as a
- PSD file
_________________________________________________________________
Part 4: Inserting the A-Z
Step 1:
- Go to the Layers Pallet
- Make sure you are on Layer A
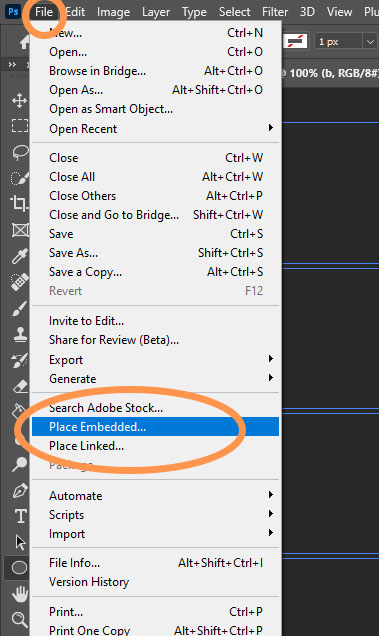
- Go to File
- Place Embedded

Step 2:
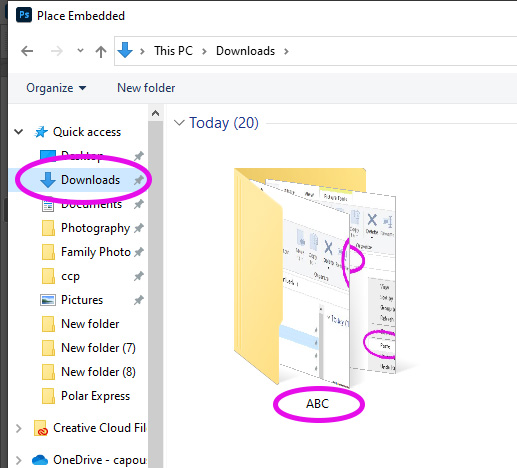
- Go to
- Downloads
- ABC Folder
- Double Click to open folder
- ABC Folder
- Downloads
Step 3:
- You will see a yellow folder called JPEG
- This is the folder where all the ABC shrunk images are
- Pick the letter A
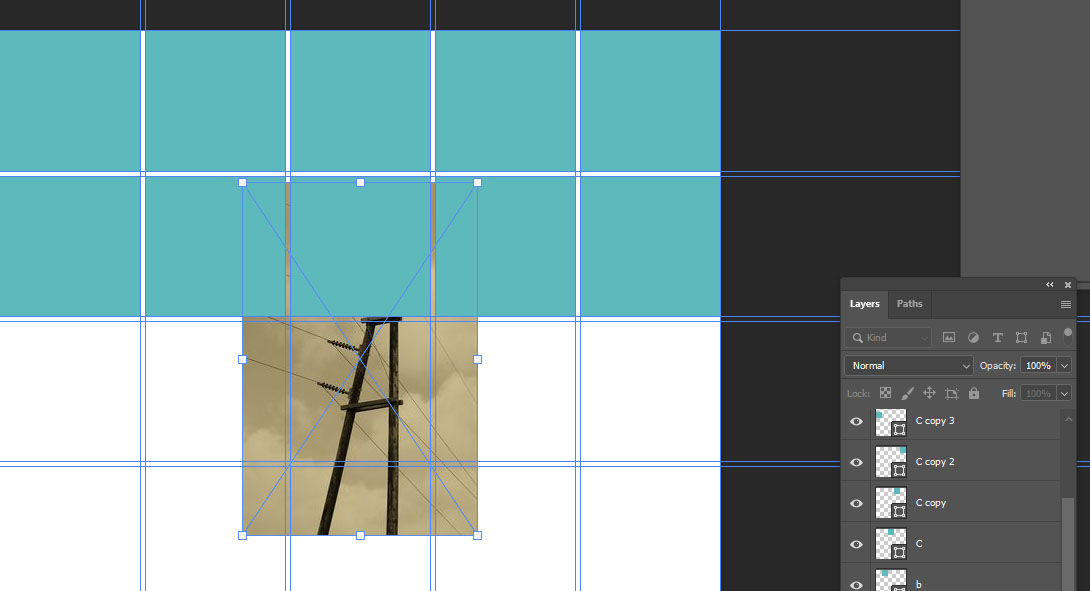
- The Photo will appear in the middle of the page
Step 4:
- Move the photo (Letter A) ontop of the first box
Step 5:
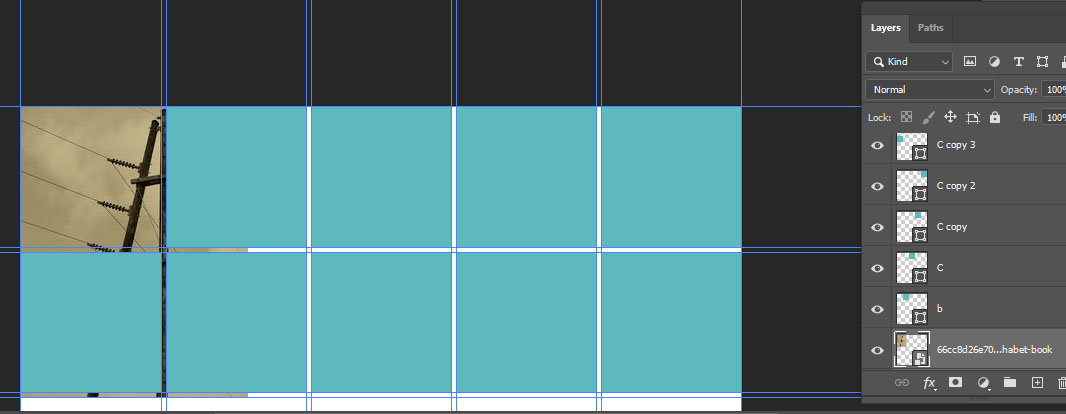
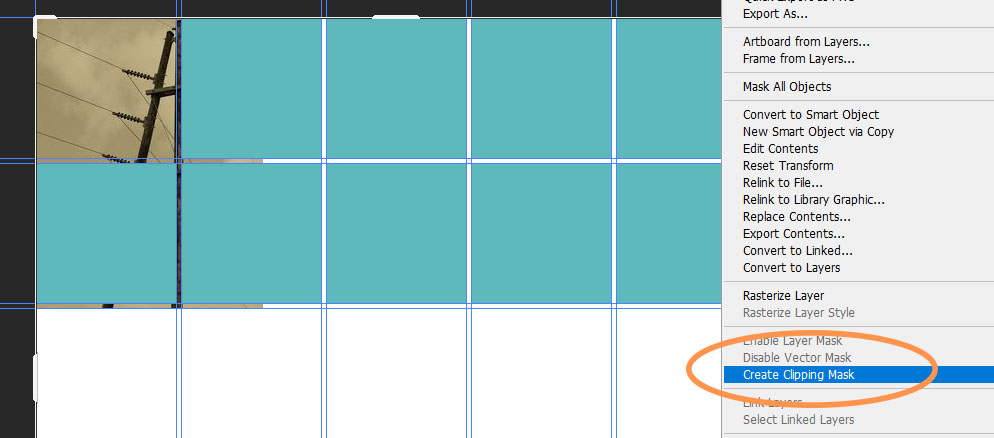
- Right click on this layer
- Create Clipping Mask
- We will fix the photo to fit perfectly in the next step
- Create Clipping Mask
Step 6:
- Click
- Control T
- Hold Shift Key
- Make the letter smaller to fit into the box
- Hold Shift Key
- Control T
- Click Enter when you are done

Step 7:
- On the Layers Pallet, make sure you are on layer B

Step 8:
- Go to
- File
- Place Embedded
- File
- From the Jpeg folder (the shrunk letters) pick the letter B
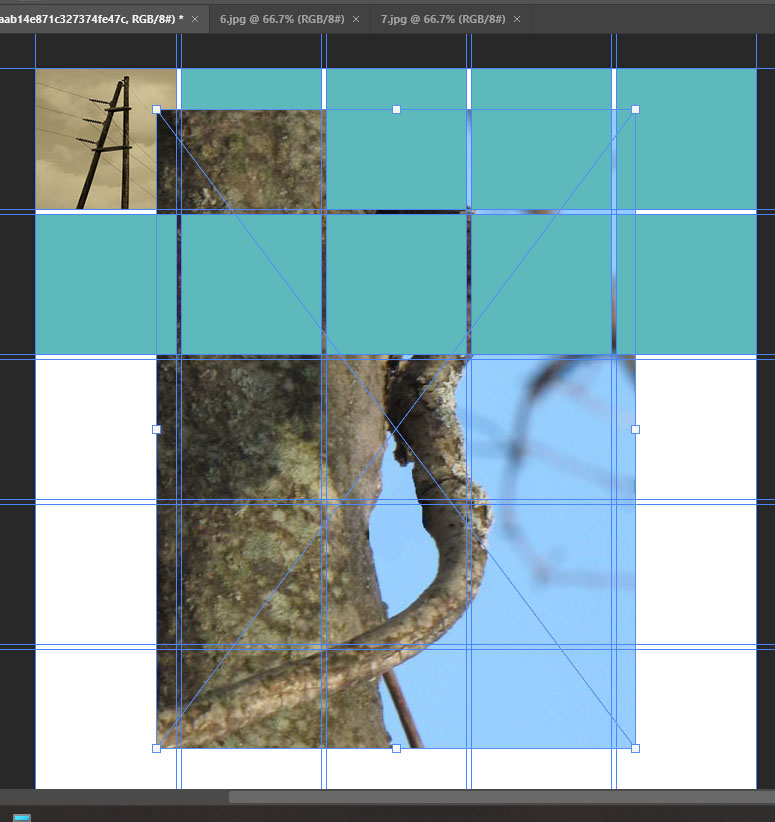
- The Photo will appear in the middle of the page.
Step 9:
- Move the photo (Letter B) ontop of the second box
Step 10:
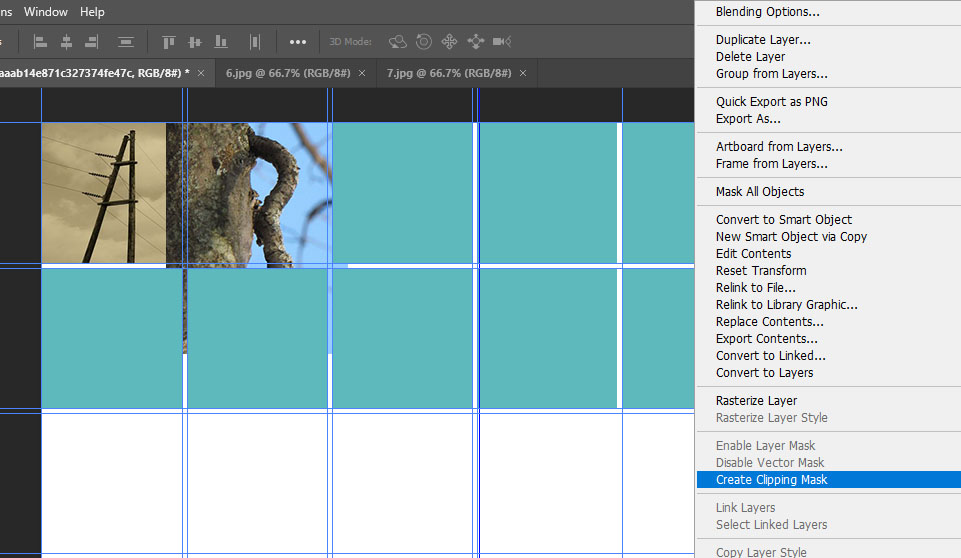
- Right click this layer
- Pick Create Clipping Mask
- Your photo will now be clipped inside of the box
- (We will fix the photo to fit perfectly in the next step)
Step 11:
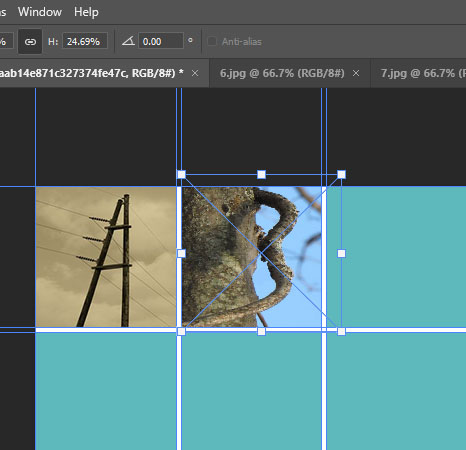
- Click Control T
- Hold the Shift Key and move/drag your letter smaller to get it to fit into the box
- Click Enter when you are done
****Continue steps 1-6 with every letter until you have all letters listed A-Z****
Step 12:
- When you have finished A-Z
- Flatten Image
- No Logo
- Must do final step 13

Step 13:
- The final A-Z MUST BE EDITED
- Open in Camera Raw
- Do a quick edit to make all the letters look consistand in color/lighting.

