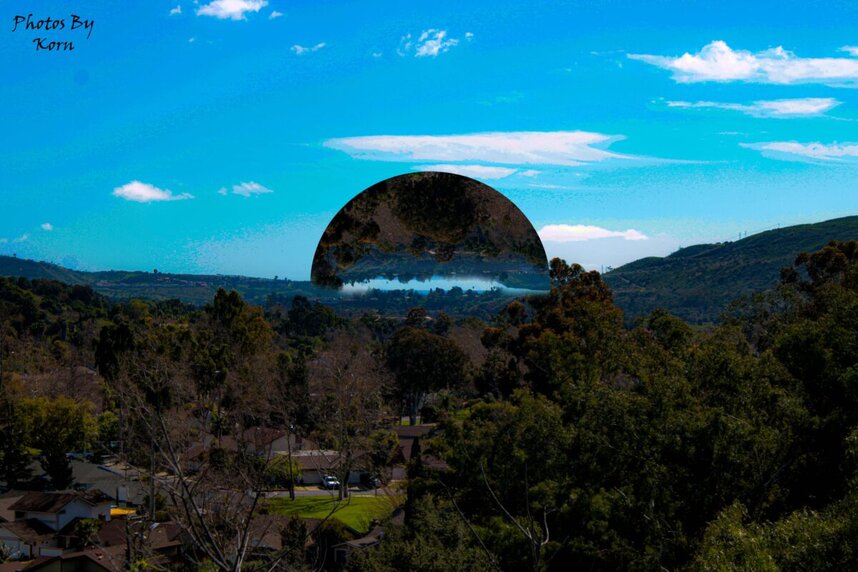

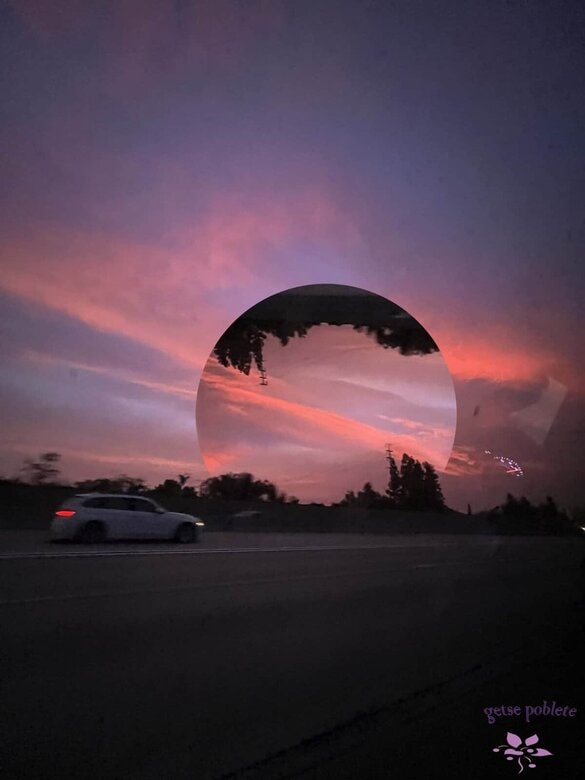
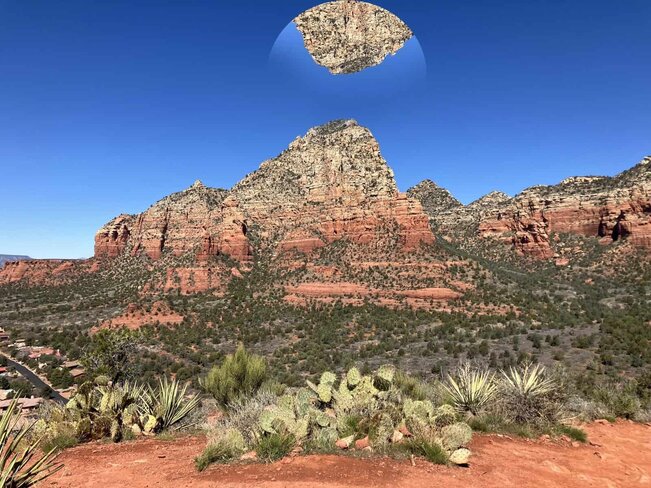

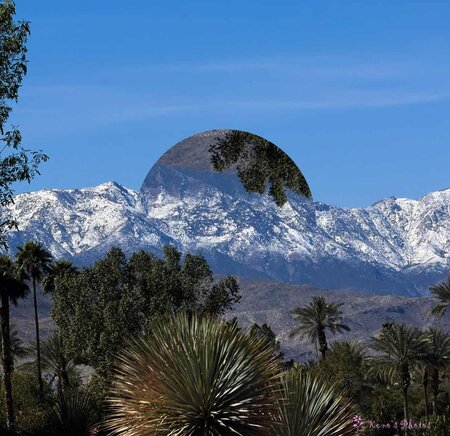
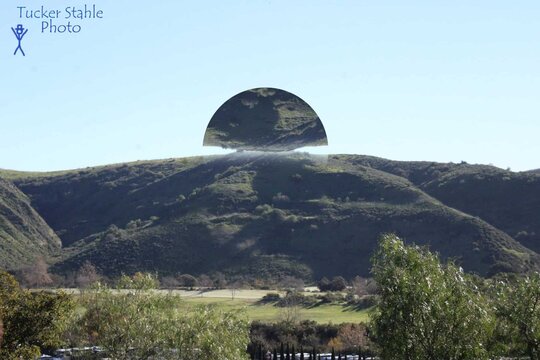
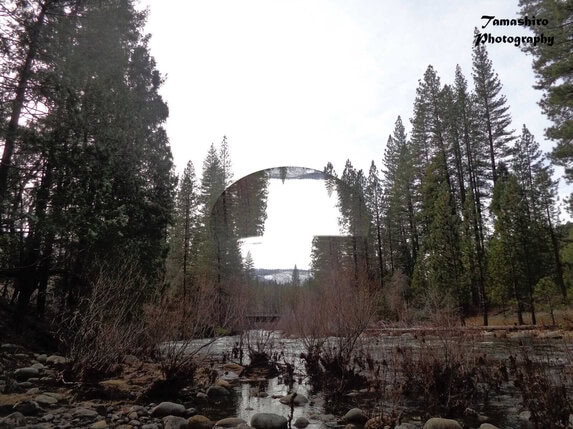
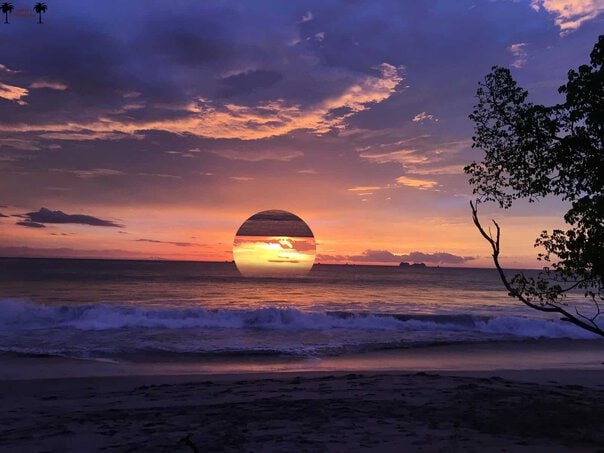
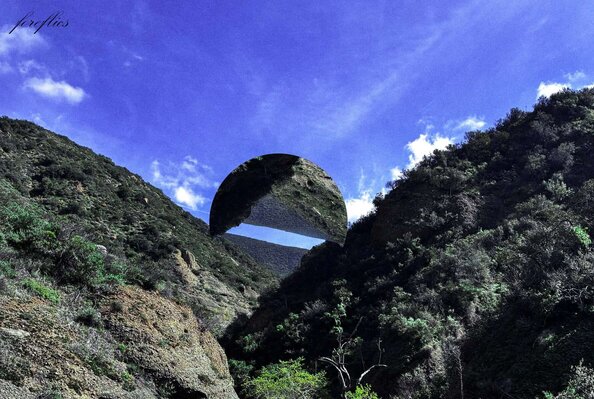
Photograph
- Select any LANDSCAPE photo you have taken either at school or that you have on your phone from another location.
- Make sure the photo is Edited!
Photoshop
Step 1:
- Open your image
- Select the Elliptical Marquee Tool

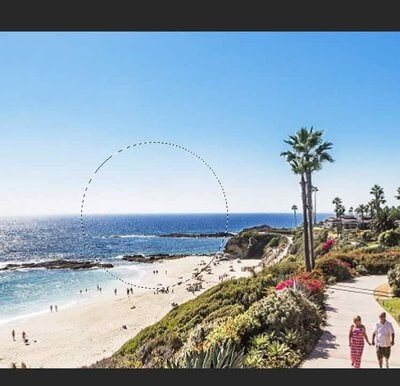
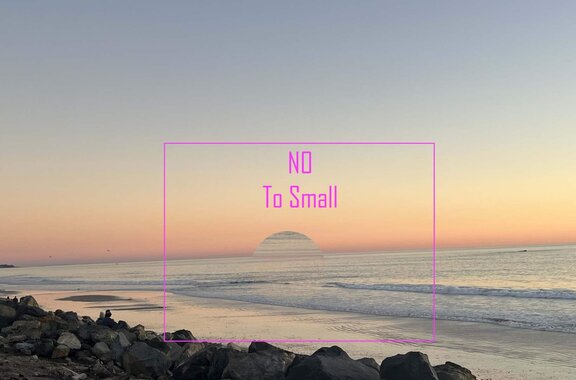
Step 2:
- Draw a circle in the middle of the photograph
- You MUST include the sky in the photo
- Do NOT make the circle to smalle
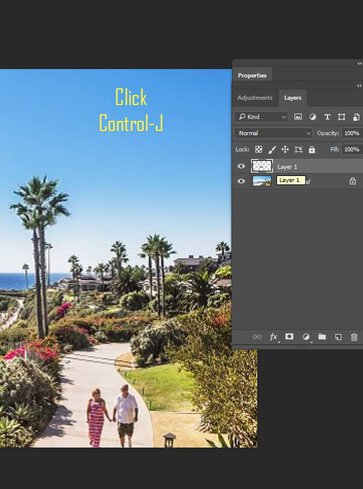
Step 3:
- Click Control-J
- This will make a copy of the circle
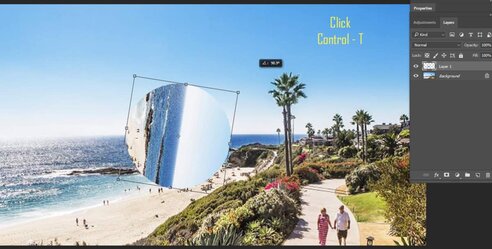
Step 4:
- Click Control-T
- Turn your circle upside down
- By Using the curved arrows that show up when the mouse is by the top corners
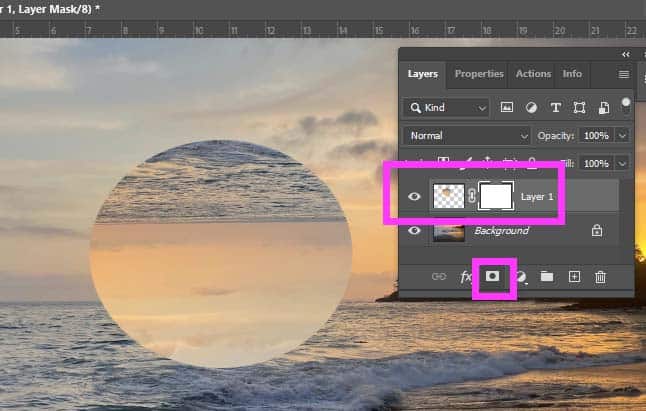
Step 5:
- Add a Layer Mask to Layer 1
- (box with circle at bottom of layers)
Step 6:
- Select the black brush tool
- Make sure the box is black ontop and white on the bottom
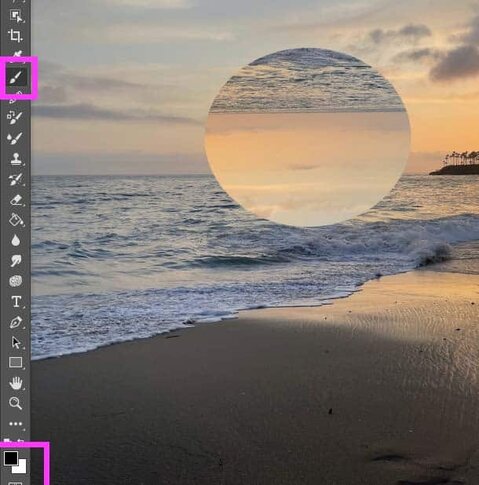
Step 7:
- Make the Flow 25%

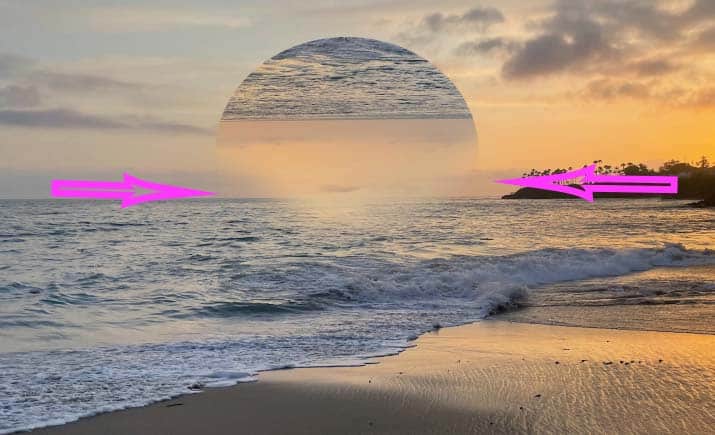
Step 8:
Carefully Paint out the bottom section of the circle
- You may also slightly paint out the bottom edges
- It us up to you how you’d like the project to look
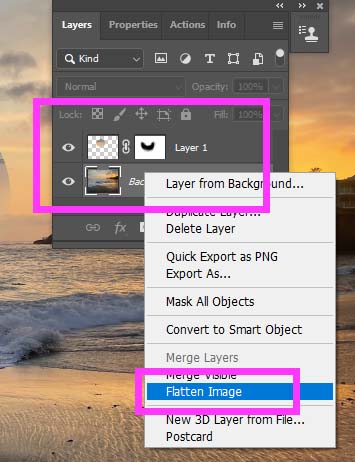
Step 9:
- Right click on Layers Pallet
- Flatten Image