

Setting Up Camera
- Manual Mode Setting
- Aperture: f/12
- Shutter Speed: Press shutter half way to take a light reading
- You will be changing the shutter speed until correctly exposure
- Shutter Speed: Press shutter half way to take a light reading
- Aperture: f/12
Photography Section
******Taking Photos to Create HDR*****
- You will be taking 3 photos
- each photo will be a different exposure
Photo 1:
- Correct exposure
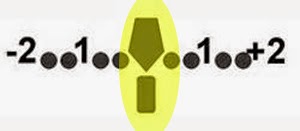

Photo 2:
- Do not move the camera
- Meter again and move the shutter to 1 (Overexposed)
Photo 2:
- Do not move the camera
- Meter again and move the shutter to 2 or 3 (Overexposed)


Photo 3:
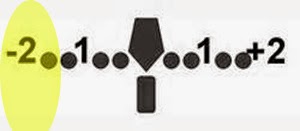
- Do not move the camera
- Meter again and move the shutter to -2 or -3 (Underexposed)

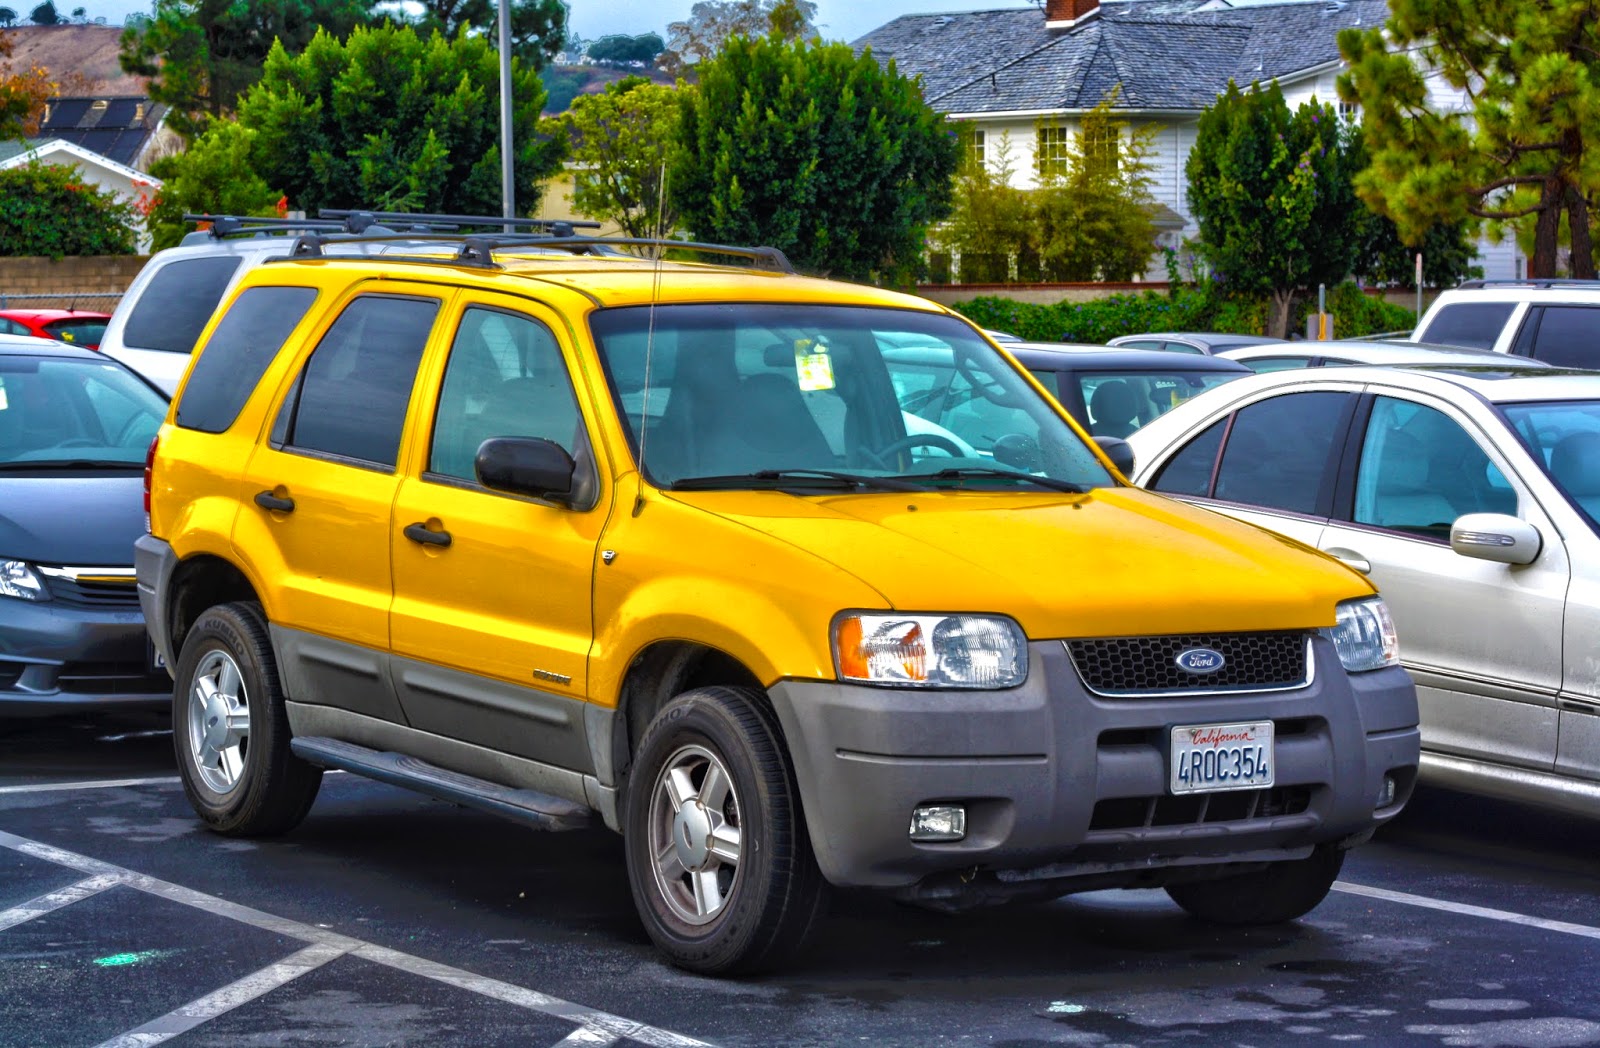
When all the images are combined in photoshop, you will get a finished image of the car
Photoshop Section
Step 1:
- File
- Automate
- Merge to HDR
- Automate

Step 2:
- Click Browse
- Select the 3 photos with the different exposures
- Click OK
- Photoshop will combine the 3 photos together
- Click OK
- Select the 3 photos with the different exposures

Step 3:
- You will see the 3 images at the bottom of the screen
- Make sure ALL 3 boxes are checked

Step 4:
- You will be moving the Adjustment sliders to make your photo pop more
- The following Adjustments are suggestions ONLY. You may alter them as needed for your photo
- Exposure: Lessen or Increase as needed
- Detail: Increase to 300% or a little less as needed
- Shadow: Decrease
- Highlight: Decrease
- Vibrance: Increase to 100% or a little less as needed
- Saturation: Increase
- Click OK when done

Step 5:
- Open the photo in ACR (camera raw)
- Vibrance: Increase
- Saturation: Decrease or Increase according to your photo
- Contrast: Increase
- Brightness: Decrease or Increase according to your photo
- Shadows/Highlights: Decrease or Increase according to your photo
- Temerature and Tint: Decrease or Increase according to your photo

Step 6:
- Under Color Mixer
- Move the sliders for the various colors of your image
- Use Saturation/Luminance/Hue

Step 7:
- Add Logo in Photoshop
- Flatten Image
Save as PNG
You will NOT be able to save as a jpeg